Submachine 5, review by Warpzone


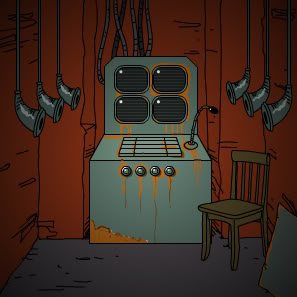
Grab your preemptive Tetanus Shot, and don’t question where the food comes from; it’s time for another installment in everyone’s favorite mysterious urban spelunking sim! The rotting infastructure of the Submachine network beckons once again, but this time you’re apparently a trained professional, tasked with rebooting an ancient “Mover” to reconnoiter “the far side of the submachine net.” Or maybe you’re some punk kid crashing the lab and reading his e-mail, I’m not sure. But that ambiguity is a hallmark of the Submachine series, and it only adds to the mystery. If time has any meaning when portals are involved, it’s years after the events of the previous Submachine games, and you’ll find yourself trolling through the rubble which at one point comprised the earlier adventures. The more you learn, the less you know, and it’s not until you unlock the final author’s comment with the last Secret that you even begin to suspect what this latest outing might have meant. I love the addition of the auto-notes, which track vital information and offer tantalizing hints into the mentality of the explorer, as always without giving too much away. There are a few caveats, but this is Submachine. If you’ve played the other games, you know damned well what you’re signing up for. There’s more button-hunting, which can sometimes involve some incredibly tiny and obscure details in the environment. Make sure you know what part of the Cipher Plates you’re clicking on, because that point becomes your cursor position. You’re not lining the plate up with the slot. You’re clicking on the slot with your (now invisible) mouse cursor. I thought the author’s attempt at a 3D puzzle was cool, even though my brain refused to process it as a 3D puzzle, treating it instead as an awkwardly designed button-clicking puzzle. Still, it was an interesting change of pace. I was disappointed that the dangling pipes didn’t do anything. I would have liked to see more inexplicable weirdness like tone-sensitive blocks of stone or metal gizmos that spin and twirl in response to the mouse cursor’s position, but the method of locomotion employed by the “Mover” just about makes up for the lack of weird alien physics throughout the rest of the game. What more is there to say? It’s more Submachine! Play it. Beat it. Ferret out every last secret. Tell the author you liked it, and dream about playing the next one! Most ARGs aren’t this deep and spooky!

review written by WarpZone, found on NewGrounds.


Copyright infringement


Just two days ago I found out that someone has stolen my work from original Submachine1 using reverse engineering and then put those stolen graphics, stolen sounds and, most importantly stolen code into his game and called it his own. Not cool at all. The game is called Escape Da House 5, and obviously I won’t post a link to it here. You can google it up if you want to see this monstrosity with your own eyes, since the game is horrible, not only because the stolen goods but because gameplay is lame as hell and the creator has no sense of color whatsoever. The construction of menu and inventory shows his abilities in the field of programming (what happened, couldn’t you just steal that from the Submachine as well?) so feel free to play it and have a laugh about it. You can also comment on his site and even email him with congrats on a job well done, since you can easily find those contacts under the credits button in the game itself.

This may sound bitter, but I assure you it’s not. Honestly – it made me stronger, since everywhere I went (everywhere meaning some sites that host this game and hold comment section) people were recognizing the rip-off. And that was making me smile, because Submachines are a recognizable trademark and you can’t just steal it because it will not go unpunished.

The second thing – watching this game’s poor gameplay all I can say to it’s creator is – it’s not all about the graphics or coding or sounds that you can steal anytime anywhere. It’s all about THE STORY, man.

And last but not least: I feel strong, because I have my fans behind my back. They support me. I feel their breath on my shoulder, not only pushing me to create more games with better quality, but allowing me to just say:

so what?

when situation like this one occurs. Like Tony Soprano used to say: what can you do?… Sue his ass someone said – well it’s not worth the effort nor time. I’d rather make a new game. Gnomes, anyone?

Special thanks! goes to Karen Maple and Eric Himmelsbach who emailed me about this problem, and ShadowsQuest2500 who wrote about this on my forum.

ps – I know the timing of this post is somewhat unlucky, but I assure you this is not an april fool’s joke. :D


Submachine 5: the root


submachine_5

Phew!!! Barely, but I managed to keep my promise. Submachine 5 in January. January 30th, but still. :D The fifth episode of the Submachine series. This time we go back to the very first submachine ever built – historically speaking. It was created by an unknown scientist in the early 20th century. This is the place where it all started.

~~~~

This game was updated with new graphics and fullscreen HD option in January 2014. Available in my shop.

~~~~

 play this game

walkthrough: videoenglish | español | francaise

italiano | polska | deutsche | hungarian

~~~~

review: Warpzone

~~~~

best adventure game of 2008 by JayIsGames.com audience.

~~~~

NewGrounds Daily Feature – 01/31/2008


Submachine 5: the root; la solution francaise


Submachine 5 : the root, la solution :

– Cliquer sur les valves successives jusqu’a l’apparition du titre. Ramasser la feuille et le crayon au sol (ils serviront a prendre des notes au cours du jeu). Tourner a gauche, baisser les deux leviers et ouvrir la trappe, descendre. En bas de l’échelle, tourner a gauche et allumer l’ordinateur. Cliquer sur les trois fichiers sur l’écran. Aller deux fois a droite, ouvrir la porte, entrer, aller a droite et ouvrir la trappe. Descendre puis aller a droite pour découvrir un téléporteur. Entrer le code 552.et appuyer sur le gros bouton. – Cliquer derriere le téléporteur (sur la gauche), descendre puis aller a droite pour récupérer le premier secret (une petite boule rouge). Revenir au téléporteur puis aller sur la droite jusqu’a la grotte, entrer. Avancer et ramasser la petite pierre rouge au sol (sous les fils), avancer encore. Décrocher la prise au bout du fil noir (cliquer sur les côtés pour la débloquer). Faire tomber la plaque au mur puis cliquer sur la prise pour la brancher. Aller a droite, descendre, aller au bout a droite et monter. – Cliquer sur le boîtier mural pour faire glisser la plaque. Aller deux fois a gauche. Entrer dans la piece et ramasser la clé anglaise sous la chaise. Ressortir et retourner a l’échelle, descendre. Aller a gauche et descendre. Aller a droite et démonter les écrous du boîtier avec la clé. Prendre la clé rouillée. Remonter, aller a droite et monter. Aller a gauche, entrer dans la piece et ouvrir le dernier boîtier avec la clé rouillée. Prendre la plaque métallique 1. Redescendre et aller deux fois a gauche. – La plaque métallique fonctionne avec le boîtier au mur, un ancien systeme de télétransporteur. Placer la plaque dans l’encoche en haut a droite du boîtier et cliquer sur le bouton. Descendre, aller a gauche et ramasser la plaque 2 sur la chaise. Ressortir et descendre tout en bas. Aller a gauche, pousser la plaque contre le mur et dévisser le panneau avec la clé, prendre le secret 2. Aller tout a droite et noter la présence du chargeur. Remonter au sommet. Retirer la plaque 1 et cliquer sur le bouton. – Le systeme de télétransporteur fonctionne avec un systeme de coordonnées, ici on est en (0,0), le point de départ, juste avant on était en (0,1). Avec les plaques 1 et 2 on a donc 7 destinations possibles. Aller en (2,0). Ouvrir la plaque, descendre et cliquer sur le bouton pour faire monter l’aiguille. Aller a gauche, faire de meme et ramasser l’ampoule. Aller encore a gauche et faire de meme. Revenir au téléporteur, puis aller en (0,1). Descendre jusqu’au chargeur, utiliser l’ampoule sur la machine et la charger en faisant tourner la manivelle trois fois. Récupérer l’ampoule et revenir au téléporteur. – Aller en (0,0), aller deux fois a droite et utiliser l’ampoule sur la borne. Aller ensuite en (2,0), aller deux fois a gauche et ouvrir le boîtier mural pour trouver le secret 3. Revenir en (0,0) et reprendre l’ampoule. Aller en (1,0), descendre et aller a droite, placer l’ampoule sur la borne. Aller ensuite en (0,2), descendre, aller a gauche et noter les symboles. Au bout, tourner la manivelle, regarder derriere le gros tuyau (a gauche) pour trouver le secret 4. – Aller en (2,0), aller tout au bout a gauche, passer le mur cassé et prendre la gemme 2. Aller a gauche, monter et prendre le secret 5 sur le fauteuil. Aller en (1,2), visiter les pieces et repérer les manivelles sur les murs. Dans une des pieces se trouve un coffre, regarder dans les trois trous sur le mur. Le but du jeu est d’aligner les aiguilles face au petit ornement. Pour ce faire, il faut faire tourner les manivelles des pieces (chacune contrôle une aiguille). Une fois les aiguilles alignées, le coffre s’ouvre et dévoile un cube métallique, le ramasser. Dans une des pieces, on peut prendre une ampoule d’éclairage au mur. – Aller en (1,0), descendre puis aller deux fois a droite, cliquer sur la plaque dorée de la baignoire, regarder dans la baignoire et y jeter le cube. Reculer et ouvrir le robinet d’évacuation avec la clé. Prendre la gemme 1 dans la baignoire. Aller en (2,1), aller a droite, monter. Aller a gauche et cliquer sur le bouton, aller tout a droite et cliquer sur le bouton, redescendre l’échelle. Aller tout a droite et descendre. Placer l’ampoule pour éclairer, aller tout a gauche et sélectionner les bons symboles au mur (se reporter a la note sur la feuille). Valider en cliquant sur le bouton en bas. – Descendre a l’échelle, placer le « lead casting » sur le piédestal. Le reprendre et renouveler l’opération jusqu’a tout soulever. Descendre et ramasser la gemme 3. Revenir en arriere, remonter la grille en recliquant sur les boutons, aller ensuite en (0,0). Revenir au téléporteur du départ (a l’extérieur). Aller en 747. Aller tout a droite, ouvrir la porte et entrer. Placer les gemmes dans leurs encoches puis abaisser la manette du tableau de contrôle. – Le jeu est fini mais on peut aller utiliser les secrets pour en apprendre un peu plus sur le jeu. Placer les billes rouges dans le trou au mur pour passer les grilles, lire les affichettes et regarder a travers les hublots.

Author: Lambda


Submachine 5: the root; solución en español


Guia de Submachine 5: The Root

by César

1. coge la nota
2. izquierda, abre la compuerta
3. abajo 2 veces, izquierda, enciende el PC y lee las instrucciones
4. derecha 2 veces, abre la puerta, entra, derecha, abre la compuerta
5. abajo 2 veces, derecha, introduce las coordenadas 5-5-2 (estan en el papel) y pulsa el boton (te trasladaras a otra pantalla)
6. click en el lateral izquierdo de la maquina, abajo, derecha, coge la bola roja #1 y regresa a la maquina
7. derecha 3 veces, entra en la cueva, derecha, coge del suelo una pieza roja
8. derecha, click en el panel para abrirlo, luego click en la pieza metalica rota de la izquierda (para soltar 2 seguros) y click en el enchufe … clickealo para enchufarlo al panel (se encendera la luz)
9. derecha, baja la escalera, derecha, fijate en el panel de la pared: es el panel de las claves (mas tarde tendras que usarla bastante)
10. derecha 2 veces, sube la escalera, click en el panel (se abrira)
11. izquierda 2 veces, entra en la habitacion, coge la llave inglesa (debajo de la silla) y sal
12. derecha 2 veces, abajo, izquierda, abajo, derecha, usa la llave inglesa para quitar los tornillos del panel y coge la llave
13. izquierda, arriba, derecha, arriba, izquierda, entra en la habitacion, usa la llave en el panel de la izquierda, coge la llave de claves #1 y sal
14. derecha, abajo, izquierda 2 veces, usa la llave de claves en la ranura de la derecha del panel de las claves, pulsa el boton, aparecera una nueva estancia (que llamaremos 0.1)
15. baja, izquierda, coge la llave de claves #2 de la silla
16. derecha, baja 3 veces, izquierda, click en la placa de la izquierda, usa la llave inglesa en el panel naranja, coge la bola roja #2
17. derecha 2 veces, fijate en la maquina cargadora
18. izquierda, sube 4 veces, quita la llave de claves #1 e introduce la llave de claves #2 en la ranura de la izquierda, pulsa el boton (aparecera una nueva estancia, que llamaremos 2.0)
19. abre la compuerta, baja, pulsa el boton superior para que la aguja se situe a la derecha
20. sube, izquierda, abre la compuerta y baja, coge la bobina
21. sube, izquierda, abre la compuerta, baja y pulsa el boton de nuevo
22. sube, izquierda, fijate en la pared de ladrillos
23. derecha 3 veces, quita la llave #2 y coloca la #1 en la ranura de la derecha, pulsa el boton
24. baja 4 veces, derecha, coloca la bobina en la maquina de carga, gira la rueda 3 veces, coge la bobina cargada
25. izquierda, sube 4 veces, quita la llave y pulsa el boton
26. derecha 2 veces, coloca la bobina en la pieza naranja
27. izquierda 2 veces, coloca la llave #2 en la ranura de la derecha y pulsa el boton (para ir a un nuevo lugar que llamaremos 0.2)
28. baja, izquierda 4 veces, gira la rueda (oiras un ruido)
29. derecha 4 veces, sube, coloca la llave #2 en la ranura de la izquierda y pulsa el boton para ir a 2.0
30. izquierda 2 veces, pulsa el boton gris y coge la bola roja #3
31. izquierda, la puerta de ladrillos esta ahora abierta, entra y coge la gema #2 del estandarte
32. izquierda, sube la escalera, coge la bola roja #4 del sillon
33. baja, derecha, adelante por la puerta de ladrillos, derecha 3 veces, coloca la llave #1 en la ranura de la izquierda y la llave #2 en la derecha, pulsa el boton para ir a 1.2
34. entra en la habitacion, derecha, coge la bombilla de la pared
35. entra en la habitacion, adelante, veras una maquina cuadrada en el suelo, fijate en los agujeros de las paredes, cada uno tiene una barra que hay que mover desde otro lugar para situarla en coincidencia con las muescas:
– sal de la habitacion, izquierda 2 veces, veras una rueda en la pared, es la que mueve la barra del agujero de la izquierda, girala el nuemro de veces necesario para que la barra del agujero coincida con la muesca
– izquierda 2 veces, la rueda junto a la silla corresponde al agujero del centro, girala …
– izquierda 2 veces, la rueda de la pared corresponde con el agujero de la derecha, girala …
36. izquierda 2 veces, coge la caja metalica que se ha elevado de la maquina, sal
37. izquierda 3 veces, quita las llaves y pulsa el boton para ir a 0.0
37. derecha 2 veces, coge la bobina
38. izquierda 2 veces, coloca la llave #1 en la ranura de la izquierda para ir a 1.0
39. baja la escalera, derecha, coloca la bobina en la base naranja
40. derecha, click en la parte superior de la bañera, mete la caja metalica (se disolvera y aparecera una gema que no puedes coger), sal
41. usa la llave inglesa en el desague de la bañera y coge la gema #3
42. izquierda 2 veces, sube la escalera, quita la llave #1 y coloca la llave #2 en la ranura de la derecha para ir a 0.2, pulsa el boton
43. baja la escalera, izquierda 4 veces, click detras del barril a la izquierda y coge la bola roja #5, veras que los artefactos negros tienen unos simbolos verdes (cambian en cada juego) … selecciona la nota del inventario para verlos
44. derecha 4 veces, sube la escalera, coloca la llave #2 en la ranura de la izquierda y la llave #1 en la derecha para ir a 2.1, pulsa el boton
45. derecha, sube la escalera, izquierda, pulsa el boton gris
46. derecha 2 veces, pulsa el boton gris
47. izquierda, baja la escalera, las rejas se habran movido al otro lado, sube y vuelve a dejar los botones como estaban, vuelve a bajar
48. derecha 2 veces, baja la escalera, usa la bombilla para iluminar la sala
49. izquierda 2 veces, clickea los simbolos de la pared conforme indica la nota y pulsa el boton (se movera una piedra del suelo y aparecera una escalera)
50. baja, usa la pieza roja en el nivel superior de la estatua … se elevara, coge la pieza y repitelo con los otros niveles, aparecera un agujero en el suelo, baja y coge la gema #4
51. sube 2 veces, derecha 2 veces, sube, izquierda 2 veces, veras las rejas, sube y pulsa los botones para para moverlas
52. baja, izquierda, quita las llaves y pulsa el boton para ir a 0.0
53. izquierda, sube, izquierda 7 veces, veras la maquina de coordenadas, introduce 7-4-7 y pulsa el boton
54. derecha 2 veces, pulsa el boton de la derecha, se abrira la puerta, entra
55. coloca las gemas en el panel, click en la palanca de la consola … mira la animacion final
….
HABITACION SECRETA
Usa las gemas en las ranuras de las diferentes salas


Submachine 5: the root; english walkthrough


Presented by David Hundley

Pre-Screen:

-Click on each set of valves to begin game.

Intro:

-You see a small alcove and notepad with pencil on the floor.

-Click on the notepad to pick it up; only crucial notes will automatically be jotted down.

-Go left, click on each side lever and middle lever to open hatch.

-Go down the hatch and to the left. Click button on hard drive to bring up screen. Click on each picture to jot down some vital info.

-Go right x2, open portal door, right again and down the hatch. Go right and enter 5-5-2 into portal (as seen in Sub 4).

The Root (5,5,2) – Cipher Plate 1:

-Click on bottom left side of portal, down the cliff and to the right for secret 1/5.

-Go back up and to the right x3, through the crevice and right again. Click on the small orange lead casting (as seen in Sub 0) and go right once more. This is the only lead casting you will need for the entire game, it will be re-used on each stone at the Ancient Anubis.

-Click on electrical panel to remove cover-plate. Click the “L” shaped latches on both sides of plug (plugged in to the ground) to unlock. Click on plug twice to remove from “power supply” and plug into electrical box to turn lights on.

-Go right, down, right x3, up and left x2 to “observation room.” Enter room and click on wrench under chair, exit room.

-Go right x2, down, left, down and right once more to rusted panel. Use wrench on all 4 bolts to remove cover-plate and click on rusted key.

-Go left, up, right, up and left once more to first room. Enter room and you’ll see 3 panels, one of which is locked. Use rusted key to unlock panel and click on cipher plate 1, exit room.

-Go right, down, left x2 to “transfer switch” (panel with push button). Insert cipher plate 1 into right slot located at top of panel and click button. You will hear a power surge, you’re now at coordinate 0, 1 (hence the “empty” slot followed by cipher plate “1”).

Note: cp or cps = cipher plate(s).

Coordinate 0,1 – Cipher Plate 2:

-Go down and left to room with chair. Click on cipher plate 2.

-Go back out, down x3 and left once. Click on single plate against wall to reveal secret compartment. Using the wrench, remove both bolts to find secret 2/5.

-Go back right and up x4 to transfer switch. Remove cp 1 from right slot and place in left slot. Place cp 2 in right slot and click button. You’re now at coordinate 1, 2.

Coordinate 1,2 – Revolving Rooms:

-Click in doorway, go right (ignore valve) and through 2 more doorways. You’re now in the central room.

-On every wall is a hole with a dial inside each one. The object of the dials is to make each pointer match up to the ornament on the outer rim by using the valves, exit room.

-Go right and through doorway to the first valve and turn twice. Go right and through the doorway to the second valve (with the chair) and turn twice. Go right and through the doorway to the third valve and turn 3 times. Go right and click on the lit bulb (only one not covered) in the socket. Out of all the lights, only one is uncovered. Go through doorway back to central room. The center box should now be open exposing a smaller box. Click the metal box.

-Exit room and go left x3 back to transfer switch. Remove both cps and place cp 2 back in left slot, leaving right slot empty and click button. You’re now at coordinate 2, 0.

Coordinate 2,0 – High Pressure:

-Click on the first hatch to open and go down (reminiscent of Sub 1 with the horizontal, vertical valves). Press the top button to reverse the needle to high pressure. Click out and left to next hatch, where needle is already set to high and click on empty coil. Click out and left to the 3rd hatch and click on the top button to reverse the needle to high pressure. Return to transfer switch. Remove cp 2 from left slot, place cp 1 in right slot and click button. You’re now at coordinate 0, 1.

Coordinate 0,1 – Charger Room:

-Go down x4 and right once to charger room. Place empty coil in charger and crank wheel x3 to fully charge coil. Go back out and up x4 back to transfer switch. Remove cp 1 from right slot, place in left slot and click button. You’re back at coordinate 1, 0.

Coordinate 1,0 – 1st Electrical Socket:

-Go down and right once to the electrical socket. Insert coil into socket, you will see the coil flash and charge up. Leave coil in place and return to transfer switch. Remove cp 1, place cp 2 in right slot and press button. You’re now at coordinate 0, 2.

Coordinate 0,2 – Signs:

-Go down and left x4 (symbols will be jotted down as you pass by) to the valve. If done correctly, the symbols will be lit up (one in each column). Click on bottom left of pipe to find secret 3/5. Turn valve and you will hear an explosion (reminiscent of Sub 1 where the pipe burst). Return to transfer switch, remove cp 2 from right slot, place cp 1 in left slot and click button. You’re back at coordinate 1, 0.

Coordinate 1,0 – Retrieve Coil:

-Go down, right once and click on coil. Return to transfer switch, remove cp 1 from left slot and click button. You’re back at the root again.

The Root – 2nd Electrical Socket:

-Go right x2 and place coil into socket. Return to transfer switch, place cp 2 in left slot and click button. You’re back at coordinate 2, 0.

Coordinate 2,0 – Sub 2 Brick Wall:

-Go left x2 and click the panel button to reveal secret 4/5. Go left x2 to Sub 2 screen and click on wisdom gem 2.

-Go left, up the stairs and click on secret 5/5.

-Return to transfer switch. Place cp 1 in right slot and click button. You’re now at coordinate 2, 1.

Coordinate 2,1 – Missing Bulb:

-Go right, up and right once more to LED panel. Click the button to switch led to right side. Go left x2 and repeat on left side (you will hear bars drop). Go back down and the bars should now be on the left.

-Go right x2 and down once, the room will be pitch black. Place bulb in empty light socket. Go through crawlspace to adjacent room. Using notes, match the symbols up with there location (right, left, center) for each column of symbols and click on switch below. The floor will slide back and drop the ladder down into open section.

-Go down ladder to ancient Anubis (as seen in Sub 0 & Sub 4) and place the lead casting into first stone to raise the Anubis. Remove the lead casting from the first stone and repeat on the other 2 stones to reveal hidden passage.

-Go down and click on wisdom gem 3. Go back up, through crawlspace, up, left and up again. Click on both switches again to reverse led’s and move the bars back to the right.

-Go down and to the left to transfer switch. Remove both cps, place cp 1 in left slot and press button. You’re now at coordinate 1, 0.

Coordinate 1,0 – The Solidifier:

-Go down and right x2 to what appears to be a holding tank filled with liquid. Click on small copper plate to reveal a scientific formula for citric acid mixed with water. I’m assuming, since the box is metal that it is drenched in citric acid and the tank is filled with water (or some other variation). Click for a close up inside tank and drop in metal box. The box will solidify revealing wisdom gem 1. Click out of tank and to the right side where relief valve is located. Now that the water is acidic, you’ll need to empty the tank. Using the wrench, turn the relief valve to release the liquid and drain into the floor. Click back into the tank and click on wisdom gem 1. Back out and return to transfer switch, remove cp 1 (0, 0) from left slot and click button. You’re back at the root.

The Root (0,0):

-Go left, up, left again and back through crevice to the portal. Enter the numbers 7-4-7 and click button. You’re now at the corridor.

Corridor (7,4,7) – Mover:

-Go right x3 into the mover room. Insert the 3 wisdom gems into the corresponding templates and press the ignition button by the control panel. (Feel free to look into the viewer, not required) The room will begin to move forward along the beams of light cast by the wisdom gems.

Secret Location: from the mind of Mateusz Skutnik

-Click on screen for secret location to view some of Mur’s own thoughts and ideas for The Root and the future Sub6, hopefully this year.

Congratulations… you’ve beaten Submachine 5!


Submachine 5: the root; polska solucja


autor: MegiPoland

SOLUCJA
Kliknij po kolei wszystkie zawory na rurach.
Rozpoczynamy wędrówkę:
Zabierz kartkę papieru i ołówek
Idź w lewo
Kliknij rączki po obu stronach klapy włazu
Kliknij najwyższą część klapy
Idź dwa razy na dół
Idź w lewo
Kliknij większy guzik na obudowie pod stołem
Kliknij po kolei trzy zielone panele
(za każdym razem zostanie dokonany automatyczny zapis na kartce
– masz więc teraz:
korytarz (corridor) 747,
laboratorium 001,
Root 552
Idź dwa razy w prawo
Kliknij guzik i wejdź do środka
Idź w prawo
Otwórz właz w taki sam sposób jak poprzednio
Zejdź dwa razy na dół
Idź w prawo
Wprowadź kod (z notatki) 552
Kliknij guzik pod kodem
Kliknij po lewej stronie teleportera na wysokości guzika
Kliknij na dole skały
Idź w prawo – weź czerwoną kulkę (SECRET 1/5)
Wróć do teleportera
Idź trzy razy w prawo
Kliknij otwór w skale
Idź raz w prawo
Kliknij po środku na dole – masz LEAD CASTING
Idź w prawo
Kliknij po obu stronach “zakrętki” dziwnego urządzenia na podłodze – uwolnisz wtyczkę
Kliknij panel na ścianie
Kliknij wtyczkę – światło włączone
Idź w prawo
Idź na dół
Idź w prawo trzy razy
Idź do góry
Idź w lewo dwa razy
Wejdź do pomieszczenia – weź klucz francuski (pod krzesłem)
Wyjdź z pomieszczenia
Idź dwa razy w prawo
Idź na dół
Idź w lewo
Idź na dół
Idź w prawo
Kluczem francuskim otwórz śruby na panelu
Weź zardzewiały klucz
Idź w lewo
Idź do góry
Idź w prawo
Idź do góry
Idź w lewo – wejdź do pomieszczenia
Zardzewiałym kluczem otwórz szafkę po lewej stronie – masz CIPHER PLATE 1
Wyjdź z pomieszczenia
Idź w prawo
Idź na dół
Idź dwa razy w lewo
Włóż CIPHER PLATE 1 do prawego otworu – kliknij przycisk

Idź na dół
Idź w lewo
Weź z krzesła CIPHER PLATE 2
Idź w prawo
Idź na dół trzy razy
Idź w lewo (kliknij między szarym pasem przy podłodze a szarymi klapami)
Odsuń szarą klapę (w rogu pod lampą)
Odkręć kluczem francuskim obie śruby na panelu – weź czerwoną kulkę (SECRET2/5)
Idź w prawo
Idź cztery razy do góry
Kliknij (aby zabrać) CIPHER PLATE 1
Włóż CIPHER PLATE 2 do lewego otworu – kliknij przycisk

Kliknij klapę włazu
Wejdź do środka – kliknij górny przycisk – wyjdź
Idź w lewo
Kliknij klapę włazu
Wejdź do środka – kliknij górny przycisk, weź EMPTY COIL – wyjdź
Idź w lewo
Kliknij klapę włazu
Wejdź do środka – kliknij górny przycisk – wyjdź
Idź dwa razy w prawo
Kliknij (aby zabrać) CIPHER PLATE 2
Włóż CIPHER PLATE 1 do prawego otworu – kliknij przycisk

Idź na dół cztery razy
Idź w prawo
Włóż EMPTY COIL do maszyny (na górze po prawej stronie koła)
Przekręć koło trzy razy (klikaj na wystającą część koła)
Weź naładowany COIL
Idź w lewo
Idź cztery razy do góry
Kliknij (zabierz) CIPHER PLATE 1 – kliknij przycisk

Idź dwa razy w prawo
Włóż naładowany COIL do pomarańczowego urządzenia
Idź dwa razy w lewo
Włóż CIPHER PLATE 2 do lewego otworu – kliknij przycisk

Idź w lewo dwa razy i kliknij lewy przycisk na panelu – weź czerwoną kulkę (SECRET 3/5)
Idź w prawo dwa razy
Kliknij (zabierz) CIPHER PLATE 2 – kliknij przycisk

Idź dwa razy w prawo – kliknij (zabierz) COIL
Idź dwa razy w lewo
Włóż CIPHER PLATE 1 do lewego otworu – kliknij przycisk

Idź na dół
Idź w prawo
Włóż naładowany COIL do pomarańczowego urządzenia
Idź w lewo
Idź do góry
Kliknij (zabierz) CIPHER PLATE 1
Włóż CIPHER PLATE 2 do prawego otworu – kliknij przycisk

Idź na dół
Idź w lewo cztery razy
Kliknij po lewej stronie rury (przy podłodze) – weź czerwoną kulkę (SECRET 4/5)
Wróć do widoku głównego
Kliknij na koło na rurze
Idź w lewo cztery razy (automatyczny zapis symboli)
Idź do góry
Kliknij (zabierz) CIPHER PLATE 2
Włóż CIPHER PLATE 2 do lewego otworu – kliknij przycisk

Idź w prawo cztery razy
Ze stojaka weź WISDOM GEM 2
Idź w lewo
Idź do góry
Z fotela weź czerwoną kulkę (SECRET 5/5)
Idź na dół
Idź w prawo
Wejdź w drzwi z rozwalonych cegieł
Idź w prawo trzy razy
Kliknij (zabierz) CIPHER PLATE 2
Włóż CIPHER PLATE 1 do lewego otworu
Włóż CIPHER PLATE 2 do prawego otworu – kliknij przycisk

Idź na wprost
Idź w prawo
Weź żarówkę z lampy po lewej stronie drzwi
Idź na wprost dwa razy

Na ścianach są trzy otwory – zobacz (kliknij je) dokładnie ustawienie strzałki oraz kulki!
Musisz je poustawiać w jednej linii – sterowane są kołami znajdującymi się w innych pomieszczeniach
– każde kliknięcie na koło powoduje przesunięcie o 90 stopni – na zegarze to 15 minut :D

Wyjdź z pomieszczenia
Idź trzy razy w lewo
Idź w lewo – to koło steruje środkowym otworem w ścianie
(kliknij tyle razy ile potrzebujesz)
Idź w prawo
Idź na wprost – to koło steruje lewym otworem w ścianie
(kliknij tyle razy ile potrzebujesz)
Idź w prawo
Idź na wprost
Idź w prawo
Idź na wprost
Idź w prawo
Idź na wprost – to koło steruje prawym otworem w ścianie
(kliknij tyle razy ile potrzebujesz)
Idź w prawo
Idź na wprost
Idź w prawo
Idź na wprost dwa razy
Jeśli dobrze ustawiłeś urządzenia w otworach w ścianie to możesz wziąć z postumentu METAL BOX
Wyjdź z pomieszczenia
Idź trzy razy w lewo
Kliknij (zabierz) CIPHER PLATE 2 i CIPHER PLATE 1
Włóż CIPHER PLATE 1 do lewego otworu – kliknij przycisk

Idź na dół
Idź w prawo dwa razy
Kliknij na brązową tabliczkę z informacją, że wanna wypełniona jest kwasem
Wróć do widoku głównego
Kliknij na środek wanny
Włóż METAL BOX do wanny – pojawi się kolejny WISDOM GEM
Wróć do widoku głównego
Użyj klucz francuski do odkręcenia zaworu po prawej stronie wanny – kwas wypłynie
Weź WISDOM GEM 1 z wanny
Wróć do widoku głównego
Idź dwa razy w lewo
Idź do góry
Kliknij (zabierz) CIPHER PLATE 1
Włóż CIPHER PLATE 1 do lewego otworu
Włóż CIPHER PLATE 2 do prawego otworu – kliknij przycisk

Idź w prawo
Idź do góry
Idź w lewo
Wciśnij dolny guzik (światełko zmieni miejsce)
Idź dwa razy w prawo
Wciśnij dolny guzik (światełko zmieni miejsce)
Idź w lewo
Idź na dół
Idź w prawo dwa razy
Idź na dół
Włóż żarówkę do lampy (po lewej stronie drabiny)
Kliknij otwór w lewej ścianie
Idź w lewo
Zobacz symbole zapisane na kartce (right – prawy; center – środkowy;
left – lewy) i kliknij odpowiadające im symbole na ścianie
Kliknij przycisk pod znakami w dolnej środkowej części ściany – wygląda jak śruba)
Otworzy się wejście w podłodze – zejdź na dół
Posąg składa się z trzech części- w każdej jest po środku otwór
Użyj LEAD CASTING na górnej części posągu – jak się podniesie – kliknij LEAD CASTING aby go zabrać
Powtórz tę czynność ze środkową i dolną częścią posągu.
W podłodze pojawi się wejście
Idź na dół
Weź WISDOM GEM 3
Idź dwa razy do góry
Idź dwa razy w prawo
Idź do góry
Idź dwa razy w lewo
Idź do góry
Idź w lewo
Kliknij dolny guzik (światełko zmieni miejsce)
Idź dwa razy w prawo
Kliknij dolny guzik (światełko zmieni miejsce)
Idź w lewo
Idź na dół
Idź w lewo
Kliknij (zabierz) CIPHER PLATE 1 i CIPHER PLATE – kliknij przycisk

Idź w lewo
Idź do góry
Idź w lewo siedem razy
Wpisz w teleporterze 747 (z kartki)

Idź w prawo dwa razy
Kliknij przycisk aby otworzyć drzwi – wejdź
Umieść wszystkie (3) WISDOM GEM w urządzeniu na wprost
Kliknij drążek na pulpicie – zobacz zakończenie

Ponieważ zebrałeś 5 SEKRETNYCH czerwonych KULEK kliknij:
GO TO SECRET LOCATION TO CLAIM PRIZE
Powkładaj kulki w otwory w ścianie,
Przeczytaj wiadomości od Mateusza Skutnika (nad wiadomościami są aktywne “judasze”)
Idź sześć razy w lewo i dokonaj wyboru ….. KONIEC


Submachine 5: the root; Soluzione in italiano


Submachine5 Soluzione in italiano

by: Cristina

Click sulla prima valvola
Click sulle due valvole, non importa in quale ordine
Click sulle 4 valvole, non importa in quale ordine

Click sul blocco che si trova sul pavimento di fronte al letto; via via che ci si imbatte negli indizi, ne verrà presa nota automaticamente.
Spostarsi una volta a sinistra (da adesso in poi si dirà 1sx), click su ciascuna delle due leve per aprire il tombino (spostandosi ulteriormente a sinistra si trova una stanza da bagno con cassetti che si aprono e rubinetto funzionante, ma che però non ha alcuna funzione ai fini del gioco). Quindi click sul coperchio.
1Giù e poi a 1sx. Per accendere il PC click sul pulsante del case. Click sulle tre figure che appaiono sullo schermo (vedere gli appunti sul blocco in alto a sinistra).
Spostarsi a destra due volte (2dx), aprire la porta che porta al portale, 1dx e 2 giù (opo aver aperto il tombino facendo azione sulle leve come per il primo). 1dx e comporre le cifre 5-5-2 sul portale, come nella Sub5.

The Root (5-5-2) – Cipher Plate1

Click dietro alla base del portale. Scendere per la scogliera e poi 1 dx; raccogliere il Secret 1/5.
Su e poi 3dx, passare attraverso la fessura e di nuovo a dx. Click sul lead casting arancione per raccoglierlo e di nuovo 1dx. click sulle leve della presa sul pavimento per liberare la spina; click sul pannello elettrico per rimuovere il coperchio; click 1 volta sulla spina per inserirla nel pannello elettrico.
1dx, 1 giù, 3dx, su e 2sx fino ad arrivare all’Observation Room; entrare nella stanza e raccogliere la chiave inglese che si trova sul pavimento dietro alle gambe della sedia. Uscire.
2dx, giù, sx, giù e dx fino al pannello. Aprire le viti con la chiave inglese.
1sx, 1 su, 1dx, 1 su, 1sx. usare la chiave sull’armadietto; click sul cipher plate 1 per prenderlo.
Uscire.
Dx, giù, 2sx fino all’interruttore (un pannello con un pulsante). Inserire il cipher plate 1 nel vano di destra in cima al pannello e premere il pulsante.

Vi troverete ora alle coordinate 0,1 (dove 0 rappresenta il vano vuoto, e l’1 rappresenta il cp1 nel secondo vano).
Da qui in avanti: cp sta per cipher plate.

Coordinate 0,1 – Cipher Plate 2:

Giù, 1sx fino alla stanza con una sedia; click sul cipher plate 2.

Uscire, 3giù, 1sx. click sulla mattonella appoggiata sul muro per spostarla; usare la chiave inglese e prendere il Secret 2/5.
Tornare a dx e 4su, fino all’interruttore. Rimuovere cp1 dallo slot destro e inserirlo nel sinistro. Inserire poi il cp2 nel slot destro e premere il pulsante. Siete ora nelle coordinate 1,2.

Coordinate 1,2 – Le Stanze Girevoli

Click sulla porta, dx (ignorare la valvola) e attraversare due porte; adesso vi trovate nella stanza centrale.
Su ogni muro c’è un buco con un puntatore su ciascuno di essi. L’obiettivo è far coincidere ogni puntatore con l’ornamento sull’anello esterno, usando le valvole. Tenere presente che l’ordine delle valvole rispetto all’ordine dei puntatori sarà capovolto: la prima valvola è per l’ultimo puntatore, la centrale coincide con quello al centro, l’ultima con il primo puntatore.

Questo è l’ordine da seguire:
1 dx, entrare nella porta click una volta sulla prima valvola.
1dx, entrare nella porta e click tre volte sulla seconda valvola (quella con la sedia).
1dx, entrare nella porta e click tre volte sulla terza valvola.

1dx, e click sul bulbo di luce nella Presa Elettrica (è l’unico senza copertura e che per cui può essere rimosso).
Entrare nella porta e rientrare nella stanza centrale. Nella scatola al centro della stanza dovreste poter vedere una scatola più piccola, Click per prenderla.

Uscire dalla stanza e 3sx verso l’interruttore. Rimuovere entrambi i cp e inserire il cp2 nel vano di sinistra, lasciando quello di dx vuoto, e premere il pulsante. Vi troverete ora alle coordinate 2,0.

Coordinate 2,0 – La Pressione

Click sul primo coperchio e 1giù (ricordate le valvole di Sub1?). click sul pulsante. Su.
1Sx, fare lo stesso col secondo coperchio ma l’ago è già al posto giusto, raccogliere il COIL, su.
Sx, idem col terzo, giù, click sul pulsante, su.

2dx. Rimuovere il cp2 dal vano di sinistra e porre il cp1 nel vano di destra e premere il pulsante. Siete adesso nelle coordinate 0,1.

Coordinate 0,1 – La stanza del Caricabatteria

4giù, 1dx, e siete nella La stanza del Caricabatteria. Mettere il coil nel caricabatteria e girare la ruota 3 volte. Riprenderlo, indietro, 4su e rimuovere cp1 dal vano di destra, metterlo a sinistra e premere il pulsante. Siamo alle coordinate 1,0.

Coordinate 1,0 – La Presa Elettrica

1 giù, 1dx, inserire il coil nella Presa Elettrica, che si ricarica. Lasciare lì il coil e tornare all’interruttore .
Rimuovere cp1, inserire cp2 nel vano di destra e premere il pulsante. Siamo ora alle coordinate 0,2.

Coordinate 0,2 – i Segni

1 giù, 4sx, vedrete dei simboli passando; click in basso a sx del tubo per trovare il segreto 3/5. girare la valvola, e sentirete un’esplosione (vi ricordate nella Sub1 quando esplode il tubo?). tornare all’interruttore, 4dx, 1su, rimuovere cp2 da destra e inserire cp1 nel vano di sinistra e premere il pulsante. Siamo ora alle coordinate 1,0.

Coordinate 1,0 – Rimuovere il Coil

1giù, 1dx, click sul Coil. Tornare all’interruttore, rimuovere cp1 dal vano di sinistra e premere il pulsante. Siamo di nuovo nella sezione chiamata The Root.

The Root – La Seconda Presa Elettrica

2dx, mettere il Coil nella Presa Elettrica. Tornare all’interruttore, porre il cp2 nel vano di sinistra, premere il pulsante. Siamo alle coordinate 2,0.

Coordinate 2,0 – Il Muro della Sub2

2sx, click il pulsante sul pannello e prendere il segreto 4/5. 2sx verso la schermata della Sub2 e click sulla Wisdom Gem 2.
1sx, su per le scale e click sul segreto 5/5 sulla poltrona.
Tornare all’interruttore. Porre il cp1 nel vano di destra e premere il pulsante. Siamo ora alle coordinate 2,1.

Coordinate 2,1 – Lampadina mancante

1dx, 1su e 1sx fino al pannello dei led. Click sul pulsante per accendere il led dalla parte dx.
2dx e ripetere la stessa operazione (si sentirà il rumore delle sbarre). 1sx, 1giù e troveremo le sbarre alla nostra sinistra.
2dx, 1giù, e troveremo una stanza oscura. Si inserisce la lampadina nel vano vuoto. 2sx fino alla stanza adiacente. Usando le note, inserire i simboli nell’ordine giusto (destra, centro, sinistra) per ciascuna colonna di simboli e click sull’interruttore al di sotto di essi. Si aprirà il pavimento e si potrà scendere.

Si giunge nella stanza di Anubi (come nella Sub 0 e nella Sub 4) dove basterà inserire il lead casting prima sulla prima pietra in alro, che si alzerà, poi nella seconda e quindi nella terza. Si svelerà un passaggio segreto.

1giù, e click sulla Wisdom Gem 3.
2su, 2sx, 1su, 2sx, 1su. Click di nuovo su entrambi gli interruttori per capovolgere i led e ritrovare di nuovo con le sbarre alla nostra dx.

1sx e tornare all’interruttore, rimuovere entrambi i pc, mettere il cp1 a sx e premere il pulsante. Siamo ora alle coordinate 1,0.

Coordinate 1,0 – La Vasca

1 giù, 2dx, c’è una vasca piena di un liquido. Click sull’etichetta arancione. Gettare la scatola di metallo nel liquido vedremo delle bolle. La scatola si scioglierà per lasciare la Wisdom Gem. Per prenderla dalla vasca click al di fuori del bordo, e vedrete che c’è una valvola in basso. Farla ruotare con la chiave inglese. Click di nuovo sulla vasca e prendere la Wisdom Gem 1.

2sx, 1su e tornare all’interruttore. Rimuovere il cp1 dal vano di sinistra e click sul pulsante. Siamo di nuovo al Root.

The Root (0, 0)

1sx, 1su 7sx e tornare al portale. Inserire i numeri 7-4-7 e premere il pulsante. Siamo ora nel Corridoio.

Il Corridoio (7,4,7)

2dx, ed entrare nella stanza del MOVER.
Inserire le tre Wisdom Gem negli appositi spazi e premere la leva dell’avviamento sul pannello di controllo. La stanza comincerà a muoversi in avanti lungo le scie di luce sprigionate dalle Wisdom Gem.

Click sull’opzione che vi porta alla Secret Location: qui potete usare i 5 segreti uno ad uno per leggere le note dell’autore e visionare le immagini più salienti del gioco con le spiegazioni di come sono nate le idee per questa Submachine.

Congratulazioni. Avete terminato la Sub 5!


Double Distinction


Well, this may be already old news, but I didn’t have time to post this earlier.

  • Submachine 4 was voted best point and click game of 2007 in the JayIsGames competition;
  • I ended up as 3rd in the developer of the year 2007 competition on FreeGamesNews;

Both were so-called people’s choice, so my big thanks goes to all of you who took 5 minutes of their lives to vote. I didn’t really have time to thank you all earlier because I was finishing Submachine5: the root. Which is finished. Waiting for a release date at the ArcadeTown. Which will be soon.


Submachine 5, hungarian solution


SUBMACHINE 5: THE ROOT MEGOLDÁS

FONTOS: Nagyon szívesen írok megoldásokat, de nem azért teszem, hogy más egyetlen pillantás alatt átmásolja a saját honlapjára, pontos forrásmegjelölés (http://sickestreality.blogspot.com/) nélkül. Kérlek, te se tedd, köszi!

1. Tekerd el a kerekeket, amíg egy szobába nem érsz.

2. Vedd fel a földről a papírt és a ceruzát és menj balra.

3. A két nyélre kattintva nyisd ki a csapóajtót és menj le.

4. Menj balra, kapcsold be a gombjával a számítógépet és nézd meg a három dokumentumot. A 747 és 552 koordinátákat találod.

5. Menj a szoba jobb végébe, át az ajtón, ott pedig mássz le a csapóajtón. Menj jobbra és írd be a gépbe, hogy 552.

6. Nézz be a gép bal oldala mögé, mássz le és egy piros golyót találsz.

7. Mássz vissza és menj jobbra addig, amíg a szürke folyosó pirosba nem kezd váltani. Itt a földön középen találsz egy kis piros valamit, ez egy ólomöntvény.

8. Menj jobbra, kattints a fedőlapra a falon. A földön látsz egy fura szerkezetet egy kis kupolával. Kattints a kupola két végén a zárakra, hogy kinyisd, ez egy vezeték. Dugd be a falba.

9. Menj jobbra, mássz le, majd menj a terem jobb végébe és mássz fel. Menj a folyosó bal végén a szobába és a szék alól vedd fel a csavarkulcsot.

10. Mássz vissza az előző szintre, onnan pedig még lejjebb. A terem jobb végében csavarozd le a fedőlapot és találsz egy kulcsot.

11. Menj vissza a legfelső szintre, ott pedig a jobb oldali terembe. Nyisd ki a szekrényt a kulccsal. Megtalálod az egyes számú kulcsot egy géphez.

12. Menj eggyel lejjebb és kettőt balra. A gép tetején tudod betenni a kulcsodat a jobb és bal oldalon. Tedd a jobb oldali lyukba és nyomd meg a gombot.

13. Mássz le, majd balra és megtalálod a kettes kulcsot.

14. Mássz le teljesen legalulra és menj balra. Tedd arrébb a sarokból a fémlapot, szedd le a csavarkulccsal a csavarokat és újabb golyót találsz.

15. Mássz vissza a géphez és most tedd a kettes kulcsot az első helyre, az egyest vedd ki.

16. Nyisd ki a csapóajtót, állítsd a nyilat jobbra a felső gombbal.

17. Menj jobbra, itt is nyisd ki a csapóajtót és vedd fel a transzformátort.

18. Az utolsó csapóajtónál is állítsd a nyilat jobbra.

19. Tedd az egyes kulcsot a jobb oldalába a gépnek. Mássz le teljesen, majd jobbra.

20. Tedd a gépre a transzformátort, tekerd meg a kereket háromszor, majd vedd fel a transzformátort.

21. Tedd az egyes kulcsot a bal oldali lyukba. Menj jobbra és tedd a transzformátort a szerkezetbe.

22. Tedd a jobb oldali lyukba a kettes kulcsot. Menj balra, jegyezd meg sorban a jeleket, majd a szoba végében tekerd meg a kereket. A cső bal oldala mögött piros golyó.

23. Tedd a kettes kulcsot a bal oldali lyukba. Menj balra, át a falon, egészen a törmelékig. Itt vedd fel a kristályt az állványról.

24. Menj balra, fel a lépcsőn, a széken piros golyó.

25. Tedd be sorban az egyes és kettes kulcsot is. Menj balra, amíg egy olyan termet nem látsz, ahol van bent valami.

26. Menj be és nézz be a három lyukon a falban. Az a lényeg, hogy a mutatóknak a bal oldali jelzésre kell majd mutatniuk. Ezt a kinti kerekekkel tudod szabályozni.

27. Menj ki, jobbra, be. Tekerd meg a kereket és figyeld, az első szobában a lyuk mögött melyik mutató változott és hogyan. Ez alapján állítsd be a kereket. Menj jobbra, be. Itt is tekerd meg ugyanígy. Menj jobbra, be, itt is állítsd be a kereket.

28. Menj innen jobbra és vedd fel a villanykörtét.

29. Menj tovább egyenesen a szobába és ha jól állítottál be mindent, találsz egy dobozt.

30. Keresd meg a gépedet és tedd az egyes kulcsodat a bal oldali lyukba. Mássz le, majd jobbra a kádig.

31. Nézd meg a kádat, tedd bele a dobozt, majd használd a csavarkulcsot a kád csövén. Vedd ki a kristályt a kádból.

32. Tedd a gépbe 2,1 sorrendben a kulcsokat. Menj jobbra, mássz fel.

33. Állítsd át odafent mindkét szerkezeten a gombokat, hogy a jobb oldali lámpa világítson.

34. Mássz el, kettőt jobbra, le. Tedd be a villanykörtét a létra melletti lámpába. Menj végig balra teljesen.

35. Állítsd be a falon azokat a jeleket sorban, amiket korábban láttál és nyomd meg lent a gombot.

36. Mássz le és tedd az ólomöntvényedet a legfelső lyukba, majd ha felemelkedik, akkor az alatta lévőbe, végül a legalsóba. Menj le és még egy kristályt találsz.

37. Menj a legfelső szintre és állítsd vissza a gombokat balra, majd menj a géphez. Tedd be a bal lyukba az egyes kulcsot, mássz le és vedd fel újra a transzformátort.

38. Utazz úgy a géppel, hogy nincs benne kulcs, majd menj a terem jobb végébe és tedd a transzformátort a sárga szerkezetbe.

39. Tedd a bal oldali lyukba a kettes kulcsot. Menj balra kettőt és nyomd meg a falon a gombot. Piros golyó.

40. Menj vissza kulcs nélkül a géppel, majd menj ki innen vissza egészen addig a gépig, amelyikkel számok beírásával utaztál.

41. Írd be, hogy 747. Menj jobbra, be az ajtón, tedd a kristályokat a falba és húzd meg a kart a konzolon.

42. A játék végén választhatod, hogy elmész a rejtett helyszínre. Itt minden egyes lyukba a falon be kell dobnod egy golyót, hogy jobbra haladhass.

author: Sickestreality


« Previous PageNext Page »