Covert Front; episode 2: station on the horizon


play this game

genre: point and click, escape, puzzle | release date: October 17th 2007

screen size: 550px/420px | data size: 4.21 Mb

english solution | solución en español | la solution francaise

hungarian solution | video walkthrough

The story of secret agent Kara and disappearance of general Karl von Toten continues…


Covert Front 2: english solution


Banishing the darkness:

If you sit around for a few seconds, it will tell you what to do: “I have to light a match.” Click the matches, then the middle of the screen. Do this again whenever the match goes out, you’ve got an infinite supply.

Permanent light:

From the start, walk forward five screens, until you’re facing a brick wall.

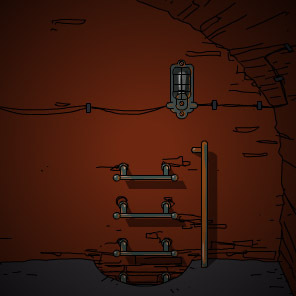
There are three stones here that you need to push into the wall.

Once you’ve done that, turn left.

Pull the switch.

It’s the little ball on the right side of the box, directly beneath the left edge of the lamp.

Lifting the grating:

The next thing you need to do is lift the grating that’s keeping you from getting into a new room.

There’s a switch you need to pull.

Go to the room just before you stare at the brick wall. Turn left twice, follow the path to the end.

Getting power to the new rooms:

In the bottom left room of the new area, there’s a fuse box, but you can’t get into it.

Looks like you need a screwdriver.

Grab the one from the toolbox and use it on all four screws.

written by funnyMan, found on jayisgames.com;

Once you’re into the box, you’ll notice that there are some things missing in here. One large object on the left, three smaller ones at bottom.

The large object is a fuse.

You can get it by backing out to the main sewer room and following the left path.

It’s sitting on the floor just inside the grate.

The three small objects are resistors. Each one only fits one of the three spots.

Resistor one is sitting on top of the box that you used to turn on the lights.

Resistor three is also nearby. Back up two screens, turn left, then right. Follow the path one more screen, and the resistor is laying on the ground between a couple of cylinders.

Resistor two is missing, you’ll have to improvise.

Use the wire from the upper left room of the new complex. It’s the red object sitting on the right hand table, between the mugs.

Once you’ve got all the pieces in place, just pull the switch.

Sending a message:

You’ll need a cable to connect with.

It’s in the lower right room of the complex, hanging on the bookshelf at right.

Enter the upper left room.

You’ll have to alter the machine a bit.

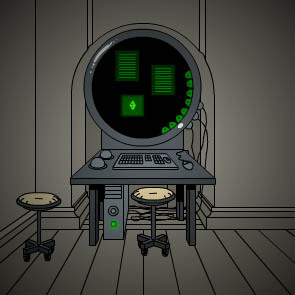
Zoom in on the plate in the lower left-corner of the machine just right of center. Unscrew it with your screwdriver and plug in the cable.

Getting into the vault:

The vault is in the new complex, straight ahead then right. You need to use the keypad to unlock it.

Once you’ve sent the message, notice anything new in the communication room?

Hit the button on the machine at lower left, read the code it prints (changes each game).

The keypad is a bit tricky, because it’s not normal.

The buttons are:

80596

34217

Submit

Movie reels:

There are three.

One is at the right hand side of the vault.

Another is in the small machine just left of center in the room opposite the vault. Press the green button to retrieve it.

For the last one, back out to the main sewer room and go forwards twice. It’s sitting on the floor next to the staircase.

Getting out:

Watch the movie reels on the large machine at right opposite the vault. Insert them in the top, then click the black area to watch.

Reel 3 is the important one.

Just before the end, we see someone walk into the vault. Notice anything?

Set the dials on that wall like they are in the video. To get to the exit, return to the main sewer area, go straight twice, turn right, enter the elevator, turn right, and press the button. Don’t forget to grab the movie reel from the machine first!

From here it’s easy:

Just hand all your objects through the car window, take the card, and look at it. You win!

Don’t forget to stop and read the various papers lying around, they help set the atmosphere and explain some of the miscellaneous unusable objects we’ve seen.

written by Alex


Covert Front 2: solucion en espanol


Dentro del tunel oscuro.

1. Click en la caja de fosforos para encender uno y poder ver.  NOTA: si no te das prisa el fosforo se apaga, pero no importa, los fosforos nunca se acaban, jeje.

2. Click dos veces al frente para avanzar.

3. Click dos veces al frente para subir las escaleras.

4. Click una vez para avanzar.

5. Estas frente a una pared de ladrillos con cables debajo. Debes empujar 3 ladrillos q sobresalen.

6. Click a la izq. para activar el generador de la luz. Toma la resistencia #1 q esta sobre el. Retrocede dos veces

7. Click en la entrada de la izq., aqui encontraras dos entradas mas. Si miras la pared frente a ti, veras la imagen del objeto desconocido q tienes en tu inventario.

8. Toma el pasillo de la izq. y ve al fondo. a la derecha

9. Activa el generador frente a ti. Este generador abre una puerta en el desagüe. Retrocede y toma el pasillo de la derecha.

10. En el suelo junto a los tanques encontraas la resistencia #3. Retrocede hasta el pie de las escaleras.

11. Click a la derecha para entrar al desagüe (tunel de ladrillos rojo y entrada circular)

12. Click dos veces para avanzar. Frente a ti veras dos tuneles.

13. Entra por el tunel de la izq. para encontrar el fusible al final del tunel. Retrocede.

14. Entra por el tunel frente a ti para encontrar  el rollo de pelicula #2 al final del tunel y una puerta cerrada. Retrocede.

15. Click a la derecha. Hay una hoja de papel en el suelo sobre el agua, puedes chekearla. Entra por la puerta abierta, veras un pasillo y otra hoja de papel en el suelo puedes leerla.

16. Click dos veces al frente para avanzar. Estas frente a un escritorio. Hay 5 entradas a tu alrededor: Dos entradas a la derecha, (dormitorio y cocina) dos entradas a tu izquierda (cuarto de limpieza y centro de control) y una entrada frente a ti.

17. Click en el escritorio, veras un mapa de la casa.

18. Click en la hoja del piso, es una foto tuya mientras estabas en la casa.

19. Click en la hoja de papel en la pared, es una carta del profesor.

20. DORMITORIO hayaras un cable, y un folder con 3 hojas de papel q puedes leer.

21. COCINA hayaras un trozo de alambre rojo.

22. CUARTO DE LIMPIEZA  hayaras un destornillador. usalo en la caja gris q esta adherida a la pared. coloca la resistencia #1 y la #3 en la caja gris, y el trozo de cable rojo en el lugar correspondiente a la resistencia #2. coloca el fusible en la caja gris. hala la palanca para activar el generador.

23. CENTRO DE CONTROL veras una hoja en el piso, chekala, es la contrasena para la semana 17. NOTA:segun el juego estamos en la semana 18. Sobre la mesa, haz click en el cuadrito de la maq. llena de cables, veras esto sobre la tapa “tr-p-bl”. Usa el destornillador para quitar la tapa y colocar el cable de tu inventario. Espera q Kara envie un telegrama informando sobre la mision. Veras una pequena luz parpadear en la maquina de la izquierda. Presiona el boton junto a esta para recibir la clave de la semana 18 (cambia con cada juego)

24. En la 5ta entrada (la entrada tras el escritorio con el mapa); veras en la pared 5 circulos, necesitas colocarlos de manera correcta para poder abrir la puerta cerrada q viste en uno de los tuneles del desagüe. Veras tambien una puerta a tu derecha y una entrada a tu izq (sala de proyeccion).

25. Coloca la contrasena recibida en el panel de la derecha para abrir la puerta. Dentro encontraras el rollo de pelicula #3.

26. SALA DE PROYECCION o control de camaras, veras la ubicacion de todas las camaras dentro de la casa. El rollo de pelicula #1 esta al fondo. Presiona el boton verde bajo ella para liberarla. En el proyector (la maq. a tu derecha) podras colocar y ver los 3 rollos de pelicula de tu inventario. NOTA: la clave para los 4 circulos de la pared q abre la puerta del tunel del desagüe está en el rollo de pelicula #3. SOLUCION: (de izq. a derecha) 1.sur-este 2.oeste 3.nor-oeste 4.nor-este.

27. Rectrocede hasta llegar a la puerta q acabas de abrir; es un elevador. Entra y aprieta el boton para subir. NOTA: debes llevar contigo los 3 rollos de pelicula o no podras usar el elevador.

28. Un auto se detendrá frente a ti. Alguien desde dentro te pedira todas las evidencias q hayas recolectado. Entregale todo lo q traes en el inventario y el te dará una nota. Lee la nota.

CONTINUARÁ….


Covert Front 2: la solution francaise


– Craquer une allumette et avancer dans le tunnel, aller toujours tout droit jusqu’à arriver à un couloir avec deux tuyaux verts au sol. Tourner au bout à gauche et appuyer sur les trois pierres qui dépassent du mur. Continuer à gauche, ramasser la résistance sur le boîtier et baisser l’interrupteur pour rétablir la lumière.

– Revenir deux fois en arrière et prendre le couloir sous l’arche à gauche. A l’intersection, tourner à droite et suivre le couloir, ramasser la résistance au sol. Revenir à l’intersection, prendre à gauche. Suivre le couloir jusqu’au bout et abaisser le levier.

– Revenir en arrière presque jusqu’au début et descendre dans le tunnel en briques rouges à droite. Suivre le tunnel jusqu’à l’intersection. Prendre le tunnel de gauche et ramasser le fusible au bout vers la grille. Revenir à l’intersection et prendre le tunnel en face, ramasser la bobine de film au bas des marches. Revenir à l’intersection et aller à droite, entrer dans le nouveau tunnel et suivre le couloir jusqu’à déboucher dans une pièce.

– Entrer dans la première pièce à gauche et fouiller la boite à outils pour trouver un tournevis. Utiliser le tournevis pour dévisser le boîtier au mur, placer les deux résistances et le fusible. Ressortir et aller dans la première pièce à droite, ramasser les câbles de couleur. Aller à la deuxième pièce à droite et prendre le fil rouge sur la table. Revenir à la première pièce à gauche et placer le fil rouge à la place de la résistance manquante, pousser la manette. Aller à la deuxième pièce de gauche, dévisser la petite plaque à droite de la machine à écrire, utiliser les câbles de couleur pour transmettre son rapport (cliquer sur « send »). Cliquer sur le bouton de la machine collée au mur de gauche et noter le code qui sort.

– Revenir dans la pièce centrale et aller tout droit. Cliquer sur le digicode à droite vers la porte et entrer le code (attention les boutons ne sont pas dans l’ordre !). Passer la porte et prendre la bobine de film sur l’étagère. Revenir en arrière et aller dans le couloir de gauche. Appuyer sur le bouton vert de la machine du fond et prendre la dernière bobine. Placer les bobines une par une dans le projecteur à droite et regarder les films. A la fin du film 3, bien noter la disposition des roues sur le mur derrière l’homme.

– Revenir en arrière et placer les quatre roues sur le mur comme dans le dernier film. Si la combinaison est bonne on voit la porte d’ascenseur s’ouvrir. Revenir à la pièce où se trouvait la première bobine de film, tourner à droite et entrer dans l’ascenseur. Cliquer sur la paroi à droite et appuyer sur le bouton.

– Transmettre tous les objets de l’inventaire à l’homme dans la voiture et prendre la carte, lire la carte. A suivre …

written by Lambda


mr. MothBall


mrMothBall

mr MothBall is a 21-level platformer which should entertain you a lil’bit while we’re all waiting for CF2 premiere…

play this game


Submachine4; Русское прохождение


written by cyka_no_iq

Я выведу тебя из сабмашины_4: Лаборатория.

…Найди зеленый листок…
…Отнеси его к статуе…
…Ты окажешься в лаборатории или где-то неподалеку…

Итак, ты на крыше лаборатории. Клик вправо – увидишь молоток, который нужно взять. Возвращайся обратно и спускайся по лестнице. Сначала к дымовой трубе, в затем – вправо – к чердачному окошку. Разбей замок молотком, открой ставенки и вперед!
Спускайся вниз, увидишь больничный халат, в кармане – колесики – нафталин. (не ешь их, пригодятся!). Забери их. Иди вправо, у потолка рядом с печной трубой висит шланг, забери его! Еще клик вправо – на кресле лежит голубая жемчужина, камушек-секрет (1), за креслом, в самом углу – штуковина, чтобы прочищать дымоход. Иди к трубе на крышу и бросай в нее эту штуку. Дымоход прочищен, из трубы вывалился ключ. Забери его в комнате с трубой и граммофоном. Идем налево. Над тумбочкой висит золотой ключик, в следующем экране – дверь, и желтая ручка под столом. Нужна она, забирай).
Ключом, выпавшим из дымохода, открываем дверь и заходим в нее.
Этажом ниже в правом углу лежит камушек-секрет(2), а еще ниже – важная для нас локация. Иди налево – в экран с подобием компьютера на столе, за мусорным ведерком камушек-секрет(3), а теперь нужно поговорить с Мёрто. (Клик на компьютер, а затем просто кликай по зеленой кнопке в правом нижнем углу экрана. )
(@mur) – Кто это?
– твой клик
(@mur) – Ты в лаборатории?
– твой клик
(@mur) – И у тебя нет клавиатуры??
– твой клик
(@mur) – Вот и объяснение…Ты вышел из Лупа?
(@mur) – Не так ли?
– твой клик
(@mur) – Ну ладно, прежде всего, тебе нужно добраться до комнаты-портала. Она за железной решеткой, и если она закрыта, то придется взломать главный замок. Насколько я знаю,  ты не найдешь ни кода, ни ключа к нему.
– твой клик
(@mur)- Второе, если уж дойдешь до портала, тебе понадобятся координаты, куда прыгать. У меня есть список на компе.
– твой клик
(@mur)- Сейчас я распечатаю.
– твой клик
(@mur) – Иди к порталу. Начинай прыжки. Можешь, найдешь выход. Удачи. Мур.

Ну и действительно, в принтере окажется списочек порталов. Дойди до самого правого экрана на этом этаже – до курилки. Там на подоконнике лежит зажигалка – забери ее.  Иди к экрану с двумя дверями и спускайся. Этажом ниже возьми стеклянную чашку, еще ниже – камушек-секрет (4)  за спинкой упавшего стула и записи сотрудников со стола. Иди влево и заходи в ванную, там возьми мыло на раковине и камушек-секрет (5) за трубами в левом углу. Три клика вправо – будет еще один стол и лестница.  Бери компакт-диск и поднимайся. Этажом выше увидишь подставку с пробирками – вторая слева – твоя. Еще клик вправо, увидишь стол с горелкой и отверткой, которую нужно забрать. Нам еще придется сюда вернуться, поэтому пока можно ничего не делать, кроме того, как стащить отвертку. Иди в самое начало – на крышу, нам нужен самый левый ее участок. На торце здания прикручен вентиль, который и надо отвинтить отверткой и забрать с собой.  Иди в ванную.  Молотком освободи отверстие на верхней горизонтальной трубе. На вертикальную в слот вставь вентиль. На решетке на полу поставь чашку и налей воды (повернув вентиль). Забирай чашку с водой и иди к горелке (три клика вправо, один вверх и еще один вправо). В правом нижнем углу, за трубой, лежит камушек-секрет (6). Дальше надо сделать вот что:
Поставь чашку на горелку, желтый переключатель – краник вставляй в слот на трубе (верхний), в нижний слот вставляй шланг, поворачивай рычаг на труде, и вентиль на горелке. Затем подожги зажигалкой то место, откуда должен по идее идти газ (прямо под чашкой). Дальше открывай набор «Великий Химик» (шучу). Сначала брось в чашку мыло, затем фиолетовую жидкость из пробирки (триоксид железа?), затем нафталин – таблеточки. Забери пустую пробирку. В самой чашке должна получиться белая жидкость, забирай чашку с собой. Возвратись в ванную и набери воды в пробирку (так же, как в чашку – поставив на пол и повернув вентиль), забирай пробирку с водой с собой. Иди направо до закрытой двери и открывай ее золотым ключиком. О! Решетка и замок, который невозможно открыть или взломать. Вылей на него белую жидкость из чашки, и проблема решится. Позвони в колокол так, чтобы кубик был поднят, и иди вправо. Вот он – портал-сабмашина! Можешь забрать записку, но важного там мало. Теперь смотрим документы, которые нам распечатал Мёрто, координаты для прыжков.  Можно, конечно, исследовать их в произвольном порядке, но чтобы по два раза нигде не ходить, я предпочитаю этот способ (грубо говоря, по порядку):

Прыгай в 104 (Древняя секция).

Исследовав местность, увидишь звездочки разных комбинаций и рычаги с черточками. В разных сочетаний эти рычажки дают разные звездочки,  то есть опустив два диагональных рычажка, мы откроем камушек вида «х». Короче:
Клик вправо, клик вниз. Опускаем два средние рычажка. Идем налево, берем квадратную втулку и камушек-секрет (7) в левом нижнем углу, в груде камней. Возвращаемся к панели с рычажками и теперь опускаем два крайние (а центральные поднимаем). Идем вправо, берем круглую втулку, ножик и звоним в колокол так, чтобы кубик был поднят. Возвращаемся к панели с рычажками и опускаем 2-й слева (так, чтобы три сразу были опущены – 2-й слева и два крайние). Идем на уровень вверх и направо, берем плитку B. Возвращаемся к панели с рычажками и опускаем 3-й слева, а второй поднимаем (так, чтобы три сразу были опущены – 3-й слева и два крайние). Идем на уровень вверх и берем плитку D. Затем вставляем втулки в соответствующие им ниши, и сверху опускается лестница. Возвращаемся к панели с рычажками и опускаем все сразу. Идем на два уровня вверх, разбиваем молотком потрескавшуюся плитку под лошадкой. Там камушек-секрет (8). Еще уровнем выше берем плитку С, а еще выше отрезаем плитку ножичком. Она упала как раз к панели в рычажками. Спускаемся и забираем ее – плитку А. Спускаемся еще на уровень ниже, забираем из глаза собаки камушек-секрет (9), и вставляем плитки в специальные слоты. Поворачиваем открывшуюся кнопочку, слышим шум, и возвращаемся к порталу (2 клика вверх, один влево).  Появилась лестница вверх, идем туда.  Рядом с подзорной трубой вытаскиваем аккумулятор (Там он почему-то называется coil), делаем шаг вправо, забираем записку. В ней сказано, что нужно (ну разумеется) зарядить аккумулятор, а то фонарь не горит и  в подзорную трубу ничего не видно. Фонарь заряжается в подвальной секции, координат которой у ребят не было, а у нас есть.

Возвращайся к сабмашине и прыгай в 690 (Луп)

Тот, кто играл в третью сабмашину, знает, как нумеруются комнаты. А именно – по системе координат, где комната с машиной – О, первая цифра – горизонтальная ось, а  вторая – вертикальная. То есть сделав 1 шаг вправо, мы оказываемся в комнате (1, 0). Таким образом в комнате (-1,0) – одна комната влево от сабмашины есть устройство с рычажками и цифрами. Определенная комбинация открывает кнопочки в лупе. Короче, набираешь на устройстве 1; 0, нажимаешь на нижнюю кнопку, слышишь щелчок, и идешь в комнату (1;0), видишь открытую красную кнопку и нажимаешь на нее. Таким образом надо открыть 4 кнопки – (1;0), (1; 1), (-1; -1) и (0, 1). В правом нижнем углу комнаты (0, -1) лежит камушек-секрет (10). Теперь, когда все открыто, иди в комнату (-1, 1) – там забирай Орб.

Возвращайся к сабмашине и прыгай в 529 (Подвальная секция).

В левом углу валяется разбитый аккумулятор, что наталкивает нас на мысль, что и у местных ребят ничего не получилось. Две комнаты вправо и ты найдешь зарядку, кстати, в нижней розетке спрятан камушек-секрет (11).Заряжай аккумулятор (вставить, повернуть рычаг и подождать до позеленения). Технически, можно возвращаться в древнюю секцию, но тут тоже есть дело. Спускайся на нижний этаж. В центральной комнате, в проводах справа от лазера лежит камушек-секрет (12). В боковых нижних комнатах – блоки питания, их надо зарядить аккумулятором. Сначала один (в правой комнате) (вставить, повернуть рычаг и подождать до позеленения), потом нужно аккумулятор подзарядить этажом выше, а затем и другой блок питания (в левой комнате – там же валяется записка). Когда обе кнопочки на лазере станут зелеными, включай его. Пройди две комнаты вверх – по свету лазера, увидишь зажим для компакт диска, вставляй его. Иди дальше по свету лазера, то есть направо, увидишь подставку для ОРБА, ну и туда его, туда. Подожди, пока ОРБ разобьется и забери ключ от сундука. Кстати в углу записка, сообщающая новые координаты – 551.
Не забудь все же зарядить аккумулятор перед тем, как прыгать снова.

Теперь, в 551 (Подземелье Маяка, правая часть).
Сразу, в левом углу найдешь камушек-секрет (13), шаг влево и будет записка. Тебе нужно нажать на верхнюю кнопочку пульта и остановить движение в трубе.

После этого можно прыгать дальше, в 462 (Подземелье Маяка, левая часть).
Слева пока ничего не нужно, но можно сходить и посмотреть на колокольную головоломку, заодно забрать записку, в которой тоже ничего важного. Зато справа, где труба уходит в землю, лежит камушек-секрет (14). А еще правее – замок с вентилем. Замок разбивается несколькими ударами молотка, берешь вентиль, и можно уходить.

Например, в 770 (Ловушки Гробницы)

Привет, клаустрафобы! Сбоку валяется записка про то, что у человека до тебя не было никаких идей, а на стене, меж тем, подсказка – круг, квадрат и треугольник. Посчитав углы фигур, мы получим 043 – координаты, куда и прыгаем.

043 (Еще Ловушки Гробницы)

Два клика влево и найдешь колокол, в который надо позвонить, камушек-секрет(15), и записку о том, что кому-то очень нужна была вода, хотя бы капля. Вот затем, мы и наливали ее, родную, в пробирку. Идем вправо, и капаем водичкой на это огромное светящееся яйцо, нам вылетает скипетр. Можно прыгать дальше.

800 (Корабль)

Попадаем в темноту, если ты не забыл взять в курилке зажигалку, то зажигай керосинку, ее еле видно. В левом углу у трубы лежит камушек-секрет (16). Иди направо, там звони в колокол, откручивай отверткой шурупы на обшивке, забирай еще один камушек-секрет (17) и перерезай ножиком провода. Иди налево до упора, и поднимайся по лестнице. Опять попадаем в темноту и зажигаем керосинку. Еще вправо и вверх, еще раз зажигаем). Вставляем вентиль в слот, закрываем крышку и спускаемся. Нажимаем на кнопку у решетки, решетка открывается, а там сундук мертвеца! Открывай сундук ключом из ОРБА, забирайте руку. Рядом с сундуком лежит записка про то, что в самом конце, если вам повезло, попробуйтпрыгнуть в 728.

Но нам сейчас не туда. Нам надо вернуться в самое начало – в Лабораторию, 001.

Там спрятан еще один камушек-секрет, который нам на достать было раньше. Идите в сторону курилки (4 влево, 2 вверх и один вправо). Там есть странное устройство со слотом для аккумулятора, вставляй его, нажимай на нижний болтик, и тогда камушек-секрет(18) освободится. Забирай его и вытаскивай аккумулятор.

Теперь нужно вернуться в подвалы Маяка – 462, пройти на экран влево и забрать камушек-секрет(19) из ранее закрытого ящичка.

Теперь возвращаемся в Древнюю секцию (104), к подзорной трубе. Вставляй аккумулятор в тамошний блок питания, иди влево, включай фонарь и смотри в подзорную трубу. Увидишь зарубки – 452, туда и прыгаем.

Увидишь статую, ей нужно дать руку и вставить скипетр, фактически, игра пройдена.

Тебе напишут, что ты с успехом прошел все испытания, и твое резюме им очень понравилось, и ты можешь начать работать в Лаборатории.
Жди дальнейших инструкций.

Далее ты попадаешь в комнату и письмом, где говорится, что ежели ты собрал все камушки-секреты, то для тебя еще припрятано вкусненькое. Иди в правую комнату, там в правом нижнем углу лежит еще один камушек-секрет (20), и прыгай в 728.

В комнате 728 в левом верхнем углу лежит последний камушек-секрет, 21-й.
В комнате правее эти камушки надобно загрузить в машинку, откроется решетка, и ты увидишь вещи создателя игры, Матеуша Скутника, с которых рисовалась серия игр «САБМАШИН».


what I’m currently working on…


.. well it’s not a secret that I’m working on Covert Front 2. And that it’s almost ready. But I STILL don’t know the release date. On a special request I’m publishing two more screens from the upcoming episode. So enjoy.

cf2_scr2

cf2_scr3


If You don’t know what Submachine is…


… You can surely find out from this article. Written by Greg J. Smith, full version can be found here.

consign_submachine4

Leaving the biggest imprint on me are the works of Polish graphic novelist Mateusz Skutnik. Skutnik is the author of the Submachine series of games, each of which finds you escaping from an elaborate, explorable puzzle box. Captivity is a familiar theme in this genre of games, known as escape the room games in the point-and-click world. This gameplay style evolved from Robyn and Rand Miller’s 1993 classic Myst, which shaped the game industry as much as SimCity and Doom.

The Submachine games could all be described as immersive labyrinths. In each of these first-person sleuthers, the player must navigate through a series of abandoned research facilities and ruins in hopes of finding a means to freedom. Stranded without instructions, maps or context, the story forms via notes and transmissions picked up along the way. The Submachines demand an eye for pattern recognition, and the intricacy of some of the puzzles can be quite maddening. Adding to the ambiance is an eerie score and impressive sound design. There are a number of recurring motifs including typewriters, radios and pipelines that visually unite the games. Be warned, these puzzle boxes are habit-forming.


Covert Front episode 1; video walkthrough


DayMare Town official site is up n’ running!


Well, the title says it all. Completely unexpectedly DMT became a hit, so I guess I owe You some kind of continuation. A series perhaps. Well, at the end of the first game we can clearly see that main character walking down the brigde, escaping the Daymare, but he’s heading towards some more locations. That was an open path for me to continue. Appears we didn’t leave the Daymare, only some small City Hall square. Who knows what lies on the other side of the bridge?…

Um, right, the official homesite:

…DayMare Town…


« Previous PageNext Page »