


Pan Blaki; interview in “Życie Warszawy”
October 2, 2007
 Czekanie Bóg wie na co
Z Karolem Konwerskim i Mateuszem Skutnikiem, twórcami komiksu „Pan Blaki”, rozmawia Dominika Węcławek.
Jak skłoniliście wydawnictwo Znak do rozszerzenia oferty o komiks?
Karol Konwerski: Do dzisiaj nie do końca rozumiem, jak do tego doszło. Ponad rok temu wysłaliśmy Znakowi nasz pierwszy album z historiami o Blakim, nie licząc zresztą na wiele. Po pewnym czasie dostaliśmy pozytywną odpowiedź. To pierwsza taka pozycja w ich ofercie i pierwszy przypadek wydawcy nie- komiksowego, który zainteresował się polskimi twórcami komiksu.
Ale i komiks filozoficzny nie zdarza się często. Czy przekładanie języka wykładów Leszka Kołakowskiego na scenariusz komiksowy było łatwe?
KK: Pierwsza i najważniejsza rzecz: „Pan Blaki” nie jest adaptacją wykładów profesora Kołakowskiego. „Mini-wykłady o maxi-sprawach” stanowiły jedynie inspirację dla naszej pracy. Kołakowski zestawia poważne kwestie etyczno-filozoficzne z prozą życia, ale pozostaje w nich przede wszystkim, co zrozumiałe, filozofem. Pomyślałem: a jakby zrobić to inaczej? Pokazać to, o czym mówi profesor, w formie historii z Blakim, które osadzone są na tym najprostszym, najbliższym nam poziomie dnia codziennego, nie występując z pozycji tych, którzy wiedzą i mają rację, bo nie mamy do tego prawa. Opisać te maxi-sprawy, w bardzo konkretnych sytuacjach, których bohaterami był lub może być każdy z nas.
Wielu czytelników może być jednak zaskoczonych, że wykonywanie codziennych czynności skłania kogoś do filozoficznych rozważań.
KK: Odrobinę mnie to wówczas zdziwi. Nie przekonuje mnie bezrefleksyjne przyjmowanie rzeczywistości. Codzienne sprawy, z jakimi mamy do czynienia, to więcej niż połowa naszego życia. Przyjęcie założenia, że nie niesie ono w sobie niczego wartościowego, oznaczałoby skazanie na totalną automatyzację. Wstać rano, iść do pracy, wrócić z pracy, oglądać telewizję i czekać Bóg wie na co. I tak dzień za dniem, rok za rokiem…
Czy czarno-biała forma obrazków to kontynuowanie stylu wypracowanego w poprzednich komiksach o panu Blakim, czy raczej wiąże się z treścią?
Mateusz Skutnik: Forma graficzna serii komiksowej o Blakim została ustalona już dawno temu. Czerń, biel i szarości to rozpoznawalne atrybuty tego komiksu. W związku z tym treść nie miała większego wpływu na dobór szaty graficznej.
Nie kusi Was zrobienie dłuższej formy fabularnej, nasyconej taką problematyką? Mateusz dał się już wcześniej poznać jako autor komiksów, który w ciekawy sposób patrzy na problemy np. z zakresu etyki.
KK: Trudno powiedzieć, czym zajmiemy się w przyszłości. Wiem, że chcę nadal opowiadać historie, czy to w formie komiksu, czy inaczej.
MS: Dłuższa forma fabularna? Czemu nie. Ale niekoniecznie jako komiks. Obecnie myślimy o dwóch kierunkach rozwoju fabularnego pana Blakiego. Pierwszy to stworzenie filmu animowanego, być może serialu telewizyjnego, opartego na dotychczasowym materiale. Druga, zupełnie odmienna droga to stworzenie moralizatorskiej gry internetowej, która by łączyła cechy klasycznych gier-zagadek, takich jak Myst czy Syberia z powolnym snuciem opowieści i filozofii pana Blakiego.
Dominika Węcławek, ar, 2007-10-02, Ostatnia aktualizacja: 2007-10-02
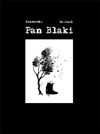
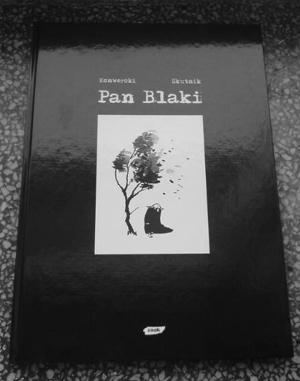 Pan Blaki just hit the bookstores today. So it’s an official premiere day. :D


 Magazyn Sukces nr 9/2007
 Pan Blaki media buzz continues, as it is not yet on the market, and another newspaper just printed a promo about this graphic novel album. Sweet. This time it’s major nationwide cultural newspaper. Even sweeter. This album is scheduled to hit the market at the end of september, 28th as I remember that correctly. It will be featured in the right panel of this site, just as Rewolucje4: Syntagma is right now, so you’ll be able to purchase this album. I know that it’s in polish, but that will give you a feel of mystery surrounding this album, and you can tell much of it by the drawings themselves. Allright, I’m pushing it.