


Pan Blaki; DB tease and an interview
August 13, 2007

Another newspaper printed an article about Pan Blaki graphic novel album, to be released in september. Is there some kind of a buzz already emerging?… lol…
Polish language below.
~~~~
Dziennik Bałtycki, Wydanie z dnia 13 Sierpień 2007
Jestem, więc myślę
Pan Blaki, w codziennych sytuacjach niespiesznie snuje rozważania o kłamstwie, nudzie, sławie, dobroci i szczęśliwym trafie…To filozofia w pigułce, przemawiająca do każdego.
Mateusz Skutnik i Karol Konwerski w 2005 roku stworzyli komiks”Blaki”. Jego bohaterem był – jak sami mówią: Niewielki, wiecznie czymś zatroskany facecik, który sprawia wrażenie, jakby całe życie spędzał na rozmyślaniach. Bowiem, Blaki myśli dla samej przyjemności myślenia.” Zatroskanego facecika pokochali czytelnicy. Nie trzeba więc było długo czekać. W Wydawnictwie Znak jesienią ukaże się komiks “Pan Blaki” inspirowany książką znanego filozofa Leszka Kołakowskiego “Mini wykłady o maxi sprawach”. Kawałek piersi kurczaka, kiełki bambusa, kieliszek białego winna są w stanie sprowokować Blakiego do refleksji na tematy filozoficzne. Gotując obiad zauważa: Nuda jest zjawiskiem, którego najpierw musimy doświadczyć, a dopiero potem mówić o jego istnieniu… Przypadkowość nie jest lekarstwem na nudę. Wizyta w Urzędzie Skarbowym skłania go do refleksji o wybaczaniu. Branie kredytu w banku, parzenie herbaty, zakupy… to czynności tak zwyczajne, że aż banalne. Jednak, stanowią znakomity punkt wyjścia do rozważań o sprawach najważniejszych. Pan Blaki, uwikłany w prozę życia nieustannie próbuje dociec prawdziwej natury rzeczy. Z jego refleksji i spostrzeżeń wyłania się subtelne przesłanie, do dzisiejszych, pędzących na oślep, czasów: Zatrzymaj się, zastanów. Bądź uważny. Może świat stanie się ciekawszy, a ty odrobinę lepszy?
– Dlaczego czytelnicy tak pokochali filozofującego Blakiego?
– Wydaje mi się, że jest to filozofia przyziemna, codziennego dnia – odpowiada autor rysunków Mateusz Skutnik. – On tak naprawdę rozmawia o rzeczach zwyczajnych. O tym co mu się wydarza i to analizuje. W związku z tym przemawia do wielu ludzi, którzy się z nim utożsamiają. Dlatego natychmiast łapie ciepły, dobry kontakt z czytelnikiem, który może się utożsamiać z jego problemami.
– Jakie komiksy czytał pan w dzieciństwie?
– Wychowałem się na klasyce: “Tytus, Romek i Atomek”, “Hans Kloss” i “Kajko i Kokosz” – czyli święta trójca polskiego komiksu peerelowskiego. Komiks wydaje się, że jest jedną z prostszych form do przekazania jakichś historii, jeżeli ktoś ma coś do opowiedzenia. Jest nawet taka teoria, że jeżeli ktoś nie czytał komiksu będąc dziecięciem, później trudno mu czytać rysunkowe opowieści będąc dorosłym.
– Dlaczego został pan autorem obrazkowych historii?
– Tę formę znam od dzieciństwa i czuję się w niej, jak ryba w wodzie. Nie jestem w stanie napisać opowiadania, książki czy zrobić filmu (bo komiks można porównać do pewnego rodzaju filmowej opowieści), ale w komiksowej historii się odnalazłem. Kiedy pojawia się nowa historia, którą chciałbym opowiedzieć czytelnikom postaje komiks.
– Czy prawdą jest że Tomasz Bagiński (nominoway do Oskara za “Katedrę”) zamierza zrealizować film oparty na komiksie “Kinematograf” z tomu “Rewolucje”?
– Jak najbardziej. Myśmy się już dwa lata temu spotkali w tej sprawie. Tomek jest niestety, bardzo zapracowanym człowiekiem i nie ma zbyt wiele czasu. Nie ukrywam, że byłby to film artystyczny zrobiony, jakby “po godzinach”. Ale jesteśmy umówieni.
– Powiedział pan w jednym z wywiadów, że nie ma ciśnienia na sukces i będzie tworzył mniej.
– W Polsce nie da się tak naprawdę zarabiać na komiksie. Więc to jest swego rodzaju hobby, choć jednocześnie to tworzenie sztuki. Ale ja się z tego cieszę, ponieważ zarabiam na zupełnie innych rzeczach, a komiks zostaje jako ta forma hobbystyczna-artystyczna, którą spokojnie, niespiesznie uprawiam dla przyjemności. Nie muszę tego robić, żeby zarobić na chleb i nie muszę stać się sławnym dzięki komiksom.
Grażyna Antoniewicz


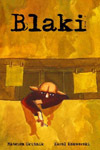 “Blaki” – mały nostalgiczny facet z papierosem