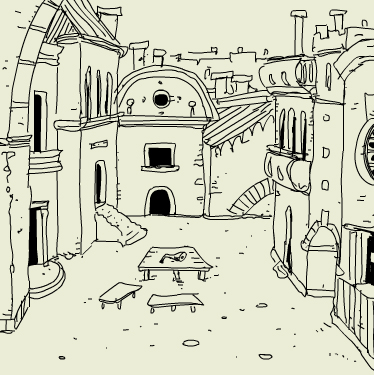
DayMare Town 2; solution en español


Guia de DayMare Town 2:

Nota: a lo largo del juego podras recolectar hasta 40 monedas, con ellas podras comprar objetos y obtener una puntuacion final … la guia solo indica las monedas necesarias para progresar en el juego

1. coge una moneda del suelo
2. izquierda, coge una moneda y la piedra … combinala con la cuerda del inventario
2. derecha 2 veces, baja la escalera, derecha, coge una moneda, luego usa la piedra/cuerda en el asidor de la derecha, se abrira un tunel
3. entra, izquierda … derecha, veras a un gigante, click arriba … clikea al gigante, quiere fuego … dale el encendedor cuando tenga la mano abierta, encendera el cigarro y se ira
4. pasa por el arco, click en la mesa, coge un gusano de la carne y 3 monedas
5. click en la casa aristocratica de la derecha, baja la escalera, coge 3 monedas del suelo, click en la trampa para ratones, coge el queso y sal
6. entra en el museo (a la izquierda), coge 3 monedas del suelo, compra un ticket (arrastra las monedas al ticket) y todos los souvenirs (una llave, un huevo de madera, un panfleto y una flor)
7. entra y dale el ticket al guardia, coge una moneda y entra
8. entra en la sala de la derecha, pon el huevo en la vitrina rota y coge una moneda del suelo
9. sal del museo y regresa a la puerta de la ciudad (city gate), dale la llave al guardia, se le caera el llavero, cogelo
10. regresa a la plaza y click en wall street, click en un pasadizo a la izquierda, veras un cubo de basura, coge las monedas y la manzana, luego sube la escalera y a mitad de camino encontraras otra moneda y un globo
11. entra en la puerta de la derecha (tenement house), coge 2 monedas
12. click en la puerta con escaleras de la izquierda, dale el panfleto al hombre sentado … luego entra en la farmacia, coge 3 monedas del suelo … click en la ventanilla, compra todos los objetos y sal
13. entra en tenement house, izquierda, coge una moneda y dale la aspirina (strong painkiller) al hombre y sal
14. click en la tapia del fondo, izquierda, dale el arsenico al hombre con sombrero y se ira
15. ve al lado derecho, abre la puerta con el llavero y entra … dale la flor al hombre barbudo y coge una moneda
16. entra en la casa, coge el huevo de la mesa y 2 monedas y regresa a la plaza
17. entra en la carniceria (butcher), click en la ventana, veras a un hombre … sal y click otra vez en la ventana, dale el agua destilada … sal y click otra vez en la ventana, coge un huevo y regresa a la plaza
18. izquierda, el acueducto, click en el arco de la derecha, veras una estatua, click en la medalla y abrira la boca, dale la manzana … coge la medalla del suelo
19. click en la puerta del fondo, coge una moneda, abre la puerta con el llavero, adelante 2 veces, veras ruinas, derecha, veras una puerta negra, entra
20. click en la gallina … coge el huevo en el aire
21. regresa a la puerta de la ciudad, abre la puerta con el llavero y entra
22. derecha, baja la escalera y entra en la casa … abre el horno y coge el pan, sal
23. en el inventario, corta el pan y el queso con el cuchillo y combinalos para hacer un bocadillo
24. dirigete a las ruinas, izquierda, click en el agujero, dale el bocadillo al hombre y el te dara un huevo de bronce, sal
25. regresa a la plaza, derecha, a fisher alley, izquierda 2 veces, coge 2 monedas de la ventana … baja las escaleras, derecha, ve al final del embarcadero y coloca el gusano en el anzuelo de la caña de pescar … click en el hombre hasta que pesque un pez, cogelo
26. usa el cuchillo y corta el pez, conseguiras otra medalla
27. vuelve a las ruinas, derecha 2 veces, entra por la puerta negra, sube la escalera, click en la ventana … veras al gigante, dale las medallas y coge el ultimo huevo de su mano
28. dirigete al museo, y coloca los huevos en la vitrina … en el pasillo se abrira una puerta, entra, derecha, coloca el globo en el cuadro de Michelle de la Fiaf
29. sal de la habitacion, izquierda, usa el cuchillo y corta las cuerdas … click en el globo y FIN


DayMare Town 2; english walkthrough


written by punkthug

YOUR GOAL IS 41 COINS.

O is coin, I is Interaction, L is Left, R is Right, F is Forward

Opening: You are facing wooden doors, O x 1 on ground
L
Pick up stone, O x 1 on ground
R
R
O x 1 On cliff ledge,
O x 1 Building ledge,
F (down ladder)
(notice door)
R
Facing sewer door, O on ground to the right
I: inventory, combine fishing line and stone drag to sewer handle
Enter Sewer, O x 1 next to creatures, right,under tail
L to exit out of sewer
You are now facing the sewer pipe you just exited, O x 1 on ground by grate.
R
Giant blocking path, click on chest
I: Click on giant, put lighter in giants hand
DO NOT FOLLOW GIANT UP, GAME WILL LOCK
F

You are now standing directly on the other side of the city gate, your in BUTCHERS MARKET. Clockwise from Left: Aqueduct, Museum, Butcher, right turn to Wall Street, Aristocrats House and Exit to Fishermans Alley, bottom of Screen (6 o,clock) City Gate

Click on table O x 3, collect maggot from animal leg
GB
R, exit to fishermans alley
L
L
Cute Fuzzy!, your going the right way!
Click on widow sill, O x 2
F down ally
F
L, kite flyer
Click on weeds, O x 1 middle right
R
R, Cute Fuzzy!, your going the right way!
Click on Pier, O x 1 on dock
F
I: Lets go fishing! drag maggot to hook, click on fishercreature, aawwwwwww, to big, throw it back! Click on fishercreature again, much better, take fish

Your on your own, return to BUTCHERS MARKET, see you there!

Again, Clockwise from Left: Aqueduct, Museum, Butcher, right turn to Wall Street, Aristocrats House and Exit to Fisherman’s Alley, bottom of Screen (6 o’clock) City Gate

I’m feeling intellectual, let’s go to the museum, O x 3 on floor
I: Buy ticket from left window and all items from right window
F
I: Hand ticket to Usher, O x 1 on floor
F
R
I: Place egg in broken display case (just click until you get the correct one)O x 2 on floor
Back to BUTCHERS MARKET
R to Wall Street
You are facing Wall Street, Clockwise from Left, Pharmacy and Alley next to Pharmacy, Wall at end of Street, Tenement House on Right(game does not notify you of the locations)
Click on Pharmacy: AN OLD FRIEND! It’s the Librarian! I: Give her something to read, how about the Museum Pamphlet, Oooops, there goes the balloon.
Enter Pharmacy, O x 3 on floor
I: Buy Knife, Water, Pain Killer, LEAVE ARSENIC!
Back to street, enter alley. (Yes, you can click on hieroglyphics on wall and in other parts of the game, but nothing happens). On left next to Pharmacy,
F and Left, O x 3 on ground around garbage can
Click in can (I think he’s asleep), O x 1 and pearmain

(Wikipedia says: Adams Pearmain is a cultivar of apple. It is a dessert apple, with a similar flavor to the Russet. It was introduced to England in 1826 by Robert Adam, under the name Norfolk Pippin)

Back up and go up ladder,(A CROW!) O x 1 on ledge, continue up and retrieve balloon.
Return to Street
Enter Tenement House on Right
O X 2 on shelf, play with clock of you want
L
O x 1 on floor, ignore depressed person.

RETURN TO MAIN SQUARE

Enter Aristocrats House:
Go down stairs, collect cheese from trap, O x 3, floor and wall.
Go all the way upstairs:
DEATH WAITS!
I: Give Aristocrat Strong Painkiller.
Death leaves, Aristocrat thanks you by offering you… O x 10 !!!!!!!!!!! in drawer(Other players give Aristocrat Arsenic, BOOOOOOOO)
Return to Square
Enter Butcher Shop, O x 1 on floor in blood,
I: Click on back window, back up, return, YIKES!
Give Butcher Bottle of Distilled Water, back up, return and get Museum Egg.
Return to Square, click bottom of screen to City Gate.
I: Drag Big Shiny Golden Key to Gatekeepers hand that holds the citys key ring, back up and collect ring
You now officially have the “keys to the city!”
Use key ring to Exit city gate
R
R down ladder
Use city keys to open (Bakers) little door
O x 1 on front right burner
Get loaf out of oven
LET’S CUT SOME THINGS UP!
I: With Knife Cut: Bread, fish and cheese, Make a sandwich with bread and cheese.
Return to BUTCHERS MARKET
Click on far left of screen and enter Aqueduct
Careful with your clicking, it is easy to click out of this area.
On right wall there are arch’s, click on FARTHEST arch;
HEY! WE KNOW THAT GUY, BUT THIS TIME HE DOES SOMETHING!
I: Get your mouse ready, click on necklace and shove the Pearmain in his mouth, (TAKE IT LIKE A MAN!)
Back Up, you will see dropped Ancient Medallion on the ground, pick it up.
Click on far door. O x 1 on ground
Use Gate Keys to open.
Dark area, lots of eyes, click on left, Cute Fuzzy!, your going the right way!
O x 1 on ground, white speck in dark area on the right by doorway.
F
Sand everywhere, click on first door on LEFT. Cute Fuzzy!, your going the right way!
O x 1 on railing, Click on hole in center of screen
I: Give sandwich you made to Sand Witch, O x 3 right of lamp, take egg witch offers you.
back all the way to dark room (easier)
go forward once. This time click on building to the right.
Click on doorway in center of screen
Hen House, O x 1 in basket
Get mouse ready
I: Click on hen and grab falling egg, more than one try if you miss.
Back out.
Click on far back wall.
Enter building, on the left in entrance Cute Fuzzy!, your going the right way! O x 1 on floor at foot of stairs, white speck in black area,
go up stairs, click on window, O x 2 on UPPER ledge,(you will miss these if your screen is not right)
I: Drag fish medallion and ancient medallion and place them in the left hand of (GIANT?)
Take egg from Right hand. (Here is the other place you can click on hieroglyphics but nothing happens)

YOU’RE ON YOUR OWN, RETURN TO BUTCHERS MARKET

R to Wall Street, Click far back wall, ) x 1 on top of wall

L is an angry man, REVENGE! REVENGE! he will take arsenic if you bought it, but nothing happens
R
R, Cute Fuzzy! your going the right way!
Use last key to open far door
YES, there is chalk on the ground and your cursor reacts, I believe this means this guy is the one who has been drawing the hieroglyphics with the chalk, what they mean right now, I do not know.
O x 1 by steps,
I: Give flower to creature and follow inside
O x 2 on floor, take egg
Return to BUTCHERS MARKET,
Enter Museum
YOU SHOULD HAVE: 39 COINS, KNIFE, BALLOON AND 5 EGGS.
I: Place eggs in display case:
Return to Hall,
Door at end of hall is now open: Cute Fuzzy!, your going the right way!
Enter door
R
I: Place Balloon in Painting
Back up
L
Go up stairs, O x 1 on desk.

Now, if you want explore the town, Some of these items, creatures, people, symbols may be in Mateusz’s next game. Visit Cherry Embassy. This “person” scares the hell out of me. She stands in the corner and when you return she may or may not be in the corner. Instead she may have moved to the center of the room and just stares at you. I have played this game multiple times to see if she was of some importance. Still do not know.

When you are done return to the museum.

Enter the room across from the Egg Display, (Left)
HERE IS WHERE MOST FAIL, THERE IS ONE MORE COIN, NUMBER 41!!!!!!!!!!

I: CUT BALLOON STRINGS WITH KNIFE, BALLOON WILL NOT LEAVE UNTIL YOU GET IN.

BALLOON WILL START TO RISE SLOWLY THEN SPEED UP.

KEEP YOUR CURSER NEAR THE MIDDLE OF THE SCREEN, MORE TO THE LEFT AND YOU WILL SEE A COIN ON THE LEDGE, YOU HAVE TO BE QUICK!

~~~~

written by ViciousBits, found on jayIsGames

*City Gate/Outskirts
Gate Keeper won’t let you in.

Go left to pick up just an ordinary stone (1 coin here). Go right twice (1 coin here). Go right again – note small locked door. Go right again (1 coin here). Note that round cover to tunnel only stays open when the handle’s pulled down. How to weight it?
Combine hook on a piece of string and just an ordinary stone. Attach to handle.

*Fisherman Alley
(1 coin in screen with tunnel to Middle of Nowhere/Outskirts)
To the left…

Go left (2 coins here). Go forward twice. Go right. Click on pier (1 coin here). Go to end of pier – note fisherman with no bait for his hook.

To the right…
Large fellow blocks the way.

He needs a light for his cigarette. Give him the lighter while he is gesturing with an open hand and he will fly away.

*Butcher’s Market

Click on the table. Retrieve flesh eating maggot (3 coins here).

*Aristocrat’s House (building on the right)

Go into the basement (3 coins here). Take cheese from mouse trap.

*Museum
(3 coins in entryway with Tickets and Souvenirs sellers)
Ticket-taker won’t let you in without a ticket.

Buy a ticket from the ticket seller and everything (flower, wooden egg, pamphlet, and key) from the souvenir seller. Click each item, then on your coins and place them in the indicated silouhettes, then “buy”.

Go forward. Give ticke to Ticket-taker (1 coin here).

Go forward. Go left – note the missing balloon. Return to main hall – note the closed door at the end due to theft. Go right (2 coins here). This is where the theft took place – note the sign describing the exhibit as the egg collection.

Place wooden egg in 2nd-from-the-left spot in display case.

*Butcher
(1 coin in the front room)
Creepy butcher through the small window is thirsty.

You will buy him water at the Pharmacy.

*Wall Street

Click on building on the left. Librarian is protective of its balloon. What might distract a librarian?
Give it the museum pamphlet. Balloon floats up and away.

*Pharmacy
(3 coins in Pharmacy interior, with the spigot and the test tubes)

Buy everything from the pharmacist (blade, water, arsenic, pain killer)

*Wall Street alley (next to Pharmacy)
To the left…

Click around the corner (3 coins here). Look in bin/trash can, collect pearmain (1 coin here).

Up the ladder…

Click up the ladder twice (1 coin here). Click up the ladder once more. Retrieve the balloon.

*Tenement House (building on the right)
(2 coins in the front room with the wacky-moving clock.)

Click to the left (1 coin here). That guy looks like he’s in pain…
Give him the strong pain killer.

*end of Wall Street (wall in the middle of the screen, in the distance)
(1 coin in the screen with just the wall and some plants peeking over the top)
To the left…

Go left. The little man wants revenge. What might help him with that?
Give him the arsenic.

To the right…

Go right – note the locked door in the wall.

Head back the way you came…
*city Gate (to the left of the Butcher’s Market)
Gate Keeper won’t give up his keys.

Distract him with something shiny…
Give him the big shiny golden key bought in the souvenir shop.
Go back a step and now you can pick up the dropped keys.

*Aqueduct (right from City Gate, also accessible on the left from Butcher’s Market)

Click on the right of the screen, among the archways – note the yawning head on the wall; note its jewelry/medallion.

Click on door with sign over head reading “district closed due to infection” (1 coin here). Use a rusty key on the door.

*Forbidden District
To the left…

Go left and enter hole – note the sound the Sand Witch makes… sound like an animal? (3 coins here).
She doesn’t want plain cheese.
You’re going to make her a sand-wich.

To the right…

Go right. Click on the visible doorway. There’s a chicken. Click on the chicken and then on the falling egg before it breaks. Go back one screen. Click to the right just to the left of the wall that covers that side of the screen. Go into the building (1 coin here). Go upstairs. Look out the window – note the giant with one hand open; note his medallion.

Head back the way you came…
*Fisherman Alley

Go back out through the Middle of Nowhere tunnel to the Outskirts.

*Outskirts

Remember that locked door?
Use a rusty key to open the door. Open the oven and take the small loaf.

Return to Fog Haven (via Fisherman Alley)…
*Fog Haven

Go to the end of the pier. Put the maggot on the end of the hook. Click on the fisherman. Um… That’s a bit.. big, isn’t it?
Click again and a fish will come up. Take the fish.

Return to the Butcher’s Market…

Start divvying things out – who wanted the water?
The Butcher. Give him the water, then go back a screen, then forward again. He left you a Faberge egg on the window ledge.

Combining things…

Use the knife on the limburger cheese and the small loaf. Combine the limburger cheese slices and the loaf sliced in half = limburger cheese sandwich. Who wanted a sand-wich..?
Take the sandwich to the Sand Witch in the Forbidden District – she will give you a bronze egg.

Use the knife on the fish. Hey, a medallion! Where have I seen a medallion before..?
On the yawning statue and around the giant in the Forbidden District’s neck.

Return to the Aqueduct (via Butcher’s Market)…
*Aqueduct

Click on the archway on the right to view the yawning statue. Click on its mouth to get it to open then pop the pearmain in. The medallion will fall off. Go back a screen to pick it up.

*Forbidden District

Go back to the giant. Put both medallions in his open hand and the closed hand will open, giving you the silver egg.

Return to Wall Street (via Butcher’s Market)…
*Wall Street

Go back to that locked door. Use a rusty key on it. The little girl (?) there looks sad. What might cheer her up?
Give her the flower. Follow her into the building on the right (forget the chalk; you can’t pick it up) (2 coins here). Take the golden egg.

Return to the Museum (in Butcher’s Market)…

The order of the eggs is: chicken, wooden, bronze, silver, gold, faberge (not that it’s hard to figure out). Return to the main hall. The closed door is now ajar with all the stolen eggs returned. Go through the door. Go right. The painting is missing something, isn’t it..?
Put the balloon in the painting.

Go back to the left twice and up the stairs (1 coin here). Return to the main hall. Go into the left room – there is now a hot air balloon waiting to carry you off! Cut the strings holding it down then click on the balloon.


DayMare Town 2; la solution francaise


DayMare Town 2, la solution :

by: Lambda

– Ramasser la première pièce au sol. Aller à gauche et ramasser la pierre et la deuxième pièce. Aller deux fois à droite, descendre à l’échelle. Aller à droite, ramasser la pièce au sol puis combiner la pierre et le fil dans l’inventaire et accrocher le tout à la poignée pour ouvrir la trappe. Entrer et traverser le tunnel.
– Ramasser la pièce vers la bouche d’égout, aller à droite. Cliquer vers le haut pour voir la tête du géant. Cliquer dessus et lui donner le briquet dans sa main ouverte. Prendre le passage dévoilé.
– Sur la place, cliquer sur la table au centre. Prendre les trois pièces et le ver sur la viande. Aller à gauche (« city gate ») repérer le gardien de la porte. Aller à droite (« aqueduct »). Sous une des arches à droite il y a un sculpture avec une tête, on y reviendra plus tard. Cliquer vers la porte du fond, elle est fermée, ramasser la pièce au sol. Revenir sur la place.
– Entrer à gauche dans la « cherry embassy », une petite fille est dans la pièce. Ressortir puis entrer dans le « museum » à gauche. Ramasser les trois pièces au sol. Acheter un ticket d’entrée à gauche (placer des pièces dans les emplacements pour payer). A droite acheter les objets souvenirs suivants : œuf, clé, fleur. Suivre le couloir et donner le ticket pour entrer (ramasser la pièce au sol avant d’entrer).
– Prendre le couloir à droite et placer l’œuf dans le présentoir et ramasser les deux pièces au sol. On reviendra à l’autre couloir et à la porte plus tard. Ressortir et acheter le prospectus qui reste, revenir sur la place.
– Aller en face (« butcher »), ramasser la pièce au sol et entrer dans le tunnel. Le bonhomme caché dit qu’il a soif. Revenir sur la place. Cliquer au fond à droite (« wall street »). Entrer à droite (« tenement house ») et prendre les deux pièces sur l’étagère, tourner à gauche et ramasser la pièce.
– Ressortir et cliquer sur la première porte à droite. Donner le prospectus au bonhomme avec le ballon. Entrer dans la pharmacie et ramasser les trois pièces au sol. Acheter l’eau, l’arsenic et la pilule. Reculer dans la rue et aller dans le passage sous l’arche à gauche. Avancer et ramasser les pièces au sol et fouiller la poubelle pour trouver une pomme et une pièce. Monter à l’échelle, ramasser la pièce vers le gnome et prendre le ballon tout en haut.
– Revenir dans la rue et aller vers le mur du fond, prendre la pièce au sommet du mur. Aller à gauche et donner l’arsenic au bonhomme. Aller ensuite à droite, la porte est fermée. Retourner à la pharmacie et acheter le couteau. Revenir sur la place.
– Entrer dans « aristocrat’s house ». Descendre les marches et ramasser les pièces et le fromage du piège. Monter les marches et donner la pilule à l’homme alité. Fouiller le tiroir et prendre les pièces. Revenir sur la place, aller vers le gardien de la porte. Lui donner la clé dorée et ramasser le trousseau. Revenir à la tête sculptée, cliquer sur le médaillon et mettre la pomme dans la bouche. Ramasser le médaillon au sol. Revenir à l’endroit où l’homme a soif, donner la bouteille au monstre. Reculer puis revenir pour trouver un œuf.
– Utiliser le trousseau sur la porte de la ville. Sortir, aller à droite et descendre à l’échelle. Ouvrir la porte fermée avec le trousseau. Entrer et prendre le pain dans le four. Dans l’inventaire, couper le pain en deux et le fromage en tranches. Combiner pain et fromage pour avoir un sandwich.
– Aller à droite et reprendre le tunnel d’égouts. Aller à gauche, cliquer sur la fenêtre pour trouver des pièces. Descendre et aller à droite, cliquer sur le ponton, ramasser la pièce et aller au bout. Mettre le ver sur l’hameçon du pêcheur. Cliquer sur le pêcheur, la première prise est mauvaise. Recommencer et prendre le poisson. Couper le poisson avec le couteau dans l’inventaire.
– Revenir en arrière et aller cette fois à gauche. Aller encore à gauche au cerf-volant. Prendre la pièce cachée au niveau de la plante. Revenir sur la place, aller ouvrir la porte au fond vers l’aqueduc. Ramasser la pièce dans le couloir et traverser. Cliquer sur la gauche et entrer dans le trou dans le sable. Donner le sandwich à la sorcière, prendre l’œuf.
– Revenir en arrière et aller cette fois à droite. Cliquer sur la petite porte et trouver la poule. Prendre la pièce dans le panier, cliquer dessus pour pondre un œuf et l’attraper avant qu’il tombe (on peut recommencer sinon). Ressortir et aller à droite. Entrer, ramasser la pièce au sol et monter l’escalier. Cliquer sur la fenêtre, donner les deux médaillons dans la main du géant, prendre l’œuf. Il y a aussi deux pièces sur la corniche.
– Revenir sur la place. Aller vers « wall street », cliquer sur le mur du fond et aller à droite. Ouvrir la porte avec la dernière clé. Entrer et donner la fleur au bonhomme, ramasser la pièce au sol et entrer dans la maison. Ramasser les pièces et prendre l’œuf sur la table.
– Revenir au musée et aller poser les œufs sur le présentoir. Revenir en arrière et passer la porte ouverte. Aller à droite et placer le ballon dans le tableau (au dessus de la nacelle). Reculer, aller à gauche et monter les marches, prendre la pièce sur le bureau. Revenir au couloir principal et aller dans le couloir de gauche. Couper les amarres du ballon et monter dans la nacelle.
– Voilà comment finir le jeu avec 30 pièces en poche. Il y a sûrement d’autres pièces cachées et peut-être d’autres actions à accomplir, à vous de trouver !


Daymare Town, hungarian solution


DAYMARE TOWN MEGOLDÁS

FONTOS: Nagyon szívesen írok megoldásokat, de nem azért teszem, hogy más egyetlen pillantás alatt átmásolja a saját honlapjára, pontos forrásmegjelölés (http://sickestreality.blogspot.com/) nélkül. Kérlek, te se tedd, köszi!

1. Nézd meg a bal alsó sarokba belógó épületet. Egy madarat látsz.

2. Nézd meg a kutat. A bal oldala mellett a földön van egy kampó, vedd fel. A kút káváján egy érmét találsz.

3. Nézd messzebbről a kutat. A jobb oldala mellett, kicsit lentebb van egy kő. Balról mellette a földön egy madzagot találsz. A jobb oldala mögött kulcsot találsz.

4. Rakd össze a kampót és a madzagot.

5. Kattints a szemben lévő házak fölé, majd a magasabb kémény alsó része mellé jobbról. Még egy madár.

6. Nézd meg a kút melletti csatornarácsot és nyúlj le a kampóddal. Egy fura négyszöget találsz.

7. Nézd meg a második ajtót (book house). Mellette jobbról a falban van egy kis mélyedés, vedd ki belőle az öngyújtót.

8. Menj be az épületbe, be a liftbe. Menj a -3. szintre. Fordulj meg, amíg egy fekete ablakot nem látsz. Menj át és vedd fel a kereket.

9. Menj vissza a lifthez és menj a -1. emeletre. Menj jobbra. A könyvespolc negyedik sorának a második felében van egy könyv, amiben a harmadik madarat látod.

10. Menj az első emeletre a lifttel. Nézd meg a jobb oldali képet a falon. A ház tetején van valami, közelebbről nézve ez a negyedik madár.

11. A kép bal oldala mögött egy kis papírt találsz.

12. Nézz el a szoba jobb oldalához és találsz egy könyvet.

13. Menj a lifttel a földszintre, menj ki és menj a harmadik épülethez (armory). Tedd a kereket a bal oldali mélyedésbe az ajtó mellett.

14. Menj be és nézd meg az apró szekrényt a lépcsőn. Találsz egy csavarhúzót.

15. Nézd meg a képet a falon és jegyezd meg, hogy állnak a gombok.

16. Menj be a jobb ajtón és kattints a szoba jobb felső sarkába. Nézz ki a kéményen, itt van az ötödik madár.

17. Menj vissza és most menj be a szemközti ajtón. Add a könyvet a fazonnak, vedd fel az alakzatot.

18. Nézd meg a mosdót, nyúlj bele a kampóval és egy kulcsot találsz.

19. Menj ki és fel az emeletre. A talapzaton egy alakzatot találsz, a földön pedig egy rongyot.

20. Menj ki innen és nézz be a jobb oldalon a passage nevű nyílásba. Nézd meg a rácsot.

21. Tedd a rongyodat a csavarhúzóra és tedd a rácsra, majd gyújtsd meg az öngyújtóval. Add az érmét a fazonnak és kapsz egy alakzatot.

22. Menj be a második épületbe és a -2. szintre. Nézd meg a falon a kis szerkezetet és állítsd be rajta a gombokat, ahogy a képen láttad (bal felső balra, jobb felső és bal alsó felfelé, jobb alsó jobbra). Találsz egy alakzatot.

23. Menj jobbra és az asztalon emeld fel a követ, majd tedd alá a papírt. Még egy alakzat.

24. Menj ki és menj az első épülethez. Az épület előtt menj balra, majd fel a lépcsőn, amíg egy ajtóhoz érsz. Nyisd ki a kulcsoddal, nézz ki az ablakon és a fa lombjának bal oldalán a hatodik madarat látod.

25. Menj vissza az épület elé és menj be. Fent van egy gerenda, kattints fölé, majd középtájon kattints a távolabbi gerendák bal oldalára, hogy a hetedik madarat lásd.

26. Menj be a bal oldali utolsó ajtón és kattints a szoba jobb felső sarkába. A fészekben a nyolcadik madár.

27. Menj ki és be jobbra a középső ajtón. Az asztal mögött van egy doboz, nyisd ki a kulcsoddal. Találsz benne egy alakzatot.

28. Menj ki és menj a szemben lévő korláthoz, majd balra, egyenesen és tovább jobbra a kis fekete ablakig. Kattints fölé, majd a jobb ablakra és megtalálod a kilencedik madarat.

29. Menj tovább jobbra és a korlát bal szélénél ott a tizedik madár.

30. Menj ki az épület elé, kettőt balra és be a sikátorba. Vedd fel a tojást.

31. Menj vissza, egyet jobbra és fel a lépcsőn az ajtóhoz, amit korábban nyitottál ki. Add a tojást a fazonnak.

32. Menj vissza az első épület elé és menj be.A korlátnál menj jobbra, amíg tudsz. Tedd be a szerkezet megfelelő részeibe az alakzataidat és nyomd meg mindnek a gombját.

33. Menj vissza a korláthoz és menj balra. Itt is tedd be a szerkezetbe az alakzatokat, nyomd meg a gombokat.

34. Menj tovább jobbra, amíg egy nagy gépet nem látsz. Húzd meg a kart a földön. Mássz fel rá.

author: Sickestreality


DayMare Town official site is up n’ running!


Well, the title says it all. Completely unexpectedly DMT became a hit, so I guess I owe You some kind of continuation. A series perhaps. Well, at the end of the first game we can clearly see that main character walking down the brigde, escaping the Daymare, but he’s heading towards some more locations. That was an open path for me to continue. Appears we didn’t leave the Daymare, only some small City Hall square. Who knows what lies on the other side of the bridge?…

Um, right, the official homesite:

…DayMare Town…


DayMare Town


dmt1

play this game

walkthrough | la solution francaise | solución en español

Русское прохождение | polska solucja | hungarian solution

This game is very different from the Submachines or Cover Front. Sketchy outline-only drawings give more artsy look to the gameplay and create a bit of minimalist atmosphere. Add creepy sounds and twisted story and you get the picture. DMT is the harderst puzzle game I made so far. It’s really nasty, so be warned. It’s for advanced pnc gamers.

How is it possible that I release this so soon after Covert Front?…

A word of explanation. First of all, DMT was in production since a year and a half. Second of all, I have an evil twin. While I was making submachines and Covet Front, he was making DMT. A project created on the side, just for the fun of it. And since he’s evil, this game is unbelievably hard to acomplish. So good luck.


DayMare Town; Solución en Español


written by Claudia, found on el Comentairo

Clickear en la piedra que esta abajo al medio de la pantalla.
Agarrar el hilo negro.
Clickear a la derecha de la piedra. Agarrar la llave. Clickear en el rincón izquierdo de la pantalla principal para ver el pájaro # 1
Clickear en el cielo, en la parte superior de la pantalla, luego clickear a la derecha de la chimenea para ver el pájaro # 2. Clickear en el pozo de agua.
Agarrar el gancho que esta a la izquierda del pozo.
Combinar el hilo y el gancho.
Agarrar la moneda que esta sobre el pozo, a la derecha. Clickear en la alcantarilla.
Usar el hilo con el gancho en la alcantarilla.
Agarrar la pieza del puzzle chino. Ir a la armería “Armory”.
Entrar en la puerta. Clickear en donde dice “What is that”, en el rincón inferior izquierdo.
Abrirlo y agarrar el destornillador. Clickear en la pintura del soldado. Anotar la dirección en la que están los botones ( izquierda, arriba, arriba, derecha ). Entrar al cuarto de tortura “torture room”.
Entrar en el pequeño pasillo que esta a la izquierda, ignorar al pequeño hombre por ahora.
Clickear en la pileta.
Usar el gancho con el hilo en el hueco de la pileta. Agarrar la llave. Subir al primer piso de la armería.
Agarrar el paño que esta en el rincón derecho.
Combinar el destornillador con el paño. Entrar a la oficina.
Clickear en el boquete que esta en el rincón superior derecho, luego en la abertura para ver el pájaro # 3.
Salir a la pantalla principal y entrar en la “Bookhouse”. Clickear en el hueco pequeño que esta a la derecha del muro.
Agarrar el encendedor. Entrar y subir al primer piso en el elevador.
Clickear en el cuadro que esta a la derecha.
Clickear en la izquierda del marco. Agarrar el papel.
Clickear en el pájaro, para ver el pájaro # 4
Clickear en la ventana, agarrar el libro. Volver al elevador e ir al piso -1
Entrar en la habitación que esta a la derecha.
Agarrar el libro que esta en la cuarta fila para ver el pájaro # 5. Volver al elevador e ir al piso – 2
Clickear en el puzzle y colocar las piezas en el orden que estaban en el cuadro del soldado. Agarrar la segunda pieza del puzzle.
Ir a la habitación de la derecha, clickear en la roca.
Clickear en la roca nuevamente para que flote y colocar la pieza de papel debajo de ella para romperla. Agarrar la pieza del puzzle. Volver al elevador e ir al piso -3
Clickear donde dice “Turn around”.( sobre la pared a la derecha ).
Entrar en la ventana. Agarrar el plato. Volver a la pantalla principal.
Clickear en la armería y luego en el ornamento que esta a la izquierda.
Colocar el plato en el ornamento.
Entrar en la armería, subir al segundo piso, agarrar la pieza del puzzle.
Volver con el pequeño hombre en la habitación de tortura.
Darle el libro y agarrar la pieza del puzzle. Volver a la pantalla principal. Clickear en el pasaje y luego donde dice “What a terrible smell”.
Colocar la pequeña antorcha ( destornillador + paño ) en el hueco, usar el encendedor. Se ve un grupo de hombres.
Darle al más brillante la moneda. Agarrar la pieza del puzzle.
Entrar al “City Hall”.
Entrar, clickear en la especie de madera que hay en la parte superior de la pantalla, sobre la izquierda y buscar el pájaro # 6. Entrar en la segunda oficina de la derecha.
Clickear en la caja. Usar la llave para abrirla. Agarrar la pieza del puzzle. Entrar en la tercer habitación de la izquierda.
Clickear en el rincón superior derecho.
Clickear nuevamente para ver el pájaro # 7. Volver al pasillo. Clickear el final del pasillo.
Ir a la izquierda, clickear en la escalera para continuar.
Hay un pedestal en el que hay que colocar las piezas del puzzle.
Colocar la pieza 1 en el segundo pedestal. Clickear en el botón para que baje.
Colocar la pieza 7 en el cuarto pedestal. Clickear el botón.
Colocar la pieza 6 en el primer pedestal. Presionar el botón.
Colocar la pieza 3 en el tercer pedestal. Presionar el botón. Bajar la escalera que esta a la derecha.
Clickear en la parte superior de la pantalla y luego en el hueco de la derecha para ver el pájaro # 8. Clickear en la derecha, vemos una maquina. Ignorarla por ahora.
Clickear en la parte inferior izquierda de la baranda para ver el pájaro # 9. Volver al final del pasillo e ir a la derecha.
Clickear en la escalera para continuar hasta ver 4 nuevos pedestales. Colocar la pieza 5 en el pedestal 4, la 2 en el pedestal 2 y el 4 en el pedestal 1. Volver a la pantalla principal.
Entrar al “City Hall”. En lugar de entrar, clickear en la izquierda.
Subir la escalera hasta ver una puerta cerrada.
Usar la llave para abrirla y entrar.
Vemos un hombre encadenado y una pintura cercana a el.
Clickear en la ventana y luego en la izquierda del árbol para ver el pájaro # 10 ( el ultimo ). Volver al inicio de la escalera e ir hacia la izquierda.
Clickear cerca de la esquina para ver un pedestal con un huevo sobre el. Agarrar el huevo.
Volver a donde esta el hombre encadenado y darle el huevo. El hombre va a desaparecer. Volver a la armería y entrar.
Ir a donde estaba la maquina. A la izquierda del final del pasillo.
Clickear la palanca.
Esto hace que aparezca un puente.
Clickear en el puente y Listo ESTAS FUERA!!!


DayMare Town, Русское прохождение


writen by Maeg, found on Anafor

небольшой камень посреди площади:
– слева от камня – нитка
– за камнем (клик на правый край камня)- ключ

колодец:
– слева от колодца – крючок
– на бортике колодца – монетка

отверстие канализации:
– соединяем в инвентаре крючок и нитку, из решетки вытаскиваем кусок головоломки №1 (квадрат с круглой дыркой)

Книжное издательство (Book house)

При входе, в маленькой нише справа – зажигалка
1й этаж (комната для чтения):
– за картинкой с домиком (левый нижний угол) – рулончик бумаги
– на столе-планшете – книга
-1й этаж (архивы)
– ничего полезного, только в книге с точкой на переплете можно посмотреть на изображение птицы
-2й этаж (мастерская)
– в головоломке выставляем рычажки в том порядке, как были пуговицы у солдата на картине (Арсенал). Получаем кусок головоломки №2 (квадрат с треугольной дыркой)
– на столе поднимаем камень и быстро подставляем рулончик бумаги. Ничего себе бумага! Получаем кусок головоломки №6 (квадрат без дырок)
-3й этаж (подвал)
– разворачиваемся, лезем в дырку, находим пластинку

Арсенал (Armory)

– справа от входа вставляем в отверстие пластинку.
– в шкафчике под лестницей – отвертка
– на портрете солдата замечаем странные пуговицы (пригодится)
– в комнате для пыток (о ужас) за углом – раковина. Крючком, соединенным с ниткой, вытаскиваем из неё ещё один ключ
– мрачному домовёнку даём книгу, забираем у него кусок головоломки №5 (уголок)
– на втором этаже забираем кусок головоломки №4 (уголок) и тряпку

Спуск в канализацию (Passage)

в инвентаре наматываем тряпку на отвертку, получается факел. Вставляем факел в отверстие, зажигаем с помощью зажигалки. Появляется отряд домовенков. Даем главному монетку, а он нам за это – кусок головоломки №3 (квадрат с квадратной дыркой)

Ратуша (City hall)

– во втором офисе справа – сейф под столом. Открываем его ключом, вытащенным из раковины. Получаем кусок головоломки №7 (в виде буквы “П”)
– в конце коридора – повороты налево и направо. В конце каждого – постаменты для кусков головоломок. Вставляем найденные куски с постаменты с соответствующими им отверстиями, нажимаем на кнопки.

После этого проходим дальше по левому коридору и попадаем к механизму. Решение головоломки его активировало, теперь мы можем нажать на рычаг и уйти из этого городка.

Но нам напишут, что мы прошли не всё.
Есть дополнительный квест – “спаси домовёнка”.
Слева от входа в ратушу находится проход. Поднявшись по лестнице, находим дверь и открываем её оставшимся ключом. Обнаруживаем там несчастного прикованного домовёнка.
Для того, чтобы получить средства для его спасения, нужно при прохождении игры отыскать всех запрятанных в игре птиц (10 штук). Птиц искать так:

1. на главной площади в левый нижний угол (что-то вроде парапета)
2. на главной площади – в небо – за трубой (справа у основания)
3. арсенал – офис (комната справа) – верхний правый угол (под потолком) – вверх по трубе
4. издательство – архивы (-1й этаж) – 4я полка стеллажа, книга с точкой на переплете
5. издательство – комната для чтения (1й этаж) – картинка с домиком – на коньке крыши
6. ратуша – в холле с дверями в офисы – вверх – на одной из балок
7. ратуша – дальний офис слева – правый верхний угол – вверху в гнезде
8. ратуша – спуск с левой лестницы сразу после головоломки – вверх – правое окошко
9. ратуша – у громоздкого механизма, открывающего выход, – место, где парапет крепится к стене
10. комната с прикованным домовёнком – окно – в ветвях дерева

После того, как найдены все птицы, идем к постаменту, который находится так: вход в ратушу – налево – налево. Если найдены все птицы, то все 10 кружочков на постаменте должны стать черными, а на нем – появиться яйцо.

Отдаем найденное яйцо домовёнку… он улыбается и исчезает

Так можно уйти с чистой совестью (а ещё – зажигалкой и крючком )


Daymare Town, la solution francaise


written by Lambda, found on Lambda

– Cliquer sur la grosse pierre vers le puits, prendre la ficelle et regarder derrière la pierre pour trouver une clé. Cliquer sur le puits, prendre la pièce sur le rebord et ramasser l’hameçon au sol. Combiner l’hameçon et la ficelle.
– Cliquer au niveau de l’angle du bâtiment à gauche du puits pour voir un premier oiseau. Cliquer dans le ciel puis au pied de la cheminée à droite pour voir un second oiseau. Revenir à la rue, cliquer sur l’égout, utiliser la ficelle et l’hameçon pour pêcher une pièce du puzzle. Cliquer sur le bâtiment « armory », entrer.
– Ouvrir le petit placard sous les escaliers et prendre le tournevis. Cliquer sur le tableau et bien observer comment sont placés les boutons. Aller à droite (« office », cliquer dans l’angle supérieur droit de la pièce, regarder tout en haut du conduit de cheminée pour voir un troisième oiseau. Revenir dans le couloir et ouvrir la porte (« torture room »). Cliquer à gauche pour découvrir un homme. Regarder dans l’évier, utiliser l’hameçon pour trouver une clé. Revenir dans le couloir, monter les escaliers et ramasser le chiffon au sol.
– Revenir dans la rue. Cliquer sur la bibliothèque (« book house », prendre le briquet dans le trou du mur à droite. Entrer dans la bibliothèque puis dans l’ascenseur. Choisir l’étage 1 et sortir. Regarder le tableau, c’est le portrait du vieil homme de la salle de torture. Regarder le second tableau, cliquer au bout du toit pour voir un quatrième oiseau. Regarder derrière le tableau à gauche pour trouver un papier. Cliquer sur le bureau à droite et prendre le livre.
– Retourner à l’ascenceur et descendre au -1. Aller à la bibliothèque à gauche et chercher le livre marqué d’un point. Ouvrir et regarder le cinquième oiseau. Retourner à l’ascenceur et aller au -2. Pour le puzzle sur le mur, il suffit de tourner les boutons dans le même sens que sur le tableau. Prendre la nouvelle pièce de puzzle. Tourner à droite et cliquer sur la table. Soulever la pierre et placer immédiatement le papier en dessous. Prendre la nouvelle pièce de puzzle.
– Retourner à l’ascenceur, descendre au -3. Aller au bout du couloir et regarder dans le trou pour voir une assiette, la ramasser. Reprendre l’ascenceur et ressortir du bâtiment. Retourner au bâtiment « armory » et placer l’assiette à gauche de la porte, entrer et monter les escaliers, ramasser a nouvelle pièce de puzzle. Retourner à la salle de torture, donner le livre au vieil homme, ramasser la pièce de puzzle qu’il laisse tomber.
– Revenir dans la rue. Aller vers le « passage » barré par la grille. Cliquer dessus, dans l’inventaire associer le tournevis et le chiffon pour faire une torche. Placer la torche dans le trou et allumer avec le briquet. Donner la pièce au bonhomme qui l’échange contre un morceau du puzzle.
– Cliquer sur le bâtiment « city hall », aller vers la gauche au lieu d’entrer. Aller encore deux fois à gauche pour trouver un gros bloc orné de boutons (ils symbolisent les oiseaux déjà trouvés). Revenir en arrière et suivre le petit bonhomme dans les marches. Ouvrir la porte avec la grande clé. Regarder par la fenêtre et cliquer dans l’arbre pour voir le sixième oiseau. Revenir au « city hall » et entrer.
– Entrer dans la troisième pièce à gauche, cliquer dans l’angle supérieur droit de la pièce, cliquer sur le nid pour voir le septième oiseau. Revenir dans le couloir et aller dans la deuxième pièce à droite. Cliquer sur la boîte à droite du bureau, ouvrir avec la clé et prendre la pièce de puzzle. Revenir dans le couloir et cliquer au dessus de la poutre puis quelque part dans l’enchevêtrement de poutres pour voir le huitième oiseau.
– Revenir dans le couloir et aller au bout. Tourner à droite et suivre les marches. Placer les pièces de puzzle dans les bonnes encoches puis valider avec les boutons. Revenir au bout du couloir puis aller à gauche. S’arrêter vers les bornes et placer les pièces de puzzle puis valider. Descendre les marches puis regarder vers le haut. Cliquer sur le hublot de droite pour voir le neuvième oiseau. Aller encore à droite et cliquer sur le barreau le plus à gauche de la barrière au fond pour voir un dixième oiseau. Ne pas cliquer tout de suite sur la manivelle du mécanisme.
– Revenir au bloc orné de boutons, prendre l’œuf d’or et aller le donner à l’homme enchaîné pour le libérer. Revenir à la manivelle et actionner la machine pour abaisser un pont et sortir de la ville.


DayMare Town; polska solucja


autor Gorka, znalezione na anitkak

1. Robimy zbliżenie na studnię. Po jej lewej stronie na ziemi znajdujemy haczyk, a na cembrowinie monetę.
2. Następnie badamy kamień. Na lewo od niego leży linka, a za nim schowany jest klucz.
3. Klikamy na schody prowadzące do ratusza, po czym skręcamy w lewo i wchodzimy po schodach między dwoma budynkami. Kluczem otwieramy drzwi i wchodzimy do środka.
4. Klikamy na człowieczka, który prosi nas o uwolnienie z niewoli. Przyglądamy się też rysunkowi na ścianie za nim, który informuje nas, co będzie do tego potrzebne – ptak dający jajko. Tak naprawdę to musimy w grze odszukać 10 ptaków, a wówczas jajko będzie nasze. 5. Wyglądamy przez okno i klikamy na lewy listek, który tak w rzeczywistości okazuje się być ptakiem. Słyszymy charakterystyczne krakanie.
6. Wracamy do podnóża schodów między dwoma budynkami i skręcamy w lewo. A następnie zaglądamy za róg. Stoi tam kolumna z 10 guziczkami. Te czarne oznaczają już odnalezione ptaki, a te białe – ptaszyska, których musimy jeszcze poszukać.
7. Wracamy na rynek i zaglądamy za róg po lewej i widzimy drugiego ptaka.
8. Teraz zajmiemy się kratką ściekową. Zbliżamy się do niej i łączymy linkę z haczykiem. Używamy jej do wydobycia pierwszego klocka.
9. Udajemy się do biblioteki. Wjeżdżamy windą na poziom 1. Oglądamy obraz z domkiem. Po jego lewej stronie znajdujemy rulon.
10. Teraz uważnie przyglądamy się domkowi na obrazku. Na samym skraju dachu po prawej stronie dostrzegamy ledwie widoczny zarys. Klikamy na niego i słyszymy znów słyszymy krakanie. Kolejny ptak odnaleziony.
11. Przenosimy się do prawej części pokoju, gdzie z biurka zabieramy książkę.
12. Wracamy do windy i zjeżdżamy na poziom -1. W prawym pomieszczeniu na czwartej półce od góry widzimy książkę z kropką. Zaglądamy do niej i mamy kolejnego ptaszka.
13. Zjeżdżamy na poziom -3. Klikamy na prawy dolny róg ekranu i zaglądamy w ciemność. Znajdujemy tam kamienny krąg (piszą, że to talerz, ale jakoś mi nie wygląda).
14. Jedziemy na parter i wychodząc zabieramy zapalniczkę z wnęki po prawej stronie drzwi.
15. Udajemy się do arsenału. Robimy zbliżenie na okrąg po lewej i umieszczamy w nim talerz.
16. Wchodzimy do arsenału. W małej skrytce na schodach znajdujemy śrubokręt.
17. Oglądamy z bliska wiszący na ścianie obraz, zwracając szczególną uwagę na guziki. Zapamiętujemy ich układ.
18. Wchodzimy na górę po schodach, gdzie na kolumnie znajdujemy kolejny klocek, a na podłodze szmatkę.
19. Schodzimy na dół i przechodzimy przez drzwi. Za winklem spotykamy czarną postać, której wręczamy książkę. Zajęta czytaniem gubi klocek, który zabieramy.
20. Zaglądamy do zlewu i przy pomocy linki wyciągamy z odpływu kluczyk.
21. Wychodzimy do holu i skręcamy w prawo. W prawym górnym narożniku pokoju znajdujemy komin, na którego szczycie siedzi ptak.
22. Wracamy do biblioteki i zjeżdżamy na poziom -2. Na ścianie pod lampą widzimy skrytkę z czterema zamkami. Ustawiamy je tak, jak guziki na obrazie z arsenału (w prawo, w dół, w dół, w lewo). Ze środka zabieramy klocek.
23. Po prawej stronie pomieszczenia znajdujemy stół z nożyczkami i kamieniem. Klikamy na kamień i szybko podkładamy pod niego rulon. Gdy się rozłupie, dostaniemy kolejny klocek.
24. Wychodzimy na rynek. Zaglądamy do zakratowanego przejścia po prawej. Ze śrubokręta i szmaty robimy pochodnię i umieszczamy ją w dziurze. Następnie podpalamy pochodnię zapalniczka. Gdy ogień rozjaśni nieco ciemności, wręczamy monetę ludkowi i w zamian dostajemy klocek.
25. Klikamy na niebo, a następnie po prawej stronie prawego komina. Oto kolejny ptaszek.
26. Czas pozwiedzać ratusz. Wchodzimy do środka. Zaglądamy do trzeciego pokoju po lewej stronie. Klikamy na górze po prawej stronie, a następnie na ptasie gniazdo.
27. Zaglądamy do środkowego pokoju po prawej stronie. Pudło stojące obok biurka otwieramy kluczem ze zlewu i ze środka wyciągamy ostatni klocek.
28. Wracamy na korytarz i spoglądamy do góry. Pod krzyżującymi się belkami znajdujemy ptaszka.
29. Przechodzimy do końca korytarza i skręcamy w prawo. Schodzimy po schodach i umieszczamy odpowiednie klocki w żółtych polach. Następnie wciskamy przyciski, by opuścić wystające trzpienie.
30. Wchodzimy na górę i skręcamy w lewo. Znów montujemy klocki i wciskamy guziczki.
31. Udajemy się w prawo i spoglądamy do góry. W prawym okienku znajdujemy ptaka.
32. Znów w prawo i pociągamy za dźwignię. Most zwodzony zostaje opuszczony. Ale jeszcze na niego nie wchodzimy. Tzn możemy, ale mamy jeszcze jedno zadanie do wykonania.
33. Klikamy na balustradę po lewej stronie i mamy ostatniego ptaka.
34. Teraz wracamy do kolumny z guziczkami (w lewo od schodów ratusza). Jeśli znaleźliśmy wszystkie 10 ptaków, na kolumnie będzie leżało złote jajko.
35. Jajko wręczamy uwięzionemu, który w magiczny sposób znika.
36. Teraz możemy już udać się na most i opuścić miasto.


« Previous PageNext Page »