Submachine 4: the Lab


game_submachine4

voted Best Point and Click game of year 2007 (by jayisgames.com readers)

New Grounds Daily Feature – 04/22/2007

New Grounds Weekly Users’ Choice – 04/25/2007

—-

play this game

walkthrough: video | english 1 | english 2

francaise | español | Русское | polska | hungarian

—-

Game Description:

Submachine. The game in which with every puzzle solved, every chapter finished you fall deeper and deeper into mystery. Fourth chapter takes us to the heart of the submachine, the place where all questions will be finally answered. Or were finally answered. Once again it’s time to ask youself – is it possible that you’re too late?


Submachine 4: the Lab; walkthrough


created by Scott, found on jayisgames.com.

You start off on the rooftops of a house. You can follow the on screen instructions for the first part. I will restate what they ask you to do…


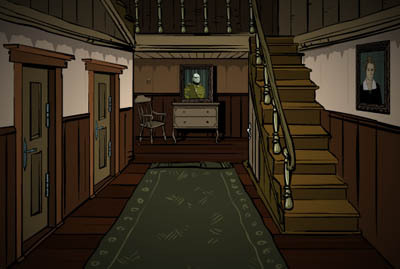
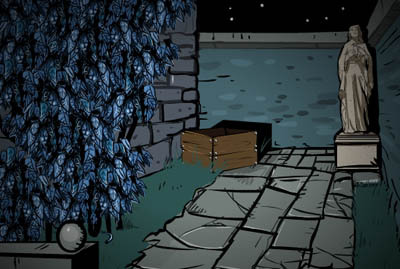
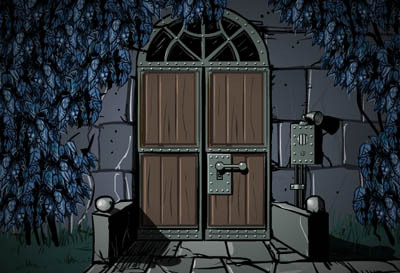
– -LABORATORY (001) *The Rooftop Go Right and on the window ledge, pick up the Hammer. Go Left twice. Go Down the ladder. Go Right and use the Hammer on the door lock and click the door open. Go inside. *The Attic Go Down and click on the white jacket Take the Naphthalene (white balls). Click out of the coat Go Right and take the green Rubbertube from the ceiling in-between the rafters. Go Right and take the Chimneybrush from beside the grey box. Take Secret 1 from the chair cushion. Go Left twice Go up the ladder and out onto the roof. Go Left and use the Chimneybrush on the chimney. Go right, into the window and down the ladder. Go Right and take the Doorkey. Go Left twice and take the Key off the coat hook. Go Left and take the Gashandle from under the table. Use the Doorkey on door and click it open. Enter *Stairwell 1 Take Secret 2 from the floor. Go downstairs. *The 2nd Floor Go Left and take Secret 3 from behind the trashcan. Click on the computer screen. Click the green button. Keep clicking until conversation has ended then click out of screen. Take Note 1. Go Right three times and take the Lighter off the window sill. Go Left twice Go down. *Stairwell 2 Take the Beaker. Go Down *The 1st Floor Take Note 4 and Note 5 off the table. Take Secret 4 from the floor with the chair. Go Left, open door and enter Take the Soap off the sink. Take Secret 5 from behind pipes. Put the Beaker on the floor grate. Use the Hammer on the metal cap above the Beaker. Go Right three times and take the CD off of the table. Go up the ladder and take the Irontrioxide (purple vial) from the tester stand. Go Right and take the Screwdriver Take Secret 6 from beside the yellow pipe. Go back to the Rooftop *The Rooftop Go Left Go up the ladder Go Left and use Screwdriver on wheel. Take the Wheel. Go back to the 1st Floor. *The 1St Floor Go Left twice and use the Wheel on the pipe leading up and down where an opening is. Turn the wheel. Take the Fullbeaker. Go Right three times. Go Up. Go Right and use the Gashandle on the top opening of the yellow pipe. Use the Rubberhose on the bottom opening of the yellow pipe. Turn gas handle. Turn grey knob on the burner. Put Fullbeaker on the burner. Use Lighter on the burner. Put in beaker in this order: Soap, Irontrioxide, then Naphthalene. Take the Acidioxide. Take the Tester. Go Left Go Down Go Left three times Put the Tester on the floor grate. Turn the wheel Take the Water Go Right four times and use the Key on the door. Open door and enter. Ring Bell 1. Use the Acidioxide on the metal panel on the wall. Go Right. Take Note 2. Enter in Code 104. Push the grey button.

– -ANCIENT SECTION (104) Go Right. Go Down Move levers 1 and 4 down. Go Right and take the Knife. Take the Blocade. Ring Bell 2. Go Left Move levers 1 and 4 up, and 2 and 3 down. Go Left and take Secret 7 from rubble on ground. Take the Stonekey. Go Right Move lever 2 up and levers 1 and 4 down. Go Up and take the TileD. Use the Blocade in circular hole on pillar and Stonekey on square hole. Go Down Move levers 2 down and 3 up. Go Up Go Right and take the TileB. Go Left Go Down Move lever 3 down Go Up twice and use the Hammer on the broken panel on the pillar. Take Secret 8 from hole. Go Up and take the TileC. Go Up and use the Knife on the string. Go Down four times and take the TileA. Go Down and take Secret 9 from statues eye. Place TileA, TileB, TileC and TileD in their directional proportionate slots on the wall. Press uncovered button. Go Up twice. Go Left Go Up and take the Coil. Go Left and take Note 3. Go Right Go Down Enter in Code 690. Push the grey button.

– – LOOPING TRAPS (690) Go Right Go Down and take Note 12. Go Left and take Secret 10 from floor by right door. Go Left Go Up Make Left lever display -1 and Right lever display -1 Push the grey button Go Down and push the red button Go back to levers. Make Left lever display 0 and Right lever display 1 Push the grey button Go Up Go Right and push the red button Go back to levers Make Left lever display 1 and Right lever display 1 Push the grey button Go Up Go Right twice and push the red button Go back to levers Make Left lever display 1 and Right lever display 0 Push the grey button Go Right twice and push the red button Go back to levers Go Up and click the glass cover Take the Orb. Go Down Go Right Enter in Code 529. Push the grey button

– – BASEMENT SECTION (529) Go Right twice and use the Coil in the top of the recharger Turn handle on the recharger Take the Chargedcoil. Take Secret 11 from the empty outlet on the wall. Go Left Go Down and take Secret 12 from between the cords on the ground. Go Left Take Note 6 from the floor. Use the Chargedcoil in the empty slot. Pull down the lever Take the Coil. Go Right Go Up Go Right and charge up the Coil again. Take the Chargedcoil. Go Left Go Down Go Right and use Chargedcoil in the empty slot Pull down the lever. Take Coil. Go left and turn handle on contraption. Go Up twice and place the CD within the claw. Go Right and take Note 7 from the floor. Look at note 7. NEW LOCATION CODE 551! Use the Orb on top of the pillar. Take the Chestkey. Go Left Go Down Go Right and recharge the Coil. Take the Chargedcoil. Go Left twice. Enter in Code 001. Push the grey button.

– – LABORATORY (001) *The 1st Floor Go to the 2nd Floor *The 2nd Floor Go Right and use the Chargedcoil on the side opening of the mechanism. Turn the bottom bolt. Take Secret 13 from the plate. Take the Chargedcoil. Go to the 1st Floor. *The 1st Floor Go Right four times Enter in Code 551 Push the grey button

– – BRICK ROOM (551) Take Secret 14 from the ground. Go Left and take Note 11 off the ground. Push top button on controls stopping the water. Go Right Enter in Code 462 Push the grey button

– – LIGHTHOUSE DIGOUTS (462) Go Right and take Secret 15 from the ground. Go Right and use Hammer four times on the lock. Open the door and take the Turbine. Go Left twice and take Note 8 Go Right Enter in Code 770 Push the grey button

– – TOMB TRAP (770) Take Note 13 from the ground Look at symbol on the right, middle of the wall Circle = 0 sides, Square = 4 sides, Triangle = 3 sides NEW LOCATION CODE 043! Enter in Code 043 Push the grey button

– – UNKNOWN LOCATION (043) Go Left and use the Water on the glowing object. Take the Sceptre Go Left and ring Bell 3. Take Note 9 Take Secret 16 from the ground. Go Right twice Enter in Code 800 Push the grey button

– – THE SHIP (880) Use the Lighter on the lamp 3/4 up and over slightly to the left Take Secret 17 from behind the lamp base. Go Right and ring Bell 4. Use the Screwdriver on all four screws on the wall panel. Take Secret 18 from within the compartment. Use the Knife on the wires. Go Left twice and take Note 10 from the ground. Go Up the ladder. Use the Lighter on the lamp at about the same place as before. Go Right Go Up the ladder Use the Lighter on the lamp that is about the same place, but much closer to the left hand side. Take Secret 19 from behind the lamp base. Place the Turbine within the compartment and close the door. Go Down and push the grey button Go Right and take Note 14. Look at note 14. NEW LOCATION CODE 728! Use the Chestkey on the chest and open it. Take the Arm. Go Left twice Go Down the ladder Go Left Enter in Code 462 Push the grey button.

– – LIGHTHOUSE DIGOUTS (462) Go Left and take Secret 20 out of the box. Go Right Enter in Code 104 Push the grey button

– – ANCIENT ROOM (104) Go Up the ladder Put the Chargedcoil in the holder Go Left and pull the lever on the large lamp. Click the eyepiece of the telescope. IIII – IIIII – II = 4 – 5 – 2 NEW ROOM LOCATION 452 Click out of the telescope Go Right Go Down the ladder Enter in Code 452 Push the grey button

– – STATUE (452) Go Left and place the Arm on the statue Place the Sceptor in its hand ENDING CREDITS

– – ENDING ROOM (???) Read note Go Right and take Secret 21 from the corner of the room. Look at upper corner of room. NEW ROOM LOCATION 596! Enter in Code 728 Push the grey button

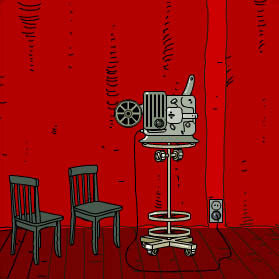
– – LUCKY ROOM (728) Take Secret 22 from the left corner speaker. Go Right and place the Secrets inside the opening. Go Right and view the camera. **These are extras that you can view, have no relevance to beating the game. Go Right and view the camera. Go Right and view the camera. Go Right and view the camera. Go Left six times Enter in Code 596 Push the grey button.

– – ENDING ROOM (596) Go Left twice Click wall lever FINISHED


Submachine 4: the Lab, la solution en francaise


– Tourner à droite, prendre le marteau sur la fenêtre. Tourner deux fois à gauche et descendre à l’échelle. Tourner à droite et casser le cadenas avec le marteau. Ouvrir la fenêtre et entrer dans le grenier.

– Descendre à l’échelle, prendre les boules de naphtaline dans la poche de la chemise. Tourner à droite, prendre le tuyau accroché à la poutre. Tourner à droite et ramasser la brosse à cheminée dans l’angle de la pièce. Ramasser la bille bleue sur le fauteuil.

– Remonter sur le toit, utiliser la brosse dans la cheminée. Revenir dans le grenier, prendre la clé tombée de la cheminée. Tourner deux fois à gauche, prendre la clé sur le portemanteau, tourner encore à gauche et ramasser la molette sous la table. Ouvrir la porte avec la clé grise et descendre. Prendre la bille bleue au premier palier. Descendre encore.

– Tourner à gauche, ramasser la bille derrière la poubelle. Cliquer sur l’écran puis sur le bouton vert. Suivre la conversation jusqu’à l’impression de la feuille. Prendre la liste imprimée. Tourner trois fois à gauche, prendre le briquet sur la fenêtre. Reprendre les escaliers et descendre. Prendre la cafetière à l’inter palier.

– Prendre les notes sur la table et la bille vers la chaise reversée. Tourner à gauche, entrer dans la salle de bain. Poser la cafetière sur la grille au sol, utiliser le marteau pour déboîter le bouchon sur le tuyau qui descend du plafond. Prendre le savon sur l’évier et la bille derrière les tuyaux.

– Tourner trois fois à droite, prendre le CD sur la table. Monter à l’échelle, prendre le troisième tube à essais.

– Tourner à droite, prendre le tournevis et la bille vers le tuyau de gaz.

– Remonter sur le toit, aller tout à gauche. Utiliser le tournevis pour dévisser la manivelle. Prendre la manivelle et revenir dans la salle de bain. Placer la manivelle sur le tuyau et tourner pour remplir la cafetière d’eau. Reprendre la cafetière.

– Revenir dans la pièce où se trouvait le tournevis. Raccorder au gaz le bec bunsen avec le tuyau souple, placer la molette sur le gros tuyau, ouvrir le gaz sur le tuyau et le bec bunsen. Allumer avec le briquet. Poser la cafetière d’eau, mettre dans l’ordre : le savon, le tube à essais et la naphtaline. Récupérer le tube et la cafetière. Redescendre l’échelle, aller à la salle de bain et remplir le tube à essai d’eau (même méthode que pour la cafetière), récupérer le tube d’eau. Aller tout à droite, ouvrir la porte avec la clé. Entrer, sonner la cloche, et verser la cafetière sur le panneau de contrôle pour ouvrir la grille. Tourner à droite, ramasser la note au sol. Entrer les premières coordonnées trouvées sur la note: 104, valider avec le gros bouton.

– Tourner à droite, descendre l’échelle de bois. Tourner à gauche, prendre la bille dans les décombres. Tourner deux fois à droite, prendre le couteau et sonner la cloche. Revenir aux quatre boutons, descendre et prendre la bille dans l’œil de la statue.

– Les quatre boutons servent à ouvrir les quatre petites fenêtres du niveau. Observer pour chacune la forme du dessin dans le cercle. Pour ouvrir une fenêtre, il faut abaisser les deux ou trois boutons correspondant au dessin. (ex : _ combiné avec | donne : +). Récupérer ainsi deux tuiles et deux pierres (une carrée, une ronde). Placer ensuite tous les boutons en bas.

– Remonter l’échelle et placer les deux pierres dans les encoches. Monter à la nouvelle échelle. Prendre la tuile, continuer de monter et couper le fil avec le couteau. Revenir aux boutons, prendre la dernière tuile.

– Descendre et placer les quatre tuiles dans les encoches. Appuyer sur le bouton puis revenir au téléporteur. Monter à la nouvelle échelle et prendre l’ampoule en verre. Tourner à gauche et ramasser la note. Revenir au téléporteur et entrer les coordonnées suivantes : 690.

– Faire le tour des pièces, ramasser la note et la bille. Noter l’emplacement des quatre panneaux. Pour se situer dans ces pièces, il faut utiliser un système de coordonnées (X ; Y). La première salle est en (0 ; 0). L’outil commandant l’ouverture des panneaux est en (-1 ; 0). Pour ouvrir chaque panneau, il faut entrer ses coordonnées dans cet appareil (en bougeant les bras) et valider à chaque fois avec le bouton. Les coordonnées sont : (-1 ; -1), (1 ; 0), (1 ; 1) et (0 ; 1). Une fois les quatre validés, aller en (-1 ; 1) et prendre l’orbe.

– Revenir au téléporteur, entrer les coordonnées : 529.

– Aller deux fois à droite, placer l’ampoule sur l’appareil et enclencher la manivelle pour lancer la charge. Récupérer l’ampoule chargée et la bille sous la prise. Descendre, placer l’ampoule dans la pièce de gauche, abaisser la manivelle et ramasser la note. Reprendre l’ampoule, retourner la charger et procéder de même dans la pièce de droite.

– Recharger encore une fois l’ampoule puis enclencher la machine centrale. Prendre la bille vers les câbles. Monter au sommet, placer le CD dans la pince pour détourner le rayon laser. Aller à droite, ramasser la note et placer l’orbe sur le piédestal. Une fois explosée, prendre la clé puis revenir au téléporteur. Entrer les coordonnées : 551.

– Prendre la bille au sol, tourner à gauche. Prendre la note et couper l’eau en appuyant sur le bouton.

– Revenir au téléporteur, taper les coordonnées : 462.

– Tourner à gauche, prendre la note repérer les cubes, seulement deux sont levés. Tourner deux fois à droite, prendre la bille au sol. Tourner encore à droite, casser le cadenas avec le marteau et prendre l’hélice.

– Revenir au téléporteur et entrer les coordonnées : 800.

– Allumer la lampe avec le briquet Prendre la bille au sol. Tourner à droite, sonner la cloche et dévisser la plaque avec le tournevis pour récupérer une bille. Couper les fils avec le couteau.

– Aller deux fois à gauche, ramasser la note et monter. Allumer avec le briquet, tourner à droite. Monter, allumer avec le briquet, placer l’hélice et refermer le hublot. Prendre la bille au sol. Descendre et appuyer sur le bouton pour ouvrir la grille. Tourner à gauche, prendre la note et ouvrir le coffre avec la clé. Prendre le bras en or.

– Revenir a téléporteur, entrer les coordonnées : 770.

– Ramasser e note, cliquer sur les signe du mur : un rond, un carré et un triangle. Les prochaines coordonnées sont donc : 043.

– Tourner à gauche, verser le tube d’eau sur le globe lumineux. Prendre le sceptre doré. Tourner à gauche, ramasser la note, la bille dans l’angle et sonner la cloche. Revenir au téléporteur, entrer les coordonnées : 104.

– Monter, placer l’ampoule chargée dans l’appareil. Aller à gauche, abaisser le levier et regarder dans la longue-vue. Prochaines coordonnées : 452. Reprendre l’ampoule et aller au téléporteur. Entrer les nouvelles coordonnées. Aller à gauche, placer le bras et le sceptre sur la statue. Fin du jeu !

– En fait le jeu n’est pas tout à fait terminé, il manque encore quelques billes. Lire le panneau puis aller à droite (ou à gauche pour quitter le jeu). Prendre la bille, noter les coordonnées : 596 (pour revenir plus tard). Entrer les coordonnées : 728. prendre la bille sur le haut parleur.

– Revenir au tout début (001). Remonter d’un niveau (étage de l’ordinateur et de l’imprimante), placer l’ampoule dans la machine et cliquer sur la vis pour obtenir une bille.

– Revenir en 462, aller vers les cubes (les quatre sont levés maintenant) ouvrir la trappe et prendre la bille.

– Revenir en 728, tourner à droite, placer les 21 billes dans le réceptacle. Visiter les pièces à droite pour apprendre en bonus quelques secrets sur la fabrication du jeu. Cette fois c’est bien fini !

Author: Lambda


Rewolucje 6; character diversity


rewolucje_szkic_digit

Today a rewolucje sketch with a little twist. I was sitting at my computer trying to improve diversity of the rewolucje characters, and came up with this drawing. As for a graphic novel series created fully in watercolours such a digital sketch can be a small oddity worth showing. So here it is.


Rewolucje Syntagma; recenzja w Hot Magazine


rewolucje4_okladka100Misterny splot

„Syntagma” to zaskakujące i rewelacyjne zakończenie osadzonej w alternatywnym świecie retro czterotomowej miniserii „Rewolucje” Mateusza Skutnika, jednego z najbardziej oryginalnych i utalentowanych polskich rysowników. W przeciwieństwie do poprzednich części – bardzo poetyckich i onirycznych, w ostatniej uderza nagła zmiana tempa opowieści, która dzięki szybkiej i sprawnej akcji staje się wręcz sensacyjna. Wszystkie dotychczasowe wątki perfekcyjnie splatają się w jeden wielopoziomowy system naczyń połączonych, okazując się idealnie zazębiającymi się trybikami wielkiej maszyny generującej spójną rzeczywistość. Kunszt misternej fabuły jest tym większy, że „Syntagma” może być swobodnie czytana jako samodzielny album, bez znajomości poprzednich części. Komiks czyta się z zapartym tchem także dzięki bardzo plastycznej i filmowej konstrukcji fabuły. W warstwie graficznej Skutnik również dokonał subtelnych zmian, wprowadzając nieco grubsze kontury postaci i mniej pastelowe, a bardziej żywe kolory. Obowiązkowa pozycja.

Łukasz Chmielewski


Submachine Insight


Blaki2 finished


foto_blaki_end

Today I finished my newest graphic novel, Blaki2 with stories written by Karol Konwerski, to be published in Znak publishing house this fall. It’s going to be a 60-page album loosely based on a book by Leszek Kołakowski. Now all I have to do is make a cover, scan this, insert text into speech bubbles and ship it to the publishing house.


Czaki, recenzja na Esensji


Córeczko! Wolałabym, żebyś była chłopcem!

Co może się zdarzyć, gdy lekarze zaraz po porodzie dochodzą do wniosku, że nowonarodzony chłopiec to tak naprawdę dziewczynka? Gdy nie są do końca pewni, czym jest to coś między nogami dziecka? I jak wygląda późniejsze życie tegoż? Na te wszystkie pytania znajdziecie odpowiedź w komiksie „Czaki” Dominika Szcześniaka i Mateusza Skutnika.

„Czaki” to taka nasza polska zinowo-undergroundowa legenda. Komiks Szcześniaka i Skutnika wydany został dotąd trzykrotnie pod tytułem „Czaki eunuch: das pimmel story”. W nieoficjalnym obiegu i dość niskiej jakości edytorskiej. Teraz doczekał się wydania dla kolekcjonerów (to ostatnio modne na naszym ryneczku komiksowym), a więc kredowego papieru, kolorowej okładki, isbn-u… i narysowanej przez Szcześniaka kontynuacji. I dobrze, bo na pewno na to zasłużył.

Ten komiks to przede wszystkim opowieść. Szcześniak (zwany w niektórych kręgach Lucjanem) stworzył historię, która pod płaszczykiem absurdu pełna jest dość ponurych obserwacji. Głównym tematem tego komiksu wydaje się być brak zrozumienia miedzy ludźmi. Zajęci własnymi sprawami, niezainteresowani drugim człowiekiem, nawet tym, z którym złączeni są najmocniejszymi więzami. „Czaki” jest dość ostrą satyrą na najmniejszą komórkę społeczną – rodzinę. Autorzy z gryzącą ironią pokazują zanik umiejętności dialogu wśród członków rodziny, których bardziej interesują problemy telewizyjnych postaci niż losy najbliższych.

Szcześniak kpi również z lekarzy, których przedstawia jako bandę niekompetentnych idiotów. No bo co to za specjaliści, którzy nie potrafią rozpoznać penisa? Co z przysięgą Hipokratesa, gdy lekarz w komiksie poinformowany o rzekomej ciąży pacjentki pyta najpierw „usuwamy?”. Mimo że to dość przerażające obrazy, scenarzysta serwuje je w taki sposób, że czytelnik pęka ze śmiechu.

Rysunki w albumie wydanym przez wydawnictwo Timof i Cisi Wspólnicy nie są może wybitne, ale nie przeszkadzają w odbiorze fabuły. A ta, jak napisałem wcześniej, stanowi trzon tego komiksu. Skutnik i Szcześniak przyjęli oszczędną, dość szkicową formę, która jednak doskonale pasuje do opowiadanej historii. Ogromną zaletą grafiki w „Czakim” jest sprawność narracyjna. Komiks czyta się płynnie, brak tu nudnych przestojów czy nieporadności. Wszystko jest wyważone, nawet sceny monologów nie nużą czytelnika. Jedynie liternictwo (zwłaszcza u Skutnika) można by dopracować bądź zastąpić komputerową czcionką, gdyż bywa nieczytelne i niedbałe.

„Czaki” to komiks godny polecenia, gdyż jest pełen kpin i czarnego humoru, ale też dość smutnych obserwacji. Historia została opowiedziana z wielką wprawą i wyczuciem. Jest w nim to, czego brakuje w wielu komiksach pojawiających się w pierwszym obiegu – łatwość snucia opowieści i umiejętność przekazywania jej czytelnikowi. Wielu rysowników i scenarzystów może się z tego komiksu dużo nauczyć.

Daniel Gizicki


rewolucje 6; sketches, part 3


rew6_car2

rew6_prisoner3


Rewolucje 6; sketches part 2


rew6_1szkic

rew6_actors

rew6_aristo2

rew6_aristo

rew6_diverse

rew6_glowa

rew6_scarface

rew6_szkic_poklad


« Previous PageNext Page »