new stats record


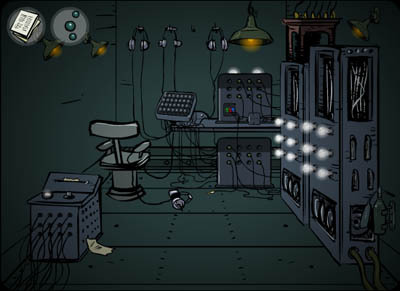
Today mochibot counted that there were 294,558 players of Covert Front episode 1 on August the 2nd. That’s well over quarter of a million in a single day. I’m impressed, Karol is impressed, we want to thank You and assure You that we’re working on the second episode. Need a proof? Take a look:

game_cf2_tease


Blaki, recenzja na gildii komiksu


“Blaki” – mały nostalgiczny facet z papierosem

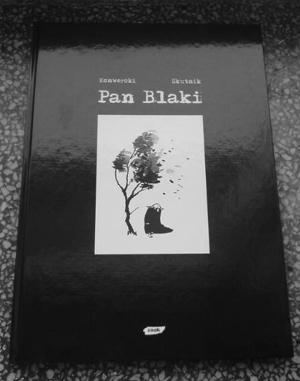
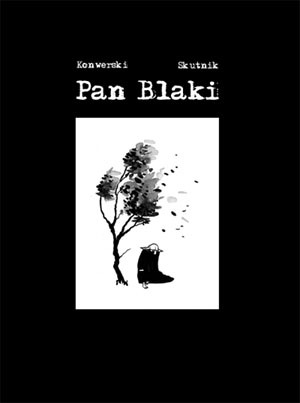
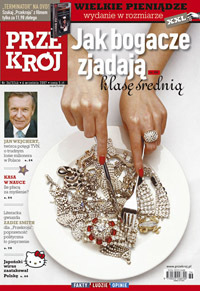
Kilka dni temu do księgarń trafił Pan Blaki – drugi album spółki Karol Konwerski (scenariusz) i Mateusz Skutnik (rysunki) o – jak to ujął twórca postaci: “człowieczku dzielącym się z czytelnikami komiksu swoimi przemyśleniami na temat życia codziennego i otaczającego go świata”*.

Oczekując aż nowy Pan Blaki trafi w moje recenzenckie ręce, postanowiłem wrócić do przeszłości i przypomnieć sobie i Wam, kim był Blaki zanim został “Panem”.

Blaki to komiks, który już przeszedł do historii. Była to pierwsza pozycja wydana przez Pawła Timofiejuka (wydawnictwo Timof i cisi wspólnicy jeszcze wtedy formalnie nie istniało).

Kim jest Blaki? To taka mała, szara zrzęda, której nikt nie chciałby mieć za sąsiada. Nie dość, że jest brzydki, to jeszcze przemądrzały, a jako przedmiot swoich przemyśleń wybiera pospolite sprawy.

Tylko dlaczego czytanie tych przemyśleń tak bardzo wciąga?

Już pierwsza nowelka pt. Bielizna uświadamia nam, że najbliższe 50 stron to czas refleksji nad życiem. Pretekstem do tego są błahe z pozoru sprawy życia codziennego. Stare krzesło przypomni o nieuchronnym upływie czasu a czajnik sprowokuje do rozmyśleń o życiu wszechświata.

Blaki jest modelowym przykładem samotnika. Mógłby posłużyć jako przykład do szkolnej rozprawki o romantycznym bohaterze, który choć żyje wśród ludzi, zawsze jest obok, niezauważony. Ktoś może pomyśleć, że Blaki to nieudacznik i looser. Nie ma dziewczyny, nie ma samochodu. Ma pracę za biurkiem przez 40 godzin tygodniowo. Podobno robi coś bardzo ważnego, podobno nawet go doceniają…

Nie mogę tak do końca rozgryźć Blakiego. Czasem wydaje mi się, że to everyman (jak w zamykającej tomik historii Dziewięć żyć), a czasem, że to pępek świata, lepszy od wszystkich, wywyższający się, jedyny inteligentny i obdarzony empatią w tłumie zidiociałych troglodytów (Oli). Ogólnie dość dziwny facet.

Wszystko w tym komiksie dzieje się niedbale. Powolna akcja snuje się niczym dym z blakowego papierosa. Wrażenie to potęguje specyficzne kadrowanie. Często kolejne kadry nieznacznie różnią się od poprzedniego. Czasem wystarczy ruch ręki, otwarcie oczu, zbliżenie bądź oddalenie postaci. Do tego szara kolorystyka i mamy już doskonałą lekturę na jesienne, deszczowe wieczory.

Blaki to komiks pod każdym względem dobrze zrobiony. Pozornie prosta tematyka ujęta w sprawnie napisanych scenariuszach, które z kolei zostały klimatycznie zilustrowane. Nastrój nostalgii zbudowany skutecznie. Do tego eleganckie wydanie, którym Timof sam sobie wysoko postawił poprzeczkę.

Blaki jest porządnym facetem, poznajcie go.

* Mateusz Skutnik [w:] Blaki – przedmowa

Autor: Kingpin


DayMare Town


dmt1

play this game

walkthrough | la solution francaise | solución en español

Русское прохождение | polska solucja | hungarian solution

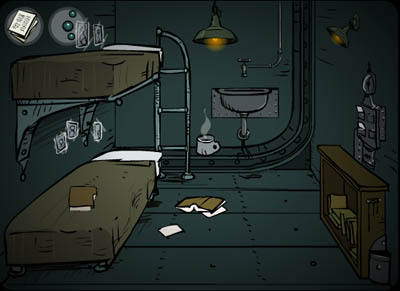
This game is very different from the Submachines or Cover Front. Sketchy outline-only drawings give more artsy look to the gameplay and create a bit of minimalist atmosphere. Add creepy sounds and twisted story and you get the picture. DMT is the harderst puzzle game I made so far. It’s really nasty, so be warned. It’s for advanced pnc gamers.

How is it possible that I release this so soon after Covert Front?…

A word of explanation. First of all, DMT was in production since a year and a half. Second of all, I have an evil twin. While I was making submachines and Covet Front, he was making DMT. A project created on the side, just for the fun of it. And since he’s evil, this game is unbelievably hard to acomplish. So good luck.


Submachine 1; video walkthrough


Q&A about the Covert Front


Ok, so now as the game hit the net and we got a huge response from the players, there are few main big questions that appear in almost every comment that need to be answered:

Q: Where was the code for opening the dining room clock?

A: It wasn’t too hard to find. ArcadeTown wanted this game to be slightly less difficult than the Submachine series, so it is. Look closely at the paintings in the main hall. There it is.

Q: Why isn’t the game finished?

A: Well, it IS finished, since it’s just an “episode 1” as clearly stated in the title of the game. You got the order to search the house, collect the evidence and escape. That was all acomplished in this episode.

Q: When is the next part coming out?

A: I can’t give you any specific date. But – Karol is already finishing the story for the second episode. The engine is ready, developing an episode with all graphics takes about a month. So go figure the date for yourself. ;)

Q: How many episodes are there going to be?

A: We have stories prepared for four episodes (prepared meaning – we have a concept of what’s going to happen, they’re not yet written though). That’s when the whole von Toten story will end. After that we’ll see if there is a pressure to keep this going on on different missions, or maybe we’ll come up with something completely different and new.


DayMare Town; Solución en Español


written by Claudia, found on el Comentairo

Clickear en la piedra que esta abajo al medio de la pantalla.
Agarrar el hilo negro.
Clickear a la derecha de la piedra. Agarrar la llave. Clickear en el rincón izquierdo de la pantalla principal para ver el pájaro # 1
Clickear en el cielo, en la parte superior de la pantalla, luego clickear a la derecha de la chimenea para ver el pájaro # 2. Clickear en el pozo de agua.
Agarrar el gancho que esta a la izquierda del pozo.
Combinar el hilo y el gancho.
Agarrar la moneda que esta sobre el pozo, a la derecha. Clickear en la alcantarilla.
Usar el hilo con el gancho en la alcantarilla.
Agarrar la pieza del puzzle chino. Ir a la armería “Armory”.
Entrar en la puerta. Clickear en donde dice “What is that”, en el rincón inferior izquierdo.
Abrirlo y agarrar el destornillador. Clickear en la pintura del soldado. Anotar la dirección en la que están los botones ( izquierda, arriba, arriba, derecha ). Entrar al cuarto de tortura “torture room”.
Entrar en el pequeño pasillo que esta a la izquierda, ignorar al pequeño hombre por ahora.
Clickear en la pileta.
Usar el gancho con el hilo en el hueco de la pileta. Agarrar la llave. Subir al primer piso de la armería.
Agarrar el paño que esta en el rincón derecho.
Combinar el destornillador con el paño. Entrar a la oficina.
Clickear en el boquete que esta en el rincón superior derecho, luego en la abertura para ver el pájaro # 3.
Salir a la pantalla principal y entrar en la “Bookhouse”. Clickear en el hueco pequeño que esta a la derecha del muro.
Agarrar el encendedor. Entrar y subir al primer piso en el elevador.
Clickear en el cuadro que esta a la derecha.
Clickear en la izquierda del marco. Agarrar el papel.
Clickear en el pájaro, para ver el pájaro # 4
Clickear en la ventana, agarrar el libro. Volver al elevador e ir al piso -1
Entrar en la habitación que esta a la derecha.
Agarrar el libro que esta en la cuarta fila para ver el pájaro # 5. Volver al elevador e ir al piso – 2
Clickear en el puzzle y colocar las piezas en el orden que estaban en el cuadro del soldado. Agarrar la segunda pieza del puzzle.
Ir a la habitación de la derecha, clickear en la roca.
Clickear en la roca nuevamente para que flote y colocar la pieza de papel debajo de ella para romperla. Agarrar la pieza del puzzle. Volver al elevador e ir al piso -3
Clickear donde dice “Turn around”.( sobre la pared a la derecha ).
Entrar en la ventana. Agarrar el plato. Volver a la pantalla principal.
Clickear en la armería y luego en el ornamento que esta a la izquierda.
Colocar el plato en el ornamento.
Entrar en la armería, subir al segundo piso, agarrar la pieza del puzzle.
Volver con el pequeño hombre en la habitación de tortura.
Darle el libro y agarrar la pieza del puzzle. Volver a la pantalla principal. Clickear en el pasaje y luego donde dice “What a terrible smell”.
Colocar la pequeña antorcha ( destornillador + paño ) en el hueco, usar el encendedor. Se ve un grupo de hombres.
Darle al más brillante la moneda. Agarrar la pieza del puzzle.
Entrar al “City Hall”.
Entrar, clickear en la especie de madera que hay en la parte superior de la pantalla, sobre la izquierda y buscar el pájaro # 6. Entrar en la segunda oficina de la derecha.
Clickear en la caja. Usar la llave para abrirla. Agarrar la pieza del puzzle. Entrar en la tercer habitación de la izquierda.
Clickear en el rincón superior derecho.
Clickear nuevamente para ver el pájaro # 7. Volver al pasillo. Clickear el final del pasillo.
Ir a la izquierda, clickear en la escalera para continuar.
Hay un pedestal en el que hay que colocar las piezas del puzzle.
Colocar la pieza 1 en el segundo pedestal. Clickear en el botón para que baje.
Colocar la pieza 7 en el cuarto pedestal. Clickear el botón.
Colocar la pieza 6 en el primer pedestal. Presionar el botón.
Colocar la pieza 3 en el tercer pedestal. Presionar el botón. Bajar la escalera que esta a la derecha.
Clickear en la parte superior de la pantalla y luego en el hueco de la derecha para ver el pájaro # 8. Clickear en la derecha, vemos una maquina. Ignorarla por ahora.
Clickear en la parte inferior izquierda de la baranda para ver el pájaro # 9. Volver al final del pasillo e ir a la derecha.
Clickear en la escalera para continuar hasta ver 4 nuevos pedestales. Colocar la pieza 5 en el pedestal 4, la 2 en el pedestal 2 y el 4 en el pedestal 1. Volver a la pantalla principal.
Entrar al “City Hall”. En lugar de entrar, clickear en la izquierda.
Subir la escalera hasta ver una puerta cerrada.
Usar la llave para abrirla y entrar.
Vemos un hombre encadenado y una pintura cercana a el.
Clickear en la ventana y luego en la izquierda del árbol para ver el pájaro # 10 ( el ultimo ). Volver al inicio de la escalera e ir hacia la izquierda.
Clickear cerca de la esquina para ver un pedestal con un huevo sobre el. Agarrar el huevo.
Volver a donde esta el hombre encadenado y darle el huevo. El hombre va a desaparecer. Volver a la armería y entrar.
Ir a donde estaba la maquina. A la izquierda del final del pasillo.
Clickear la palanca.
Esto hace que aparezca un puente.
Clickear en el puente y Listo ESTAS FUERA!!!


DayMare Town, Русское прохождение


writen by Maeg, found on Anafor

небольшой камень посреди площади:
– слева от камня – нитка
– за камнем (клик на правый край камня)- ключ

колодец:
– слева от колодца – крючок
– на бортике колодца – монетка

отверстие канализации:
– соединяем в инвентаре крючок и нитку, из решетки вытаскиваем кусок головоломки №1 (квадрат с круглой дыркой)

Книжное издательство (Book house)

При входе, в маленькой нише справа – зажигалка
1й этаж (комната для чтения):
– за картинкой с домиком (левый нижний угол) – рулончик бумаги
– на столе-планшете – книга
-1й этаж (архивы)
– ничего полезного, только в книге с точкой на переплете можно посмотреть на изображение птицы
-2й этаж (мастерская)
– в головоломке выставляем рычажки в том порядке, как были пуговицы у солдата на картине (Арсенал). Получаем кусок головоломки №2 (квадрат с треугольной дыркой)
– на столе поднимаем камень и быстро подставляем рулончик бумаги. Ничего себе бумага! Получаем кусок головоломки №6 (квадрат без дырок)
-3й этаж (подвал)
– разворачиваемся, лезем в дырку, находим пластинку

Арсенал (Armory)

– справа от входа вставляем в отверстие пластинку.
– в шкафчике под лестницей – отвертка
– на портрете солдата замечаем странные пуговицы (пригодится)
– в комнате для пыток (о ужас) за углом – раковина. Крючком, соединенным с ниткой, вытаскиваем из неё ещё один ключ
– мрачному домовёнку даём книгу, забираем у него кусок головоломки №5 (уголок)
– на втором этаже забираем кусок головоломки №4 (уголок) и тряпку

Спуск в канализацию (Passage)

в инвентаре наматываем тряпку на отвертку, получается факел. Вставляем факел в отверстие, зажигаем с помощью зажигалки. Появляется отряд домовенков. Даем главному монетку, а он нам за это – кусок головоломки №3 (квадрат с квадратной дыркой)

Ратуша (City hall)

– во втором офисе справа – сейф под столом. Открываем его ключом, вытащенным из раковины. Получаем кусок головоломки №7 (в виде буквы “П”)
– в конце коридора – повороты налево и направо. В конце каждого – постаменты для кусков головоломок. Вставляем найденные куски с постаменты с соответствующими им отверстиями, нажимаем на кнопки.

После этого проходим дальше по левому коридору и попадаем к механизму. Решение головоломки его активировало, теперь мы можем нажать на рычаг и уйти из этого городка.

Но нам напишут, что мы прошли не всё.
Есть дополнительный квест – “спаси домовёнка”.
Слева от входа в ратушу находится проход. Поднявшись по лестнице, находим дверь и открываем её оставшимся ключом. Обнаруживаем там несчастного прикованного домовёнка.
Для того, чтобы получить средства для его спасения, нужно при прохождении игры отыскать всех запрятанных в игре птиц (10 штук). Птиц искать так:

1. на главной площади в левый нижний угол (что-то вроде парапета)
2. на главной площади – в небо – за трубой (справа у основания)
3. арсенал – офис (комната справа) – верхний правый угол (под потолком) – вверх по трубе
4. издательство – архивы (-1й этаж) – 4я полка стеллажа, книга с точкой на переплете
5. издательство – комната для чтения (1й этаж) – картинка с домиком – на коньке крыши
6. ратуша – в холле с дверями в офисы – вверх – на одной из балок
7. ратуша – дальний офис слева – правый верхний угол – вверху в гнезде
8. ратуша – спуск с левой лестницы сразу после головоломки – вверх – правое окошко
9. ратуша – у громоздкого механизма, открывающего выход, – место, где парапет крепится к стене
10. комната с прикованным домовёнком – окно – в ветвях дерева

После того, как найдены все птицы, идем к постаменту, который находится так: вход в ратушу – налево – налево. Если найдены все птицы, то все 10 кружочков на постаменте должны стать черными, а на нем – появиться яйцо.

Отдаем найденное яйцо домовёнку… он улыбается и исчезает

Так можно уйти с чистой совестью (а ещё – зажигалкой и крючком )


Daymare Town, la solution francaise


written by Lambda, found on Lambda

– Cliquer sur la grosse pierre vers le puits, prendre la ficelle et regarder derrière la pierre pour trouver une clé. Cliquer sur le puits, prendre la pièce sur le rebord et ramasser l’hameçon au sol. Combiner l’hameçon et la ficelle.
– Cliquer au niveau de l’angle du bâtiment à gauche du puits pour voir un premier oiseau. Cliquer dans le ciel puis au pied de la cheminée à droite pour voir un second oiseau. Revenir à la rue, cliquer sur l’égout, utiliser la ficelle et l’hameçon pour pêcher une pièce du puzzle. Cliquer sur le bâtiment « armory », entrer.
– Ouvrir le petit placard sous les escaliers et prendre le tournevis. Cliquer sur le tableau et bien observer comment sont placés les boutons. Aller à droite (« office », cliquer dans l’angle supérieur droit de la pièce, regarder tout en haut du conduit de cheminée pour voir un troisième oiseau. Revenir dans le couloir et ouvrir la porte (« torture room »). Cliquer à gauche pour découvrir un homme. Regarder dans l’évier, utiliser l’hameçon pour trouver une clé. Revenir dans le couloir, monter les escaliers et ramasser le chiffon au sol.
– Revenir dans la rue. Cliquer sur la bibliothèque (« book house », prendre le briquet dans le trou du mur à droite. Entrer dans la bibliothèque puis dans l’ascenseur. Choisir l’étage 1 et sortir. Regarder le tableau, c’est le portrait du vieil homme de la salle de torture. Regarder le second tableau, cliquer au bout du toit pour voir un quatrième oiseau. Regarder derrière le tableau à gauche pour trouver un papier. Cliquer sur le bureau à droite et prendre le livre.
– Retourner à l’ascenceur et descendre au -1. Aller à la bibliothèque à gauche et chercher le livre marqué d’un point. Ouvrir et regarder le cinquième oiseau. Retourner à l’ascenceur et aller au -2. Pour le puzzle sur le mur, il suffit de tourner les boutons dans le même sens que sur le tableau. Prendre la nouvelle pièce de puzzle. Tourner à droite et cliquer sur la table. Soulever la pierre et placer immédiatement le papier en dessous. Prendre la nouvelle pièce de puzzle.
– Retourner à l’ascenceur, descendre au -3. Aller au bout du couloir et regarder dans le trou pour voir une assiette, la ramasser. Reprendre l’ascenceur et ressortir du bâtiment. Retourner au bâtiment « armory » et placer l’assiette à gauche de la porte, entrer et monter les escaliers, ramasser a nouvelle pièce de puzzle. Retourner à la salle de torture, donner le livre au vieil homme, ramasser la pièce de puzzle qu’il laisse tomber.
– Revenir dans la rue. Aller vers le « passage » barré par la grille. Cliquer dessus, dans l’inventaire associer le tournevis et le chiffon pour faire une torche. Placer la torche dans le trou et allumer avec le briquet. Donner la pièce au bonhomme qui l’échange contre un morceau du puzzle.
– Cliquer sur le bâtiment « city hall », aller vers la gauche au lieu d’entrer. Aller encore deux fois à gauche pour trouver un gros bloc orné de boutons (ils symbolisent les oiseaux déjà trouvés). Revenir en arrière et suivre le petit bonhomme dans les marches. Ouvrir la porte avec la grande clé. Regarder par la fenêtre et cliquer dans l’arbre pour voir le sixième oiseau. Revenir au « city hall » et entrer.
– Entrer dans la troisième pièce à gauche, cliquer dans l’angle supérieur droit de la pièce, cliquer sur le nid pour voir le septième oiseau. Revenir dans le couloir et aller dans la deuxième pièce à droite. Cliquer sur la boîte à droite du bureau, ouvrir avec la clé et prendre la pièce de puzzle. Revenir dans le couloir et cliquer au dessus de la poutre puis quelque part dans l’enchevêtrement de poutres pour voir le huitième oiseau.
– Revenir dans le couloir et aller au bout. Tourner à droite et suivre les marches. Placer les pièces de puzzle dans les bonnes encoches puis valider avec les boutons. Revenir au bout du couloir puis aller à gauche. S’arrêter vers les bornes et placer les pièces de puzzle puis valider. Descendre les marches puis regarder vers le haut. Cliquer sur le hublot de droite pour voir le neuvième oiseau. Aller encore à droite et cliquer sur le barreau le plus à gauche de la barrière au fond pour voir un dixième oiseau. Ne pas cliquer tout de suite sur la manivelle du mécanisme.
– Revenir au bloc orné de boutons, prendre l’œuf d’or et aller le donner à l’homme enchaîné pour le libérer. Revenir à la manivelle et actionner la machine pour abaisser un pont et sortir de la ville.


DayMare Town; polska solucja


autor Gorka, znalezione na anitkak

1. Robimy zbliżenie na studnię. Po jej lewej stronie na ziemi znajdujemy haczyk, a na cembrowinie monetę.
2. Następnie badamy kamień. Na lewo od niego leży linka, a za nim schowany jest klucz.
3. Klikamy na schody prowadzące do ratusza, po czym skręcamy w lewo i wchodzimy po schodach między dwoma budynkami. Kluczem otwieramy drzwi i wchodzimy do środka.
4. Klikamy na człowieczka, który prosi nas o uwolnienie z niewoli. Przyglądamy się też rysunkowi na ścianie za nim, który informuje nas, co będzie do tego potrzebne – ptak dający jajko. Tak naprawdę to musimy w grze odszukać 10 ptaków, a wówczas jajko będzie nasze. 5. Wyglądamy przez okno i klikamy na lewy listek, który tak w rzeczywistości okazuje się być ptakiem. Słyszymy charakterystyczne krakanie.
6. Wracamy do podnóża schodów między dwoma budynkami i skręcamy w lewo. A następnie zaglądamy za róg. Stoi tam kolumna z 10 guziczkami. Te czarne oznaczają już odnalezione ptaki, a te białe – ptaszyska, których musimy jeszcze poszukać.
7. Wracamy na rynek i zaglądamy za róg po lewej i widzimy drugiego ptaka.
8. Teraz zajmiemy się kratką ściekową. Zbliżamy się do niej i łączymy linkę z haczykiem. Używamy jej do wydobycia pierwszego klocka.
9. Udajemy się do biblioteki. Wjeżdżamy windą na poziom 1. Oglądamy obraz z domkiem. Po jego lewej stronie znajdujemy rulon.
10. Teraz uważnie przyglądamy się domkowi na obrazku. Na samym skraju dachu po prawej stronie dostrzegamy ledwie widoczny zarys. Klikamy na niego i słyszymy znów słyszymy krakanie. Kolejny ptak odnaleziony.
11. Przenosimy się do prawej części pokoju, gdzie z biurka zabieramy książkę.
12. Wracamy do windy i zjeżdżamy na poziom -1. W prawym pomieszczeniu na czwartej półce od góry widzimy książkę z kropką. Zaglądamy do niej i mamy kolejnego ptaszka.
13. Zjeżdżamy na poziom -3. Klikamy na prawy dolny róg ekranu i zaglądamy w ciemność. Znajdujemy tam kamienny krąg (piszą, że to talerz, ale jakoś mi nie wygląda).
14. Jedziemy na parter i wychodząc zabieramy zapalniczkę z wnęki po prawej stronie drzwi.
15. Udajemy się do arsenału. Robimy zbliżenie na okrąg po lewej i umieszczamy w nim talerz.
16. Wchodzimy do arsenału. W małej skrytce na schodach znajdujemy śrubokręt.
17. Oglądamy z bliska wiszący na ścianie obraz, zwracając szczególną uwagę na guziki. Zapamiętujemy ich układ.
18. Wchodzimy na górę po schodach, gdzie na kolumnie znajdujemy kolejny klocek, a na podłodze szmatkę.
19. Schodzimy na dół i przechodzimy przez drzwi. Za winklem spotykamy czarną postać, której wręczamy książkę. Zajęta czytaniem gubi klocek, który zabieramy.
20. Zaglądamy do zlewu i przy pomocy linki wyciągamy z odpływu kluczyk.
21. Wychodzimy do holu i skręcamy w prawo. W prawym górnym narożniku pokoju znajdujemy komin, na którego szczycie siedzi ptak.
22. Wracamy do biblioteki i zjeżdżamy na poziom -2. Na ścianie pod lampą widzimy skrytkę z czterema zamkami. Ustawiamy je tak, jak guziki na obrazie z arsenału (w prawo, w dół, w dół, w lewo). Ze środka zabieramy klocek.
23. Po prawej stronie pomieszczenia znajdujemy stół z nożyczkami i kamieniem. Klikamy na kamień i szybko podkładamy pod niego rulon. Gdy się rozłupie, dostaniemy kolejny klocek.
24. Wychodzimy na rynek. Zaglądamy do zakratowanego przejścia po prawej. Ze śrubokręta i szmaty robimy pochodnię i umieszczamy ją w dziurze. Następnie podpalamy pochodnię zapalniczka. Gdy ogień rozjaśni nieco ciemności, wręczamy monetę ludkowi i w zamian dostajemy klocek.
25. Klikamy na niebo, a następnie po prawej stronie prawego komina. Oto kolejny ptaszek.
26. Czas pozwiedzać ratusz. Wchodzimy do środka. Zaglądamy do trzeciego pokoju po lewej stronie. Klikamy na górze po prawej stronie, a następnie na ptasie gniazdo.
27. Zaglądamy do środkowego pokoju po prawej stronie. Pudło stojące obok biurka otwieramy kluczem ze zlewu i ze środka wyciągamy ostatni klocek.
28. Wracamy na korytarz i spoglądamy do góry. Pod krzyżującymi się belkami znajdujemy ptaszka.
29. Przechodzimy do końca korytarza i skręcamy w prawo. Schodzimy po schodach i umieszczamy odpowiednie klocki w żółtych polach. Następnie wciskamy przyciski, by opuścić wystające trzpienie.
30. Wchodzimy na górę i skręcamy w lewo. Znów montujemy klocki i wciskamy guziczki.
31. Udajemy się w prawo i spoglądamy do góry. W prawym okienku znajdujemy ptaka.
32. Znów w prawo i pociągamy za dźwignię. Most zwodzony zostaje opuszczony. Ale jeszcze na niego nie wchodzimy. Tzn możemy, ale mamy jeszcze jedno zadanie do wykonania.
33. Klikamy na balustradę po lewej stronie i mamy ostatniego ptaka.
34. Teraz wracamy do kolumny z guziczkami (w lewo od schodów ratusza). Jeśli znaleźliśmy wszystkie 10 ptaków, na kolumnie będzie leżało złote jajko.
35. Jajko wręczamy uwięzionemu, który w magiczny sposób znika.
36. Teraz możemy już udać się na most i opuścić miasto.


DayMare Town; walkthrough(s)


Walkthrough 1

written by Viper, found on escapetheroom.blogspot.com

Click on the well
Click on coin located on the left ledge of the well
Just to the left of the well and very small is a hook
Click back to the main screen
Click on the sky
Click to the right lower half of the chimney, see 1st bird
Click on the stone down left of the well
Left and a little up from the stone is some string
Click to the right of the stone, but still on it and you go behind the stone
Take key
Go back to main screen
Click on the left most building’s ledge, see 2nd bird
Go back to main screen and go to Amory
Click on door and look at base of staircase at small cabinet door
Open doors and get screwdriver
Click on sad clown looking man
Notice the position of the packman like buttons
Go up stairs and look to the right of the column and get cloth
Go downstairs then click on office area to the right
Click on area to the right of the window where it looks like the wallpaper is rolling down
Click in the light part of the chimney area to see 3rd bird
Click back to original screen
Click on Book House
Just to the right is an opening, click it
Get lighter
Go in Book House into elevator
Go to floor 1
Click on house picture
Click to the right to see something behind picture
Take scroll
Click back to close up of picture
Click to the right of the chimney where it looks like a string is there
See 4th Bird
Click back to larger view of floor
Click to the right and collect book
Go to floor -3
Turn around
Go towards black passage
Collect round pie shaped piece
Go back in elevator to floor -2
Click to the right of the damaged light switch to get puzzle
Put packman looking pieces in same order as clown picture in armory
Collect triangle piece
Go to the right where the scissor and rock are
Click on rock and put scroll under it
Rock breaks to reveal square piece
Go back to elevator and go to floor -1
Click to the right where the bookshelves are
Click on book with the small dot fourth shelf down quarter over from right
See 5th bird
Take elevator back to 0 floor and go to main screen
Combine screwdriver and cloth
Combine string and hook
Click on sewer grate above the well
Use hook/string in sewer,
Get round piece
Click back to main screen
Click on passage
Click passage again and see hole branching from grate
Put screwdriver with cloth in hole
Light with lighter
Give coin to man
He gives you Square holed piece and takes torch
Click back to main screen
Click on Armory
Click close up on missing round piece to left of door
Place round piece in slot
Click in Armory and go to top floor revealing an L shaped piece
Go downstairs
Go through door to basement
Go to the left of the hooks revealing a sink and a scary bearded man
Give the book to the man and he starts to read and a reverse L shape falls out
Click on sink and use hook and string to fetch key
Click back to main screen
Click on city hall
Go in and click on back most left door
Click top right to view long chimney type area
Click on nest to see 6th bird
Click back to hallway with all doors
Click above wooden plank at top
Click to the right part between wood planks in the middle to reveal 7th bird
Go back to main hallway
Click on second door on right
Click on box to right of the desk on the floor
Use key to open box
Get U shaped piece
Go back to hallway
Click on middle of screen by railing
Go to the left
Go downstairs
Go downstairs again
Click on top of circle
Click on right circle
See 8th bird
Click back to circle
Go right see machine
Click on left part of banister
See 9th bird
Go back to front of city hall
Go left
Go upstairs twice
Open door with key
See chained man
Look out window middle top left in tree
See 10th bird
Go downstairs facing bottom of staircase
Go left and left again
Take golden egg from pedestal
Go back up stairs
Give egg to chained man
He disappears
Go back to city hall
Go down the hallway to the right and place pieces and push buttons
Go back up and to the left and place remaining pieces and push buttons
Go downstairs to big machine
Pull handle
Click on handrail at top of staircase
Fin

~~~~

Walkthrough 2

written by Chaoseed Software, found on Chaoseed

The Yard
Passages to City Hall, A Well, Book House, Armory, A Stone, Passage, The Sky.

Bird – Lower left corner, ledge on building.
The Sky
Bird – Where chimney meets roof.
A Well
Coin – On rim of well.
Hook – On ground in top left. (Combine it with String.)
A Stone
String – In upper left. (Combine it with Hook.)
Yardstone Key – Click right edge of stone.
A Sewer
Piece 1 – Use Hook on String on Sewer.
Passage
Piece 3 – Use Small Torch on opening, use Lighter on torch, use Coin on person(?).
Armory (entrance)
Passage to Armory (inside).

Piece – Put Plate in left Some Strange Ornament for Piece.
Armory (inside)
Passages to Torture Room, Office (Armory).

Portrait of a Soldier – Click on buttons to see switch code.
Screwdriver – Cabinet in lower left. (Combine it with Cloth.)
Office (Armory)
Bird – Click on top right corner, then in center again.
Armory (First Floor)
Cloth – In back right corner. (Combine it with Screwdriver.)
Piece 4 – Will appear here once you use the Plate on the Strange Ornament outside.
Torture Room
Click on back-left to reach Recess.
Piece 5 – The Librarian will eventually show up here. Give him the Book.
Sinkmouth Key – Click on Sink. Use Hook with String on sink mouth.
Book House
Lighter – Check outside, the Small Hole in Wall on right.
Reading Room (Book House floor 1)
Piece of Paper – Left edge of picture of Bloomfield House.
Bird – Roof of Bloomfield House in picture.
Book – On desk in right part of room.
Archives (Book House floor -1)
Bird – Book with dot in huge bookcase.
Workshop (Book House floor -2)
Piece 2 – “Puzzle?” on wall; use switch code from Armory painting.
Piece 6 – Go to table with scissors and rock. Click rock, then quickly put Piece of Paper under it.
Basement (Book House floor -3)
Plate – Just “Turn Around” and then click “Scary”.
City Hall (entrance)
Click the door to enter. Click the left to go to Left Yard.
Left Yard
Click Left to find a pedestal with the number of birds found, as well as a mysterious yawning mouth. Click on stairs to eventually get to Prisoner’s Room. Use Yardstone Key to unlock door.
Prisoner’s Room
Secret Puzzle – Use Golden Egg on Prisoner. Yay!
Bird – Click window of Prisoner’s Room. It’s on the left side of the busy part of the tree.
City Hall (Hallway)
Bird – Click top of screen, then just above and left of center.
Bird – Third door on left, click top right, click nest.
Piece 7 – Second door on right, click A Safe, use Sinkmouth Key.
City Hall (Puzzle machine area)
Bird – Go left, past the puzzle piece pillars, you’ll find an area with a hole right in front of you. Click top of screen, then click rightmost of the three holes.
Bird – Machine area, where railing meets left wall.
Final Puzzle – Match the puzzle pieces to their pillars, click each button, finally pull lever past the left puzzle pillars area. Right area: Pieces 4, 2, 5. Left: 6, 1, 3, 7.

~~~~

walkthrough 3

written by LunaticByTheSea, found on Nordinho

Collect these items:

The coin from the Well ledge. Then the hook barely visible to the left of the well.

At the rock in the courtyard:
The string to the left of the rock and the key behind the right side of the rock.

Then at the sewer grate, combine the hook and the string and fish out the Chinese puzzle block #1 (Square with round hole)

Collect the lighter from the hole in the wall to the right of the door to the Book house.

Enter bookhouse. Go to elevator. Take elevator to the basement (-3 button) once you’re in the basement turn around and go to the dark window at the end of the hall, collect a plate.

Back to the elevator, leave bookhouse and go to the Armory…place the plate you just picked up into the left side ornament holder and then go inside the Armory. Click on the soldiers picture and note the way his buttons are aligned (changes each time you play).

Backout from the picture and enter the doorway with the arch on top, go to the left of the room and find the sink with an ugly troll sitting there. Fish a key from the sink drain.
Backout once again and find the little box to the left of the stairway, grab the screwdriver, now go upstairs and find the chinese puzzle block #4 (looks like a backwards L) Also in this room is a cloth in the far right corner on the floor, grab it.

Now back to the courtyard. Go the the grate (passage) on the right side of yard. Combine the cloth with the screwdriver and insert that in to the hole inside the grate, light it with the lighter and you’ll see a troll , give him the coin and be rewarded with Chinese puzzle block #3 ( Square with a square hole)

Now go to city hall…in the middle room on the right, use the second key you got on the safe that’s on the right side of the desk, grab the Chinese puzzle block #7 (looks like a backwards C)

Ok, now back to the bookhouse, take elevator to the reading room (top floor) go all the way to the right and grab book thats on the easel, also in that room are two pictures on the wall, click the right picture and find a roll of paper behind the left side of the frame. Now take elevator to the workshop and click on the puzzle on the right of the elevator…click the knobs till it matches the soldiers buttons ( did you note their position earlier? if not, go back to the Armory and take a look) when you’ve done this you get the Chinese puzzle block #2 ( square with a big triangle in the middle) OK, now down to the workshop in the bookhouse, go all the way to the right to the table with the rock and scissors…this next part is a little tricky and you may have to do it several times, but heres what ya do. Click on the rock and then immediately click on the paper roll and place it under the rock while the rock is in the air. It’s tricky and always takes me several tries to get it right but once done correctly you’re rewarded with Chinese puzzle block #6 (Square, no holes)

Go back to the Armory and find the sink again and give the book to the troll at the sink he rewards you with Chinese puzzle block #5 ( looks like an L)

NOTE: YOu now have ALL the puzzle pieces you need to escape.

Now go to the City Hall and all the way to the end of the hall, turn to the right and all the way till you find the little doohobbers and put the corresponding blocks in thier place and remember to push down the top buttons, now backout and do the same for the little doohobbers on the left side of the hallway and remember to push the buttons on top as well, then go down to the right and see that lever ??? DONT CLICK ON THAT LEVER YET!!!!!!! Why?

Because you need to make sure you’ve found all the little birdies and unlock the prisoner from the far left side of the courtyard…you can still escape at this point but if you want to do it absoletely correct, ya need to find the birds…


« Previous PageNext Page »