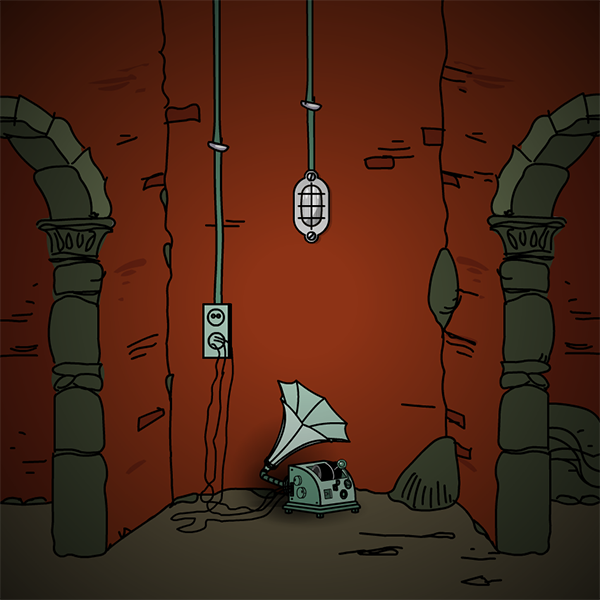
Submachine 2: the Lighthouse


available to play only in Submachine Complete Collection

 Submachine 2: revisited | an early sketch of the game

walkthrough: english | francaise | español |polski | Русское | hungarian

A sequel to the world’s famous point and click Submachine game, that grabbed minds of millions of people. I received huge feedback from all around the world, most of the demands stated to make the second game bigger with harder puzzles. So here it is, while the first game had 20 rooms, this one has a total of 98 unique rooms, and the puzzles are a lot tougher, but that’s just my subjective opinion, since I can’t really tell if they are or not. Important notice: this game has NO dead ends, you cannot get to the point of no return, where the only option is to reset the game. No such thing in the Lighthouse. Hope you’ll enjoy this game as much as I enjoyed making it, and sure enough, submachine3 is under construction as we speek, so expect more.

Submachine 3 walkthrough


level 1:
pick up the thing down in the left corner of the room, and press the levelswitch in the midle of the room.(dah!)

level 2:
go in the right room, there you wil find a map. on the map there are marked places where there are switches(the levelswitch in room 0, 0, is allways marked with an X.). just click all of the switches and press the levelswitch.

level 3:
look at the map, wierd eh? well, press one of the switches, and voilá! a number! the numbers are coordinates, like 45 is 4, 5(room). follow this until all of the lights in the coordinate-thingy in the upper left side of the screen are green.(you wil hear a sound)

/////

allright lots of people have problems with this level, so I’ll write my own comment for this level. You have to go to any of those rooms with weird machines. Pull the lever, and machine spits out a number. Now you have to go to ANOTHER room, indicated by those numbers, as said before, 21 is room (2, 1) and pull lever there. Do it six times and you’re out. ms

/////

level 4:
allright! i supose i dont have to remind u about the map enymore. there are fuor consoles with four numbers in(and 6 buttons), and two switches. the numbers are changeable, exept one, a diferent for each console. find these numbers memorize them(or write them down), and you have a code! the code must be put into each console, and then u pull the two switches and the levelswitch last.

level 5:
this one is easy, there are six switches with dots on. one dot = first pressed, two dots = second pressed, and so on, rhen you press the levelswitch, of course.

level 6:
find the switches, type the coordinates for the room in LETTERS. a = 1, b = 2, and so on.. easy!

level 7:
find the symbols with a number under that says whitch position it has in the password, memorize them(or write down), and type them in to the password thingy in the room left of the levelswitch and press the little button on the floor. if the level switch does not unlock, the password is not typed correctly.

level 8:
yepp! the map is wrecked. so, i’ll help u with coordinates this time. first, go to 0, -1. pull the switch, go to 0, 1. note the symbols, and go to 1, -1. when you press one of those things on the eh.. something, two lights go green, remember the symbols? the line in the symbols is the clue, in your head draw a line between the green lights so it matches the first symbol. in the room on the right(2, -1), do the same, just with symbol no. 2. continue till all are correctly inserted, then go to 1, 1, and press the switch. and then the levelswitch.

level 9:
mechanical eggs? hehe.. no. in the room under the levelswitch, there is an console, type in the coordinates for one of the ‘eggs’ and go to it, its open! flipp the switches inside of the ‘egg’ and… you get the big picture!

level 10:
the map is gone! well, i certanly dont hope you are collorblid. hehe. in room 0, 1, thre is a plate with letters and a switch under each. in room 0, -1, there is a similar plate but with collours instead. so, here it goes: the letters is the first letter in a collour. i think you have noticed that three of the switches on each pate doesnt work, well, they are the ones that u have to match at the other plate, see? then you bress the big button under the colloured plate to unlock the levelswitch.

level 11:
now, this looks stupid, eh? the map points out things that’s not there. well look in the room left of the levelswitch. there’s a blank map! make it match the other map, and go in the room below the levelswitch, and press this switch. feel free to go on to the next level!

level 12:
a note! read it and you get the picture. just be aware that the leaf has no specific place, it’s different every time you play.


author: Zox_of_D00m on gamershood.com.


Submachine 3; Komplettlösung


Zum Verständnis:
Auslöser = das Drehding in dem ersten Raum

Im Raum rechts neben dem Auslöser ist fast immer ein Koordinatenfeld, das einem hilft die Rätselteile zu finden.

0. Visor nehmen, Auslöser betätigen

1. PW linkva; Alle Hebel quer stellen, Auslöser betätigen

2. PW: bamita; Die 5×5 Hebel ausprobieren, bis man DEN findet, bei dem der rote große Punkt des Visors in einen Blauen wechselt, dort den angegebenen Koordinaten folgen und den jeweiligen Hebel ebenfalls betätigen, das solange machen, bis alle kleinen Punkte über dem Visor grün sind und damit der große ebenfalls, Auslöser.

3. PW: firoga; Bei den 4 Zahlenkombis ist jeweils eine dabei, die sich nicht ändern läßt. Diese Zahl muß an allen vier “Einstellern” gleich sein. Wenn man alle 4 Einsteller auf die gleichen Zahlen eingestellt hat, die Querschieber betätigen (Kontrolle durch die kleinen grünen Punkte über Visor), Auslöser

4. PW: winda; Hier haben die Machinchen Punkte oben. Man fängt bei einem Punkt an, dann bei dem mit zwei Punkten….Auslöser

5. PW: banda; Hier sind die richtigen Buchstabenkombinationen zu finden. Ich habe links auf A gelassen und rechts bis F probiert, dann gehe ich links auf B und rechts wieder alle durch usw., war es richtig, wechselt der Punkt grün und man kann die Buchstaben nicht mehr ändern, ferner wird der große Punkt im Visor blau und ein kleiner Punkt ebenfalls grün. Alle Rätsel durcharbeiten, bis auch der große Visorpunkt grün wird – Auslöser

6. PW: mjolma; Die Symbole gemäß den Zahlen in der Reihenfolge notieren, im Eingabefeld im Raum neben dem Auslöser enstprechend eingeben, Schlater betätigen. Hat man richtig notiert, wird Visorpunkt grün, Auslöser.

7. PW: flinta; Im Raum unterm Auslöser Licht einschalten – im Raum über dem Auslöser ist nun Licht an und wirft eine Symbolleiste an die Wand. Am besten notieren. Dann die Schlösser gemäß der Zeichnung schalten = die Diagonalen entsprechen einer gedachten Linie der grünen Punkte. Querdreher betätigen – war alles richtig, geht der große grüne Visorpunkt an – Auslöser.

8. PW: slitta; Die Koordinaten eines Ei in die Koordinatenmaschine eingeben, Schalter betätigen, war die Eingabe richtig, zum entsprechenden Ei, beide Hebel dort betätigen = Ei schlißt sich wieder und Punkt wird grün – ebenso 2 kleine Visorpunkte. Ist alles grün = Auslöser.

9. PW: anelka; Farben = Buchstaben, Yellow (Gelb) = Y, Red (rot) = R. bei beiden Schaltkästen sind jeweils 3 untere Punkte schwarz = feststehend und 3 grau = veränderbar. beide Paneels auf die gleichen eigenschaften bringen zB GYPGGP oben und Grün Gelb Lila Grün Grün Lila unten – ist alles richtig Auslöser
(die Buchtaben/Farben sind jedesmal anders

10. PW: botwinka; die im rechten Koordinatenfeld eingemarkerten Punkte im linken Feld nachmalen, um Raum unter dem Auslöser den Hebel bedienen, Auslöser.

11. PW: syntagma; Notiz lesen! Und auch dran halten! – Baumblatt suchen (meist links neben Auslöser). Rätsel lösen: Farben = Buchstaben (Yellow = Y) Zahlen = Menge (0= keine Farbe, 6= volle Farbe) ich habe immer erst die Farben geleert und dann entsprechend den Angaben gefüllt. Querdrehhebel betätigen. Ist alles richtig und die Visorpunkte grün geht man nun in den in der Notiz angegebenen Raum und legt das Baumblatt dort ab. Finish

author: rucksack;
found on flashgamez.


Submachine 1: the Basement, la solution en francaise


– Aller vers la gauche, jusqu’à l’horloge. Monter et ramasser la valve. Redescendre, aller vers la droite et replacer la valve sur le tuyau.
– Aller vers la droite et descendre trois fois. Bien observer les trois grosses vis sur le mur (entre les tuyaux) et noter leur position.
– Remonter deux fois et tourner à gauche, placer les trois vis dans la même position que celles observées avant. Revenir à la valve placée sur le tuyau, la tourner jusqu’à entendre le bruit de casse.
– Aller vers la droite, descendre, à droite, descendre, puis encore à droite et descendre. Ramasser la perle tombée du tuyau cassé. Revenir à l’horloge. Placer la bille dans l’horloge et récupérer la tuile B.
– Revenir au point de départ, aller à gauche, descendre, descendre, descendre puis aller à droite. Faire sonner les cloches pour faire monter les quatre cubes en l’air. (dans l’ordre : cloches 1, 2 et 4). Prendre la tuile D.
– Revenir au point de départ, descendre, aller à gauche, descendre et aller à gauche. Ramasser la pièce sur le sol. Remonter, aller à droite, descendre deux fois puis aller à gauche. Il y a un coffre fermé par une combinaison à quatre chiffres. Observer la pièce de monnaie et utiliser les quatre chiffres comme code. Prendre le fusible dans le coffre.
– Aller à droite, monter deux fois, aller à droite et descendre. Placer le fusible sur le mur. Aller à droite et placer le curseur sur le bouton de la radio. Ecouter la musique jusqu’à l’ouverture totale du tiroir. Prendre la cuillère.
– Aller à gauche, monter, aller à gauche, monter et aller deux fois à droite. Baisser la manette pour rebrancher l’électricité.
– Revenir au point de départ, baisser la manette. Descendre, aller trois fois à gauche et monter. Baisser la manette.
– Descendre, aller deux fois à droite et descendre deux fois. Baisser la dernière manette.
– Remonter, aller à droite, descendre, aller à droite et remonter. Prendre la tuile C.
– Revenir à la pièce du générateur électrique. Placer la cuillère entre les deux bornes pour faire disjoncter le courant. Prendre la tuile A.
– Avant de terminer, il y a une salle cachée à découvrir. Revenir au départ, aller à gauche, descendre, aller à gauche et descendre. Baisser la manette. Revenir au départ et monter deux fois. Prendre le cristal (wisdom = sagesse), ça ne sert à rien mais c’est un bonus.
– Revenir au départ, aller à gauche et placer les quatre tuiles. Entrer dans l’ascenseur, appuyer sur le bouton du haut pour monter puis sur celui du bas pour ouvrir les portes. Deux portes apparaissent, une avec un point bleu et une avec un rouge. Les deux permettent de finir le jeu, celle avec le point rouge fait de la pub pour la suite du jeu.

written by Lambda.


Polar Jump


play this game

The squirrel goes glacier gallivanting in this sequel to the ever popular Tribal Jump brought to you by 2DPlay.com. Jump from glacier to glacier while dodging animals to reach home as quick as you can. Collect as many spear heads as possible to maximize your score.


Roman Rumble


play this game

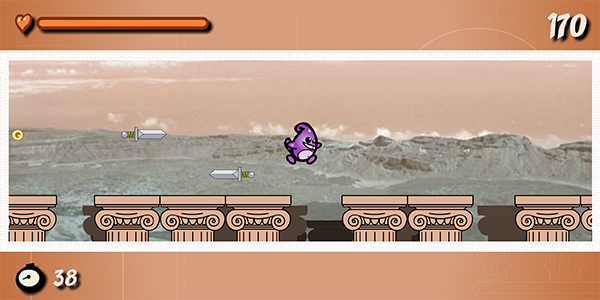
Roman Rumble is another game from the squirrel family.This time the squirrel travels to Rome on a quest to discover the ancient orders of Roman architecture. In this game you will have to guide the squirrel through 3 orders of Roman architecture – Doric, Ionic and Corinthian, while collecting ancient Roman coins and vases. Use the mouse cursor to walk the squirrel left and right. Left click to jump and tumble-leap over the gaps in the pillars and to dodge the daggers and spiky spirals. Collect the roman coins – they will give you more points and time.

Good luck.


Octopus


play this game

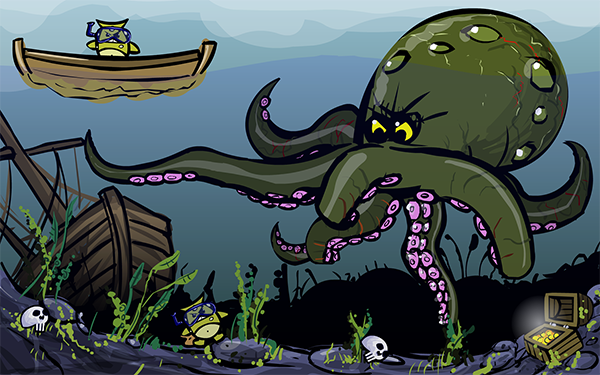
Another classic nintendo game renewed to fit the squirrel family. Use your arrow keys to navigate the squirrel right or left to get treasure from an underwater chest, avoiding the arms on an octopus. this game has a pretty decent graphics as for one of my earlier games I must say. Good music from ThumpMonks added two years after publishing gave a good final touch to this game. Despite it’s a remake, I like this game a lot.


Submachine2; Русское прохождение


written by cyka_no_iq

Я выведу тебя из сабмашины-2: Маяк.

Я не просыпался в комнате. И я все помню.
Я помню, что мне снилось, что я играю в странную игру – Сабмашину. И я помню, как я прошел ее. Но чего я не помню – так это, как я проснулся.

– Перед тобой сабмашина. Если смотреть на нее близко, увидишь справа бусинку-секрет (secret item) ( 120). На кнопки машины нажимать бесполезно.
– Пройди четыре комнаты влево и одну вверх. На полу лежит колесико от граммофона, а в кресле – еще одна бусинка-секрет (220)
-Пройди одну комнату вниз и одну вправо – там неизвестное приспособление. В штуку справа, похожую на перевернутые наушники, вставь кристалл мудрости (wisdom gem), который уже есть (типа с прошлой игры) у тебя в инвентаре. Из ящичка вылезет антенна, с шариком, на который нужно нажать. Он подскочит со странным звуком, как будто что-то выдвигается. Это лестница в соседней комнате (там, где нарисована была на стене стрелка вверх). Пройди в комнату с граммофоном (2 вправо), приблизь его и вставь в слот колесико от граммофона, затем выключи аппарат (кнопка в правом нижнем углу граммофона). Услышишь звук, как будто что-то выдвинулось – это лестница этажом выше.
– Пройди в комнату слева и иди наверх. Там еще одна лестница, но пока туда повремени идти. Слева ничего нет, а вот справа – радиопередатчик. Ничего на нем включать-выключать не нужно, но в левом углу есть табличка, вида С = какое-то число. У меня это обычно 3 или 2. Запомни или запиши свое значение. Пригодится.
– Вернись налево и иди по лестнице вверх на 1 клик. Увидишь 2 окошка в канализацию. Нижнее открыто, тебе – туда. Три клика влево и ты найдешь ключ от комнаты. Возьми его и возвращайся к лестнице. Еще один клик вверх и ты увидишь закрытый люк в канализацию. Иди направо. Под балкой увидишь символы из Submachine_FLF, но тут они без надобности. А вот в квадратной нише лежит вилка. Справа сверху над нишей – бусинка-секрет (320).
– Возвращайся к лестнице и иди вверх. Увидишь кафельную комнату и еще одну лестницу вверх. Туда пока не нужно. Нужно – влево на 1 клик. В стене спрятана еще одна бусинка-секрет (420). Нужно разбить 5-ю справа, 4-ю снизу, плитку в стене, обращенной к тебе. Можешь сходить еще левее и увидеть кинопроектор, но он пока не нужен. Нужно зайти в дверь, которая ведет наверх. 2
– 2 клика вверх и в горе мусора увидишь еще одну красную бусинку-секрет (520). Еще один этаж вверх – и ты в самом маяке (а не в подвале).
– Пройдите налево на 1 клик и зайдите в левую комнату. На второй сверху полке в книжном шкафу будет лежать записка про кота:

«Середина октября 2005-го года.
Сегодня произошла очень странная вещь. Когда я проснулся, в маяке был кот. Я очень хорошо помню, как запер все двери и окна перед тем, как лечь спать, и все же – он был тут. Понятия не имею, как он пробрался внутрь. Меня это беспокоит. Я назвал его Эйштейн, раз уж у него получилось сломать пространственно-временной барьер по собственному желанию. Может быть, все кошки так умеют, но конкретно этот кот сделал это прямо на моих собственных глазах. Ну, не совсем, хотя бесспорно, что сейчас он здесь. Интересно, имеет ли это связь с моей способностью открывать порталы между измерениями моей кармической рукой? Со временем, увидим.»
– Соседнюю комнату можно открыть ключом, который ты нашел на нижнем уровне в канализации. За дверью – ванная комната. На крючке висит ключ от верхнего уровню канализации (sewer key). Возьми его.
– Выйди из комнаты и пройди на три клика вправо – на лампе будет лежать бусинка-секрет (620). Пройди еще вправо на один клик, тут картинка с маяком (на уровне второго этажа совсем мелко нарисован код – запиши его или запомни, пригодится!). Можешь взять брошюру о маяке, на ход игры она вроде бы не влияет, но для общего понимания сюжета – лучше прочесть. Еще на один клик вправо будет гора мусора, в которой валяется еще одна бусинка-секрет (720). 4-ре клика влево и можешь спускаться – нам нужен верхний уровень канализации. (3 клика вниз, 1 вправо и еще 1 вниз). Открой люк и заходи.
– Аккуратно, лабиринт! Заблудиться, в принципе, невозможно, но можно пропустить важное. Если списком, то взять нужно в канализации: Записки для Элизабет, много бусинок-секретов, ключ от второго этажа, позитивный заряд и рычаг.
Итак, веду с самого входа: 2 клика влево, 1 вниз, 1 вправо. Тут лежит ключ от второго этажа. Бери ключ и иди дальше:
– 1 клик влево, 1 вверх, 2 влево, 1 вниз. Тут лежит бусинка-секрет (820).
– Дальше: 2 клика вниз, 1 вправо и 1 вверх. Тут будет комната старого подземелья. Здесь нужно взять письмо к Лиз (Прочитайте сами – оно роли в игре не играет, хотя там упоминается, что нужна полная сила света, чтобы все равботало – это про зеленые лампочки, дальше будет понятнее). И еще тут лежит три бусинки-секрета ( 920, 1020, 1120)
– Далее: 1 клик вниз, 1 влево, 1 вниз, 3 влево, 1 вверх, 1 вправо. Тут будет генератор с головоломкой, которая открывает дверцу с рычагом. Суть головоломки: зажечь все лампочки. Самый быстрый способ такой (пишу по координатам, первая цифра – отчет по горизонтали справа, вторая – по вертикали снизу):
(1 – 2), (3 -1), (2 – 4), (4 – 3). (Услышишь звук типа раскрывающейся защелки – значит, все сделано правильно).
– Иди за рычажком: 1 клик влево, 1 вниз, 2 вправо, 1 вверх. Бери рычаг. Возвращайся.
– 1 клик вниз, 2 влево, 2 вверх, 1 вправо, еще 2 вверх, 2 влево, 1 вниз и 1 вправо. Тут лежит положительный заряд (красная типа лампочка). Иди обратно. – 1 влево, 1 вверх. Еще два клика влево – тут будет бусинка-секрет (1220). Теперь иди до упора вправо, пока не выйдешь из канализации. Еще два клика вверх и справа от лампы увидишь квадратную нишу. Углубившись в нее на два клика, найдешь слот для рычага. Туда его и ставь, а затем опусти. Услышишь звук выдвигающейся лестницы – сладостный шорох полупобеды!
– Теперь нам нужен второй этаж (раз уж подобрали ключ) 2 клика влево, 1 вниз, 1 влево, и теперь уже в дверь. До упора вверх, затем один клик вправо – будет металлическая дверь. Заходи в нее. Сразу слева на полу возьми негативный заряд (синюю лампочку) и поднимайся на второй этаж (дверь, конечно, заперта, но на то мы и ключ нашли).
– Сначала иди налево – возьми вторую страничку дневника из печатной машинки (Первая должна быть в инвентаре еще с первой сабмашины). И еще левее – на тумбочке возле горы мусора возьми видеопамять (перфокарту, movie memory).
– Теперь идем в комнату справа. Сразу за дверью светящийся зеленым сейф. Открыть его можно кодом, который был на картинке с маяком, мелким шрифтом в районе второго этажа. Не забудь нажать сверху кнопку, и сейф откроется. Внутри лампочка – возьми ее. Еще правее в этой комнате – офигенный перпетум мобиле, на лапках которого прилеплены бусинки-секреты. Придется немного изловчиться, но …никакого мошенничества и у тебя окажутся еще 4 штуки (1620), из-под подушки можно вытащить записку самому себе. Там написано, что кот Эйнштейн убежал, и что хватит бы о нем уже переживать…
– Выходи из комнат второго этажа к железным лестницам и иди вверх на 2 клика. Увидишь порванный провод – его можно легко починить вилкой, а затем опустить рычаг. Вверх пойти бы хорошо, но и тут пока есть дела. Сначала направо и вверх по лестнице. Тут будет на сгибе проводов лежать еще одна бусинка-секрет (1720), а сверху – головоломка. Необходимо, чтобы все стрелочки касались центрального круга. Тут советов нет – настройка по наитию – и только. Главное, чтобы лампочка сверху загорелась зеленая.
– Спускаемся и идем налево. Тут загадка сложнее – четыре цифры, сбоку которых нацарапана буква Е. Как мы помним, кота звали Эйнштейн, а самая известная его формула Е= мс^2. Чему равно М, написано во втором отрывке дневника, который мы вытащили из письменной машинки, а чему равно С, написано на табличке радиопередатчика (обычно это 2 или 3). Бери калькулятор и считай, чему у тебя равно Е. Должно получиться четырехзначное число, которое и надо забить в цифровую панель. Зеленая лампочка сверху головоломки – знак того, что все идет по плану.
– Возвращаемся ( 1 клик вниз и 1 вправо) к развилке и очередной лестнице ввысь. 2 клика и остановись, присмотрись: в стенах по обе стороны лестницы есть ниши. Если идти налево, то там будет бусинка-секрет (1820), а если направо – то слоты для позитивного и негативного зарядов. Вставь их. Как обычно, зеленые лампочки – признак того, что все хорошо.
– Иди до конца вверх по лестнице и ты увидишь адско-сатанинскую сабмашину. К сожалению, она пока не работает – не все лампочки зеленые, но это мы быстро исправим. Сначала возьми слева внизу запутавшуюся в проводах бусинку-секрет (1920), затем – записку на стене. Один клик вправо и в горе мусора ты увидишь ключ от раскопок (digout key). Все, из этой комнаты придется уйти ненадолго. Иди по лестнице вниз (на первый этаж маяка), где еще была картина с самим маяком. В самой левой части этажа есть замок на стенке. Его-то и надо открыть ключом от раскопок. Иди в нишу! Тут важно взять последнюю бусинку-секрет (2020) и лампочку-пробку (fuse) рядом с лопатой.
– Для полного счастья не хватает еще кое-чего. Возвращайся на выложенный кафелем этаж. В самом левом углу будет кинопроектор. В него нужно вставить лампу (ight bulb) и перфокарту, а затем нажать на рубильничек. Нажми на объектив и ты увидишь кинокартинку: заставленный предметами стол. Среди прочего хлама, на нем лежит ID-карточка. Кликни на нее. Рука протянется и возьмет ее, после чего она выпадет из объектива. Теперь полный комплект, можно идти к сабмашине (на самый верх).
– Справа от сабмашины в специальный слот надо вставить пробку-предохранитель (fuse), а слева – ID-карточку. Теперь все лампочки зелены как весенняя листва и можно дергать за рычаг.

Надпись «Продолжение следует», выход на мониторе и иллюзия того, что от сабмашины можно сбежать тебе обеспечены:

Я вижу, как я выхожу…

Я вижу берег…
Я что, забрался так далеко?
Или так рано?
Странно, как время и пространство соединяются здесь…
Минутку…
Разве это не просто картинка на мониторе?


Tribal Jump


game_tribal_jump

play this game

Rumble in the jungle with another wild and wacky Mr. Squirrel. That adorable squirrel is back again and on another mission. Send him flying from one skull to another, but avoid those horrible totem poles.


Submachine 1, walkthrough


written by PinkMami at NewGrounds.com:

1. Go 3 rooms over to the left and up. Get the valve hidden behind the pipes. Also pull the switch.

2. Go back over 3 rooms where you started. Go up the ladder and pull the switch. Go back down. Then go one room over to the left and go down. Go down again. Pull the switch. There is also a diary page but you don’t need it. You could read it for laughs I guess. Go down again. Then go right.

3. You should be in a room with bells. Click the bells in this order:

4th bell – 1st bell – 2nd bell. Now the box below should open and get Tile D.

4. Go back one left. Then go up 2 ladders. Now left one and down one. Get the coin and go back up one and one right.

5. Go back one right. One down and right one. Now you shold be in a room with a radio. Hover over the button on the radio (the right button) and hold it until the shelf opens and get the spoon inside.

6. Now go left one room and up one. Then left again. Now go down 2 ladders and go to the left room. Click one the lock on the right of the box.

7. Now is the time to use the coin. Click on the coin and look at the number on the top. Those 4 numbers are what you will enter in the lock combination. Then click on the box and get the fuse. Then go out the door left.

8. Look at the top left of the room and look at the silver rectangle. Look at the 3 circles and remember what it looks like. For example it could be like this: (-) (l) (-).

9. Go up 2 rooms. Then one left. Now you should be in a room with a pipe and 3 tube-like things connecting them. Click on the bottom part of the tube that has circles like this: (-) (-) (-) Remember the circles before? Use the pattern you saw before and make sure the circles match the pattern. Now after that go back one room right.

10. Go up one and left one. Now you should be in a room with a long pipe going down. Drag the valve you got before and place it on the pipe. This is IMPORTANT! Make sure all the switches you came across are pulled! Now after you make sure they are, push the valve. You should hear some waterish steaming noise.

11. Go left one and down one. Now right one and down one. Now right one and you should be back at the room with the radio. Go down the ladder.

12. The pipe should be broken. There should also be a pearl on the floor. Get it and go back up. Then left. Now the fuse you got before (a white cylinder type thing with red lines), place the fuse in the empty spot. Now go up onw room then left one. Then go up one and right 2. There should be a generator. Pull the switch and it should have an electric surge.

13. Go back to the room with the radio. Now go up one and a piece of the tile should be spinning in a circle. Get it and leave. Now go back to the generator and here’s where the spoon comes in. Drag the spoon over to the electric surge and it should explode. Now wait for the small door at the bottom of the generator to open. There’s another tile.

14. Now go 4 rooms to the left. Now the pearl is gonna be usd. Drag the pearl over to the end of the rope on the clock and a small door should open on it. There’s the last piece. Now go back 2 rooms to the right and place each piece on.

15. There! Now a elevator should appear after the diamond spins. Go in and push the top button. Wait and push the bottom button and go now there should be 2 doors. One red and one blue. It doesn’t matter which door you go though because either way you still beat the game.


« Previous PageNext Page »