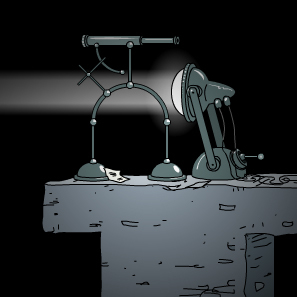
Submachine 4: the Lab


game_submachine4

voted Best Point and Click game of year 2007 (by jayisgames.com readers)

New Grounds Daily Feature – 04/22/2007

New Grounds Weekly Users’ Choice – 04/25/2007

—-

play this game

walkthrough: video | english 1 | english 2

francaise | español | Русское | polska | hungarian

—-

Game Description:

Submachine. The game in which with every puzzle solved, every chapter finished you fall deeper and deeper into mystery. Fourth chapter takes us to the heart of the submachine, the place where all questions will be finally answered. Or were finally answered. Once again it’s time to ask youself – is it possible that you’re too late?


Submachine 4: the Lab; walkthrough


created by Scott, found on jayisgames.com.

You start off on the rooftops of a house. You can follow the on screen instructions for the first part. I will restate what they ask you to do…


– -LABORATORY (001) *The Rooftop Go Right and on the window ledge, pick up the Hammer. Go Left twice. Go Down the ladder. Go Right and use the Hammer on the door lock and click the door open. Go inside. *The Attic Go Down and click on the white jacket Take the Naphthalene (white balls). Click out of the coat Go Right and take the green Rubbertube from the ceiling in-between the rafters. Go Right and take the Chimneybrush from beside the grey box. Take Secret 1 from the chair cushion. Go Left twice Go up the ladder and out onto the roof. Go Left and use the Chimneybrush on the chimney. Go right, into the window and down the ladder. Go Right and take the Doorkey. Go Left twice and take the Key off the coat hook. Go Left and take the Gashandle from under the table. Use the Doorkey on door and click it open. Enter *Stairwell 1 Take Secret 2 from the floor. Go downstairs. *The 2nd Floor Go Left and take Secret 3 from behind the trashcan. Click on the computer screen. Click the green button. Keep clicking until conversation has ended then click out of screen. Take Note 1. Go Right three times and take the Lighter off the window sill. Go Left twice Go down. *Stairwell 2 Take the Beaker. Go Down *The 1st Floor Take Note 4 and Note 5 off the table. Take Secret 4 from the floor with the chair. Go Left, open door and enter Take the Soap off the sink. Take Secret 5 from behind pipes. Put the Beaker on the floor grate. Use the Hammer on the metal cap above the Beaker. Go Right three times and take the CD off of the table. Go up the ladder and take the Irontrioxide (purple vial) from the tester stand. Go Right and take the Screwdriver Take Secret 6 from beside the yellow pipe. Go back to the Rooftop *The Rooftop Go Left Go up the ladder Go Left and use Screwdriver on wheel. Take the Wheel. Go back to the 1st Floor. *The 1St Floor Go Left twice and use the Wheel on the pipe leading up and down where an opening is. Turn the wheel. Take the Fullbeaker. Go Right three times. Go Up. Go Right and use the Gashandle on the top opening of the yellow pipe. Use the Rubberhose on the bottom opening of the yellow pipe. Turn gas handle. Turn grey knob on the burner. Put Fullbeaker on the burner. Use Lighter on the burner. Put in beaker in this order: Soap, Irontrioxide, then Naphthalene. Take the Acidioxide. Take the Tester. Go Left Go Down Go Left three times Put the Tester on the floor grate. Turn the wheel Take the Water Go Right four times and use the Key on the door. Open door and enter. Ring Bell 1. Use the Acidioxide on the metal panel on the wall. Go Right. Take Note 2. Enter in Code 104. Push the grey button.

– -ANCIENT SECTION (104) Go Right. Go Down Move levers 1 and 4 down. Go Right and take the Knife. Take the Blocade. Ring Bell 2. Go Left Move levers 1 and 4 up, and 2 and 3 down. Go Left and take Secret 7 from rubble on ground. Take the Stonekey. Go Right Move lever 2 up and levers 1 and 4 down. Go Up and take the TileD. Use the Blocade in circular hole on pillar and Stonekey on square hole. Go Down Move levers 2 down and 3 up. Go Up Go Right and take the TileB. Go Left Go Down Move lever 3 down Go Up twice and use the Hammer on the broken panel on the pillar. Take Secret 8 from hole. Go Up and take the TileC. Go Up and use the Knife on the string. Go Down four times and take the TileA. Go Down and take Secret 9 from statues eye. Place TileA, TileB, TileC and TileD in their directional proportionate slots on the wall. Press uncovered button. Go Up twice. Go Left Go Up and take the Coil. Go Left and take Note 3. Go Right Go Down Enter in Code 690. Push the grey button.

– – LOOPING TRAPS (690) Go Right Go Down and take Note 12. Go Left and take Secret 10 from floor by right door. Go Left Go Up Make Left lever display -1 and Right lever display -1 Push the grey button Go Down and push the red button Go back to levers. Make Left lever display 0 and Right lever display 1 Push the grey button Go Up Go Right and push the red button Go back to levers Make Left lever display 1 and Right lever display 1 Push the grey button Go Up Go Right twice and push the red button Go back to levers Make Left lever display 1 and Right lever display 0 Push the grey button Go Right twice and push the red button Go back to levers Go Up and click the glass cover Take the Orb. Go Down Go Right Enter in Code 529. Push the grey button

– – BASEMENT SECTION (529) Go Right twice and use the Coil in the top of the recharger Turn handle on the recharger Take the Chargedcoil. Take Secret 11 from the empty outlet on the wall. Go Left Go Down and take Secret 12 from between the cords on the ground. Go Left Take Note 6 from the floor. Use the Chargedcoil in the empty slot. Pull down the lever Take the Coil. Go Right Go Up Go Right and charge up the Coil again. Take the Chargedcoil. Go Left Go Down Go Right and use Chargedcoil in the empty slot Pull down the lever. Take Coil. Go left and turn handle on contraption. Go Up twice and place the CD within the claw. Go Right and take Note 7 from the floor. Look at note 7. NEW LOCATION CODE 551! Use the Orb on top of the pillar. Take the Chestkey. Go Left Go Down Go Right and recharge the Coil. Take the Chargedcoil. Go Left twice. Enter in Code 001. Push the grey button.

– – LABORATORY (001) *The 1st Floor Go to the 2nd Floor *The 2nd Floor Go Right and use the Chargedcoil on the side opening of the mechanism. Turn the bottom bolt. Take Secret 13 from the plate. Take the Chargedcoil. Go to the 1st Floor. *The 1st Floor Go Right four times Enter in Code 551 Push the grey button

– – BRICK ROOM (551) Take Secret 14 from the ground. Go Left and take Note 11 off the ground. Push top button on controls stopping the water. Go Right Enter in Code 462 Push the grey button

– – LIGHTHOUSE DIGOUTS (462) Go Right and take Secret 15 from the ground. Go Right and use Hammer four times on the lock. Open the door and take the Turbine. Go Left twice and take Note 8 Go Right Enter in Code 770 Push the grey button

– – TOMB TRAP (770) Take Note 13 from the ground Look at symbol on the right, middle of the wall Circle = 0 sides, Square = 4 sides, Triangle = 3 sides NEW LOCATION CODE 043! Enter in Code 043 Push the grey button

– – UNKNOWN LOCATION (043) Go Left and use the Water on the glowing object. Take the Sceptre Go Left and ring Bell 3. Take Note 9 Take Secret 16 from the ground. Go Right twice Enter in Code 800 Push the grey button

– – THE SHIP (880) Use the Lighter on the lamp 3/4 up and over slightly to the left Take Secret 17 from behind the lamp base. Go Right and ring Bell 4. Use the Screwdriver on all four screws on the wall panel. Take Secret 18 from within the compartment. Use the Knife on the wires. Go Left twice and take Note 10 from the ground. Go Up the ladder. Use the Lighter on the lamp at about the same place as before. Go Right Go Up the ladder Use the Lighter on the lamp that is about the same place, but much closer to the left hand side. Take Secret 19 from behind the lamp base. Place the Turbine within the compartment and close the door. Go Down and push the grey button Go Right and take Note 14. Look at note 14. NEW LOCATION CODE 728! Use the Chestkey on the chest and open it. Take the Arm. Go Left twice Go Down the ladder Go Left Enter in Code 462 Push the grey button.

– – LIGHTHOUSE DIGOUTS (462) Go Left and take Secret 20 out of the box. Go Right Enter in Code 104 Push the grey button

– – ANCIENT ROOM (104) Go Up the ladder Put the Chargedcoil in the holder Go Left and pull the lever on the large lamp. Click the eyepiece of the telescope. IIII – IIIII – II = 4 – 5 – 2 NEW ROOM LOCATION 452 Click out of the telescope Go Right Go Down the ladder Enter in Code 452 Push the grey button

– – STATUE (452) Go Left and place the Arm on the statue Place the Sceptor in its hand ENDING CREDITS

– – ENDING ROOM (???) Read note Go Right and take Secret 21 from the corner of the room. Look at upper corner of room. NEW ROOM LOCATION 596! Enter in Code 728 Push the grey button

– – LUCKY ROOM (728) Take Secret 22 from the left corner speaker. Go Right and place the Secrets inside the opening. Go Right and view the camera. **These are extras that you can view, have no relevance to beating the game. Go Right and view the camera. Go Right and view the camera. Go Right and view the camera. Go Left six times Enter in Code 596 Push the grey button.

– – ENDING ROOM (596) Go Left twice Click wall lever FINISHED


Submachine 4: the Lab, la solution en francaise


– Tourner à droite, prendre le marteau sur la fenêtre. Tourner deux fois à gauche et descendre à l’échelle. Tourner à droite et casser le cadenas avec le marteau. Ouvrir la fenêtre et entrer dans le grenier.

– Descendre à l’échelle, prendre les boules de naphtaline dans la poche de la chemise. Tourner à droite, prendre le tuyau accroché à la poutre. Tourner à droite et ramasser la brosse à cheminée dans l’angle de la pièce. Ramasser la bille bleue sur le fauteuil.

– Remonter sur le toit, utiliser la brosse dans la cheminée. Revenir dans le grenier, prendre la clé tombée de la cheminée. Tourner deux fois à gauche, prendre la clé sur le portemanteau, tourner encore à gauche et ramasser la molette sous la table. Ouvrir la porte avec la clé grise et descendre. Prendre la bille bleue au premier palier. Descendre encore.

– Tourner à gauche, ramasser la bille derrière la poubelle. Cliquer sur l’écran puis sur le bouton vert. Suivre la conversation jusqu’à l’impression de la feuille. Prendre la liste imprimée. Tourner trois fois à gauche, prendre le briquet sur la fenêtre. Reprendre les escaliers et descendre. Prendre la cafetière à l’inter palier.

– Prendre les notes sur la table et la bille vers la chaise reversée. Tourner à gauche, entrer dans la salle de bain. Poser la cafetière sur la grille au sol, utiliser le marteau pour déboîter le bouchon sur le tuyau qui descend du plafond. Prendre le savon sur l’évier et la bille derrière les tuyaux.

– Tourner trois fois à droite, prendre le CD sur la table. Monter à l’échelle, prendre le troisième tube à essais.

– Tourner à droite, prendre le tournevis et la bille vers le tuyau de gaz.

– Remonter sur le toit, aller tout à gauche. Utiliser le tournevis pour dévisser la manivelle. Prendre la manivelle et revenir dans la salle de bain. Placer la manivelle sur le tuyau et tourner pour remplir la cafetière d’eau. Reprendre la cafetière.

– Revenir dans la pièce où se trouvait le tournevis. Raccorder au gaz le bec bunsen avec le tuyau souple, placer la molette sur le gros tuyau, ouvrir le gaz sur le tuyau et le bec bunsen. Allumer avec le briquet. Poser la cafetière d’eau, mettre dans l’ordre : le savon, le tube à essais et la naphtaline. Récupérer le tube et la cafetière. Redescendre l’échelle, aller à la salle de bain et remplir le tube à essai d’eau (même méthode que pour la cafetière), récupérer le tube d’eau. Aller tout à droite, ouvrir la porte avec la clé. Entrer, sonner la cloche, et verser la cafetière sur le panneau de contrôle pour ouvrir la grille. Tourner à droite, ramasser la note au sol. Entrer les premières coordonnées trouvées sur la note: 104, valider avec le gros bouton.

– Tourner à droite, descendre l’échelle de bois. Tourner à gauche, prendre la bille dans les décombres. Tourner deux fois à droite, prendre le couteau et sonner la cloche. Revenir aux quatre boutons, descendre et prendre la bille dans l’œil de la statue.

– Les quatre boutons servent à ouvrir les quatre petites fenêtres du niveau. Observer pour chacune la forme du dessin dans le cercle. Pour ouvrir une fenêtre, il faut abaisser les deux ou trois boutons correspondant au dessin. (ex : _ combiné avec | donne : +). Récupérer ainsi deux tuiles et deux pierres (une carrée, une ronde). Placer ensuite tous les boutons en bas.

– Remonter l’échelle et placer les deux pierres dans les encoches. Monter à la nouvelle échelle. Prendre la tuile, continuer de monter et couper le fil avec le couteau. Revenir aux boutons, prendre la dernière tuile.

– Descendre et placer les quatre tuiles dans les encoches. Appuyer sur le bouton puis revenir au téléporteur. Monter à la nouvelle échelle et prendre l’ampoule en verre. Tourner à gauche et ramasser la note. Revenir au téléporteur et entrer les coordonnées suivantes : 690.

– Faire le tour des pièces, ramasser la note et la bille. Noter l’emplacement des quatre panneaux. Pour se situer dans ces pièces, il faut utiliser un système de coordonnées (X ; Y). La première salle est en (0 ; 0). L’outil commandant l’ouverture des panneaux est en (-1 ; 0). Pour ouvrir chaque panneau, il faut entrer ses coordonnées dans cet appareil (en bougeant les bras) et valider à chaque fois avec le bouton. Les coordonnées sont : (-1 ; -1), (1 ; 0), (1 ; 1) et (0 ; 1). Une fois les quatre validés, aller en (-1 ; 1) et prendre l’orbe.

– Revenir au téléporteur, entrer les coordonnées : 529.

– Aller deux fois à droite, placer l’ampoule sur l’appareil et enclencher la manivelle pour lancer la charge. Récupérer l’ampoule chargée et la bille sous la prise. Descendre, placer l’ampoule dans la pièce de gauche, abaisser la manivelle et ramasser la note. Reprendre l’ampoule, retourner la charger et procéder de même dans la pièce de droite.

– Recharger encore une fois l’ampoule puis enclencher la machine centrale. Prendre la bille vers les câbles. Monter au sommet, placer le CD dans la pince pour détourner le rayon laser. Aller à droite, ramasser la note et placer l’orbe sur le piédestal. Une fois explosée, prendre la clé puis revenir au téléporteur. Entrer les coordonnées : 551.

– Prendre la bille au sol, tourner à gauche. Prendre la note et couper l’eau en appuyant sur le bouton.

– Revenir au téléporteur, taper les coordonnées : 462.

– Tourner à gauche, prendre la note repérer les cubes, seulement deux sont levés. Tourner deux fois à droite, prendre la bille au sol. Tourner encore à droite, casser le cadenas avec le marteau et prendre l’hélice.

– Revenir au téléporteur et entrer les coordonnées : 800.

– Allumer la lampe avec le briquet Prendre la bille au sol. Tourner à droite, sonner la cloche et dévisser la plaque avec le tournevis pour récupérer une bille. Couper les fils avec le couteau.

– Aller deux fois à gauche, ramasser la note et monter. Allumer avec le briquet, tourner à droite. Monter, allumer avec le briquet, placer l’hélice et refermer le hublot. Prendre la bille au sol. Descendre et appuyer sur le bouton pour ouvrir la grille. Tourner à gauche, prendre la note et ouvrir le coffre avec la clé. Prendre le bras en or.

– Revenir a téléporteur, entrer les coordonnées : 770.

– Ramasser e note, cliquer sur les signe du mur : un rond, un carré et un triangle. Les prochaines coordonnées sont donc : 043.

– Tourner à gauche, verser le tube d’eau sur le globe lumineux. Prendre le sceptre doré. Tourner à gauche, ramasser la note, la bille dans l’angle et sonner la cloche. Revenir au téléporteur, entrer les coordonnées : 104.

– Monter, placer l’ampoule chargée dans l’appareil. Aller à gauche, abaisser le levier et regarder dans la longue-vue. Prochaines coordonnées : 452. Reprendre l’ampoule et aller au téléporteur. Entrer les nouvelles coordonnées. Aller à gauche, placer le bras et le sceptre sur la statue. Fin du jeu !

– En fait le jeu n’est pas tout à fait terminé, il manque encore quelques billes. Lire le panneau puis aller à droite (ou à gauche pour quitter le jeu). Prendre la bille, noter les coordonnées : 596 (pour revenir plus tard). Entrer les coordonnées : 728. prendre la bille sur le haut parleur.

– Revenir au tout début (001). Remonter d’un niveau (étage de l’ordinateur et de l’imprimante), placer l’ampoule dans la machine et cliquer sur la vis pour obtenir une bille.

– Revenir en 462, aller vers les cubes (les quatre sont levés maintenant) ouvrir la trappe et prendre la bille.

– Revenir en 728, tourner à droite, placer les 21 billes dans le réceptacle. Visiter les pièces à droite pour apprendre en bonus quelques secrets sur la fabrication du jeu. Cette fois c’est bien fini !

Author: Lambda


Submachine Insight


Submachine 0: the ancient adventure; la solution en francaise


– Aller à droite, prendre la langue de pierre (le truc qui ressemble à une cuillère) et le briquet caché dans le mur.
– Aller deux fois à gauche et ramasser la deuxième langue de pierre.
– Revenir face au temple, replacer les deux langues dans les gueules des dragons puis ouvrir la porte et pénétrer dans le temple.
– Descendre et allumer la torche avec le briquet. Descendre encore puis tourner à gauche. Allumer la torche et descendre encore. Abaisser le levier sur le mur. Remonter et tourner à gauche.
– Faire tourner le cube une fois puis aller à droite, descendre, aller à droite, allumer la torche, descendre, allumer et aller à droite. Prendre le rubis.
– Revenir au cube, le faire tourner une fois puis revenir à la dernière salle. Descendre et ramasser le deuxième rubis.
– Revenir au cube, le faire tourner une dernière fois puis revenir à la dernière salle. Aller à gauche, prendre le troisième rubis et la plaque de pierre posée contre le mur.
– Revenir au début, descendre deux fois puis tourner à droite. Bloquer les piques sortant du mur avec la plaque de pierre. Passer et poser les rubis dans leurs emplacements pour libérer la gemme de sagesse.

Author: Lambda


Submachine2; video walkthrough


Submachine 3, polska solucja


autor Dippy, znalezione na anitkak


Level 1

Podnosimy licznik z ziemi i klikamy na zielony przycisk.


Level 2 – linkva

 Idziemy w prawo, gdzie mamy planszę z krzyżykiem i kropkami. Krzyżyk określa położenie głównego przycisku, a kropki wskazują pomieszczenia, w których należy wykonać jakieś zadanie. W tym levelu wystarczy poprzekręcać wszystkie dźwignie. Każde wykonane zadanie Na koniec naciskamy zielony przycisk w pomieszczeniu oznaczonym przez krzyżyk.


Level 3 – bamita

Idziemy w prawo i tradycyjnie widzimy tablicę a na niej mnóstwo punktów. Udajemy się do dowolnie wybranego pomieszczenia zaznaczonego kropką i klikamy na wajchę. Na wyświetlaczu pojawiają się 2 liczby – koordynaty. Teraz udajemy do miejsca o podanych współrzędnych i znów klikamy na urządzonko. Czynność powtarzamy do momentu, gdy wszystkie lampki zapalą się na zielono. Na koniec wracamy do punku (0,0) i klikamy na zielony przycisk.


Level 4 – firoga

Idziemy w prawo i spoglądamy na tablicę. Widzimy sześć kropek. W dwóch oznaczonych miejscach mamy wajchy, a po lewej i prawej stronie od każdej z nich panele z cyframi. Badamy cyfry na wyświetlaczach. Na każdym z nich jedna z cyfry pozostaje niezmienna. Zapamiętujemy stałe numerki i ich pozycje na planszy i ustawiamy je w tych samych miejscach na pozostałych tablicach. Następnie przekręcamy obie wajchy. Na koniec wracamy do punku (0,0) i klikamy na zielony przycisk.


Level 5 – winda

Idziemy w prawo i patrzymy na tablicę. Widzimy kilka różnie ułożonych punktów. Zadanie jest proste, w każdym z pomieszczeń należy przekręcić zawór. Jeden mały warunek – musimy to zrobić w odpowiedniej kolejności od I do VI. Na koniec wracamy do punku (0,0) i klikamy na zielony przycisk.


Level 6 – banda

Tradycyjnie idziemy w prawo i patrzymy na tablicę. Widzimy kilka rozstrzelonych punktów, a w każdym z nich tablice z dwoma literami. Musimy tak ustawiać literki, by były zgodne z naszym położeniem, np. w pomieszczeniu (3,1) ustawiamy C i A. Na koniec wracamy do punku (0,0) i klikamy na zielony przycisk.


Level 7 – mjolma

Idziemy w prawo spojrzeć na tablicę. Widzimy na niej siedem rozproszonych punktów. W sześciu z nich umieszczone są wyświetlacze z symbolami i odpowiadającymi im cyframi. Zaś w ostatnim, tym na lewo od głównego przycisku, znajduje się tablica, na której ustawiamy odnalezione symbole. Następnie wciskamy guzik i wszystkie lampki zapalają się na zielono. Na koniec wracamy do punku (0,0) i klikamy na zielony przycisk.


Level 8 – flinta

Z przyzwyczajenia skręcamy w prawo, ale tablica jest uszkodzona. Schodzimy do punktu (0,-1) i pociągamy za dźwignię. Następnie udajemy się do pomieszczenia (0,1) i uważanie przyglądamy się schematowi na ścianie. Wracamy do dźwigni i skręcamy w prawo. Ustawiamy zatrzaski tak, by lampki zapalił się na przekątnej z lewej do prawej, czyli tak, jak przebiega pierwsza linia na schemacie. Znów w prawo i tym razem zapalamy światełka na przekątnej z prawej do lewej. I tak aż do końca. Teraz udajemy się do punktu (1,1) i przekręcamy wajchę. Na koniec wracamy do punku (0,0) i klikamy na zielony przycisk.


Level 9 – slitta

Idziemy w prawo i rzucamy okiem na tablicę. Odwiedzamy wszystkie cztery punkty i zapamiętujemy koordynaty tych, a których znajdują się kapsuły z czerwonym kółeczkiem. Udajemy się do pomieszczenia z konsolą i ustawiamy współrzędne pierwszego punktu, a następnie pociągamy za dźwignię. Udajemy się do tego pomieszczenia i przestawiamy obie wajchy. Podobnie postępujemy z dwoma pozostałymi. Na koniec wracamy do punku (0,0) i klikamy na zielony przycisk.


Level 10 – anelka

Po prawej brak tablicy. Ale nic nie szkodzi, bo mamy do odwiedzenia tylko dwa miejsca, powyżej i poniżej głównego przycisku. Na górze mamy literki (pierwsze litery angielskich nazw kolorów), a na dole tablicę z kolorami. Trzy literki i trzy kolory są niezmienne. Dostosowujemy więc pozostałe oznaczenia tak, by była zgodność między literami a kolorami. Następnie wciskamy przycisk pod tablica z kolorami. Na koniec wracamy do punku (0,0) i klikamy na zielony przycisk.


Level 11 – botwinka

Skręcamy w prawo i przyglądamy się tablicy. Teraz dwukrotne w lewo i znajdujemy kolejną tablicę, na której nie ma kropek. Należy ją uzupełnić, by wyglądała tak, jak tablica główna. Następnie schodzimy do punktu (0,-1) i przekręcamy wajchę. Na koniec wracamy do punku (0,0) i klikamy na zielony przycisk.


Level 12 – syntagma

Czytamy notatkę, która mówi, by nie korzystać z teleportu na poziomie (0,0), tylko odszukać zielony listek i zanieść go do maszyny na poziom (-12,9). Postępujemy więc zgodnie z instrukcją. Listek znajduje się w jednym z pomieszczenie w otoczeniu punktu (0,0). Następnie udajemy się pod wskazana koordynatę i układamy listek na postumencie. Teleportujemy się na górę.


Jeśli jednak nie dowierzamy sugestiom z notatki możemy odwiedzić punkty zaznaczone na tablicy i wynotować sobie wartości dla sześciu kolorów (oznaczonych pierwszymi literami angielskich nazw), zapisanych na dwóch wyświetlaczach. Następnie ustawić odpowiednie poziomy wszystkich sześciu kolorów i przestawić obie wajchy. Na koniec wcisnąć zielony przycisk w punkcie (0,0). Jednak to rozwiązanie kończy się śmiercią.


Submachine 0, polska solucja


autor Gorka, znalezione na anitkak

1. Idziemy w prawo i podnosimy języczek z pochodni oraz zapalniczkę z wnęki pośrodku ściany.
2. Dwukrotnie w lewo i spomiędzy kamieni leżących na trawie podnosimy drugi języczek.
3. Wracamy przed drzwi i umieszczamy języki w paszczach smoków.
4. Klikamy na przycisk pośrodku drzwi i wchodzimy do środka.
5. Schodzimy do tunelu w podłodze i zapalniczką podpalamy pochodnie, znajdującą się na lewej ścianie.
6. Kontynuujemy schodzenie, po czym skręcamy w lewo. Zapalamy kolejną pochodnię.
7. Znów na dół i wciskamy przycisk na ścianie po lewej.
8. Wracamy poziom wyżej i skręcamy w lewo. Obracamy sześcian ustawiony na kolumnie dowolnym znaczkiem do przodu.
9. W prawo, w dół i w prawo i ponownie używamy zapalniczki.
10. Na dół i kolejna pochodnia. Po przestawieniu sześcianu otworzyło się przejście oznaczone odpowiednim znaczkiem.
11. Wchodzimy do pomieszczenia i zabieramy czerwony klejnot.
12. Wracamy do sześcianu i ustawiamy następny znaczek.
13. Schodzimy na dół i penetrujemy kolejne przejście w poszukiwaniu drugiego klejnotu.
14. Powtarzamy czynności z ostatnim przejściem.
15. W pomieszczeniu po lewej poza klejnotem podnosimy również kamień, leżący w cieniu po prawej stronie.
16. Wracamy do dna tunelu i skręcamy w prawo. Odpalamy pochodnię.
17. Kamieniem blokujemy dolne kolec wychodzące ze ściany.
18. Wchodzimy do pomieszczenia. Umieszczamy klejnoty we właściwych otworach, zaczynając od góry. Płyty ponoszą się do góry i otwiera się tajne przejście.
19. Schodzimy na dół i sięgamy po starożytny kryształ mądrości.


submachine 3; Русское прохождение


written by cyka_no_iq

Я выведу тебя из сабмашины_3.

Здесь нет дневника
Здесь нет меню
Здесь нет ложки
Здесь нет корзины
Вообще-то, тут и собирать нечего.
Здесь только ТЫ и МАШИНА,

Примечание: Ты в закольцованных комнатах – цепочке. Перед тобой сабмашина. Сразу скажу, что комнаты тут обозначаются по системе координат, где комната с машиной – О, первая цифра – горизонтальная ось, а вторая – вертикальная. Чтобы машина открылась, нужно выполнить определенные задания, тогда лампочки на компасе станут зелеными. Тут каждый уровень имеет свой пароль доступа. Именно по этим паролям я и буду называть этапы.

1. (Нет пароля)

В левом нижнем углу возьми компас. Можно сразу прыгать. (нажать на зеленую лампочку машины).

2. linkva
Можешь немного погулять по комнатам и последить, как они отображаются (нумеруются) на компасе. В комнате (1, 0) ты найдешь карту. Крестик – это машина, комната ( 0, 0). На этом уровне все, что нужно сделать, чтобы открыть машину – это пройтись по обозначенным на карте комнатам и повернуть все рычажки. (Все лампочки на компасе станут зелеными).

3. bamita
В комнате (1, 0) ты найдешь карту. Но по сути, абсолютно все равно с какой комнаты начинать. Нужно найти любой, повернуть его и отправиться в комнату с номером, который высветился на экране. То есть, например, 33 – это комната (3,3). Нужно обойти без ошибок 6 комнат. Если ошибся – не перезапускай игру, а просто начни ходить заново с того места, где ты лажанул).

4. firoga
В комнате (1, 0) ты найдешь карту. В комнатах (1, -1), (1, 1), (-1, 1), (-1, -1) находятся панельки из 4-х чисел, на каждой из панелек 1 число неизменно. Нужно сопоставить неизменные числа всех табличек – это и будет тот код, который необходимо выставить на всех панельках. Лампочки в центре головоломок станут зелеными. После этого нужно повернуть рычаги в комнатах (0, -1) и (0, 1) и прыгнуть дальше.

5. winda
В комнате (1, 0) ты найдешь карту. В комнатах, обозначенных на ней, находятся пронумерованные переключатели ( с одним болтиком наверху – 1-й, с двумя – 2-й и т.д.). Нужно повернуть все выключатели по порядку. То есть обойти комнаты таким образом:
(0,2), (-2, -1), (0,-1), (-1, 1), (2, -1), (0, -2).
Как всегда, зеленые лампочки – признак того, что все идет хорошо. Можно прыгать дальше.

6. banda
В комнате (1, 0) ты найдешь карту. В комнатах, обозначенных на ней, находятся панельки с двумя буквами. Нужно выставить эти буквы так, чтобы их порядковый номер в алфавите соотносился с координатами комнаты, в которой они находятся. То есть в комнате (1,2) должны быть буквы А и B ( 1-я и 2-я), в комнате (3, 1) – С и А, в комнате (5, 1) – Е и А, в комнате (4, 3) – D и С, в комнате (2, 4) – B и D, а в комнате (4,5) – D и Е. Можно прыгать дальше.

7. mjolma
В комнате (1, 0) ты найдешь карту, а в комнате (-1, 0) – панель с 6-ю кнопками. В комнатах обозначенных на карте написано, какой символ соответствует кнопке с тем или иным порядковым номером. (Цифра снизу – это номер кнопки слева). Нужно просто подставить в панель, нажать на кнопку ящичка, что стоит справа от панельки и можно прыгать.

8. flinta

В комнате (1, 0) ты найдешь сломанную карту. Но это ничего! Я выведу тебя. Спускайся в комнату (0, -1) и опусти рычаг. Поднимайся в комнату (0, 1) – там включилась лампа, и на стене видна схема – квадраты с поперечными диагоналями. Запомни расположение диагоналей. У меня это / / / . Спускайся в комнату (1, -1), начиная с нее и до комнаты (6, -1) идет ряд головоломок. Когда соединяешь у них две железячки, то загораются зеленые лампочки, по диагонали). Соответственно, нужно в этом ряду головоломок так сомкнуть замки, чтобы диагонали зеленых лампочек совпадали с рисунком из комнаты (0, 1).
То есть, у меня это получилось так: в комнате (1, -1) – вертикально сомкнуть, (2, -1) – горизонтально, (3, -1) – вертикально, (4, -1) – горизонтально, (5, -1) – горизонтально и (6, -1) – снова вертикально. Затем нужно пройти в комнату (1,1) и повернуть рычаг. Если все лампочки на компасе загорелись зеленым, значит, все сделано правильно, можно прыгать дальше.

9. slitta

В комнате (1, 0) ты найдешь карту, а в комнате (0, -1) – главную панельку, с которой нужно будет работать)). На ней можно выставить две цифры, как не сложно догадаться, эти цифры – координаты комнаты с железными яйцами!))). Соответственно, нужно по очереди открывать яйца (выставляя координаты комнаты, в которой они находятся на панельке и нажимая рычаг). Внутри яиц также нужно опустить два рычажка. Обойдешь все 3 яйца (в комнатах (-2, 1), (1, 1) и (1, -2) – вот, собственно и все))) Можно прыгать дальше.

10. anelka

В комнате (1, 0) ты найдешь сломанную карту. Но это ничего! Я выведу тебя.
В комнате ( 0, 1) ты найдешь панельку с буквами, а в комнате (0, -1) – панельку с цветами. И там и там есть 3 неизменные кнопочки и 3, которые таки можно изменить. Соответственно, буквы означают цвет, которые нужно выставить, а цвета – буквы.
Нужно совместить все известные данные так, чтобы на обеих панельках все было правильно, то есть изменяющиеся кнопки показывали первую букву неизменного цвета с соответствующей кнопки двумя этажами ниже, и наоборот. Поскольку цвета и буквы все время меняются, то просто расскажу, как это все по-ангельски будет:

P (purple) – фиолетовый.
G (green) – зеленый.
Y (yellow) – желтый.
W (white) – белый.
B (blаск) – черный.
R (red) – красный.
O (orange) – оранжевый.

Когда все составишь, не забудь нажать на кнопку под панелькой с цветами. Если все лампы пылают зеленым, то все хорошо, а значит, можно прыгать дальше.

11. botwinka

В комнате (1, 0) ты найдешь карту. А в комнате (-1, 0) ты найдешь пустую карту. Ее просто надо заполнить – перерисовать с соседней. После чего в комнате (0, -1) нужно повернуть рычаг. И все, можно прыгать дальше.

12. syntagma

Сразу рядом с сабмашиной ты увидишь записку. Там сказано:
«ПРОЧТИ МЕНЯ!
Заметил ли ты, что каждая решенная головоломка увлекает тебя все глубже под землю? Это не выглядит как хороший план побега. Машина – сама по себе гигантская ловушка. Если ты действительно хочешь сбежать отсюда, тебе нужно перестать решать головоломки или ты будешь вечно блуждать в этом лупе. Луп – закольцован, он существует вне времени, вне пространства, у него нет ни начала, ни конца. Это худшее место, в которое ты мог попасть после прыжка из маяка. Вот, что я хочу , чтобы ты сделал: не открывай сабмашину в комнате (0,0). Вместо этого найди зеленый листок и отнеси к статуе в комнате (-12, 9). Это должно отсоединить тебя от Лупа, и в этом случае ты окажешься в лаборатории или где-то неподалеку. Удачи!
Мур.»

Нужны ли пояснения?

Да. В одной из комнат в пределах одного шага от нулевой координаты будет валяться тот самый листок. Иди в комнату (-12, 9) и положи его аккуратно сверху.

—-
Ты думал, тебе удалось сбежать…
Ты думал, что ты решил все загадки…
Но правда в том, что ты не хочешь убежать
От сабмашины.
—-

Лично мне все же больше нравится второй вариант развития событий.
Когда ты решаешь все же разгадать последнюю головоломку. В комнате (1, 0) ты найдешь карту. А в комнатах (0, 1) и (0, -1) – панельки с цветами и цифрами. В комантах (-1, 1) и (1, 1) – находятся цветовые панельки с изменяющимся уровнем. Этот уровень может быть равен какому-то числу от 0 до 6 (попробуй покликать на них – поймешь, как они изменяются). Нужно соотнести букву с каждым цветом и выставить на цветовой панельке ее значение.
То есть если написано, что RGW = 136, это значит, что R = 1. G = 3, W = 6. То есть R (red/ красный) нужно выставить на уровне одного клика, G (green/ зеленый) – на уровне трех и т.д. Табличка цветов есть чуть повыше, только в данном случае B означает (blue/ голубой).
Когда все цвета будут выставлены, нужно повернуть рычаги в комнатах (-1, -1) и (1, -1). Зеленые лампочки –знак того, что пришла пора прыгнуть в последний раз.
В этот раз ты будешь очень долго спускаться…комнаты будут мелькать, пока экран не потемнеет. Тогда на нем появиться надпись:

Только что ты умер от обезвоживания.


Submachine 3; hungarian solution


1. Vedd fel a földről a szerkezetet. Ezt mindig figyeld, ezen látod majd, hogy melyik teremben vagy (koordinátákkal, pl 1, -1 vagy -2, 1 stb). Kattints a zöld gombra a falon.

2. Menj jobbra (1,0) és figyeld meg, hol vannak pontok a táblázaton. Az X a 0,0, vagyis az innen balra lévő terem. Ezeken a helyeken kell elforgatnod a karokat. Menj tehát fel egyet, forgasd el. Menj balra, majd ismét balra, mindkettőnél forgasd el. Menj le, itt is forgasd, majd le, itt is van egy kar és megint jobbra az utolsóhoz. Menj fel, majd balra, nyomd meg a gombot.

3. Menj jobbra, majd fel, nyomd meg a szerkezetet és nézd meg a számot. Menj erre a koordinátára. Itt is nyomd meg a gombot és menj az itt megadott koordinátára. Tegyél így, amíg a felső sarokban a koordinátákat mutató szerkezeted tetején minden gomb zöld nem lesz. Ha a szerkezet azt a koordinátát adja meg, ahol épp vagy, akkor nyomd meg még egyszer. Ekkor menj vissza a 0,0-hoz és nyomd meg a gombot.

4. Menj jobbra és fel. Nyomogasd a gombokat és nézd meg, melyik szám nem változik soha. Jegyezd meg a számot és a helyzetét. Menj kettőt balra és ismételd meg ugyanezt. Majd menj le kettőt, onnan pedig jobbra kettőt és mindkét helyen ismételd meg. Ha megvan, akkor menj vissza az összes szerkezethez és állítsd be minden a változó számokon az állandó számokat. Tehát: ha az egyik szerkezeten a bal felső állandó a 2 volt, akkor mindegyik szerkezeten a bal felső a 2 legyen és így tovább. Ha megvan mind, 0,1-nél és 0,-1-nél találsz egy-egy kart, forgasd el őket. Menj 0,0-hoz és nyomd meg a gombot.

5. Menj jobbra, itt látod, hol vannak gombok. Keresd meg valamelyiket és azt látod, körök vannak rajta. A köröknek megfelelő sorrendben kell megnyomni őket. Sorban: 0,2 / -2,-1 / 0,-1 / -1,1 / 2,-1 / 0,-2. Ha megvan, 0,0-nál nyomd meg a gombot.

6. Menj jobbra és nézd meg a táblázaton, merre vannak a pontok. Keresd meg ezeket. Mindnél találsz egy szerkezetet betűkkel. Az a lényeg, hogy állítsd be a betűket úgy, mintha a terem koordinátái lennének. Tehát ha pl a 4,1-nél vagy, akkor a koordináta D,A lesz. Ha mind megvan, 0,0-nál nyomd meg a gombot.

7. Menj jobbra, nézd meg, hol vannak pontok. Keresd meg őket, mindnél találsz egy jelet és egy számot. Ha megvan mind a hat, akkor menj a -1,0-hoz és a számoknak megfelelő sorrendben állítsd be a szerkezeten a jeleket. Nyomd meg a gombot, majd menj jobbra és nyomd meg itt is.

8. Menj le és húzd meg a kart. Menj a 0,1-hez és jegyezd meg, merre dőlnek a vonalak. Menj az 1,-1-hez és állítsd be az első dőlt vonalat: vagy az alsó-felső, vagy az oldalsó rudakra kell kattintani, az a lényeg, hogy a középen az illesztésük úgy álljon, ahogy az első vonalad dőlt. Haladj így jobbra és állítsd be sorban a vonalak dőlését. Ha megvan, 1,1-nél forgasd le a kart, majd 0,0-nál nyomd meg a gombot.

9. Menj jobbra, nézd meg a táblázatot. Jegyezd meg a pontok koordinátáit, majd menj 0,-1-hez és írd be valamelyik koordinátát. Húzd le a gombot, majd menj erre a koordinátára és húzd meg mindkét gombot. Tedd ezt a másik két koordinátával is. Ha megvan, 0,0-mál nyomd meg a gombot.

10. Fent és lent betűket és színeket találsz. A betűk színek kezdőbetűi (az o a narancssárga, az y a sárga, az r a piros, a b a fekete, a g a zöld). Az a lényeg, hogy mindkét szerkezeten csak néhány gombot tudsz változtatni, de ugyanazok a színek szerepeljenek mindkét szerkezeten. Ha megvan, az alsó szerkezet alatt nyomd meg a gombot, majd a 0,0-nál lévő gombot.

11. Menj jobbra és nézd meg a pontokat. Menj kettőt balra és állítsd be ezeket a pontokat itt is. 0,-1-nél forgasd meg a kart, majd 0,0-nál nyomd meg a gombot.

12. Két lehetőséged van itt, a rövidebb: nézd meg a papírt és ez alapján keresd meg a levelet (1,-1). Menj a -12,9-hez és tedd az állványra.

13. A másik lehetőség: Menj a 0,1-hez és a 0,-1-hez. Jegyezd meg, amit látsz. -1,1-nél és 1,1-nél színes csíkokat találsz. Az a lényeg, hogy a betűid színeket jelentettek: az R a piros, a G zöld, a Y sárga, a B kék, a P lila, a W fehér. Nullázd le az alsó gombbal az összes színt és kattints annyiszor az ilyen színű csíkokra, ahányas szám tartozott hozzájuk. Tehát pl RGW=110, akkor a pirosra és zöldre egyszer kell kattintani (a felső gombokkal). Ha megvan, -1,-1-nél és 1,-1-nél forgasd el a karokat, majd 0,0-nél nyomd meg a gombot.

author: Sickestreality


« Previous PageNext Page »