submachine4, solución en español
July 24, 2006
written by Claudia, found on el Comentario
the Lab
- Encuentra el martillo y rompe el candado de la entrada. Entrar al ático.
- Encontrar el cepillo para la chimenea, regresar al tejado y colocar el cepillo en la chimenea. Regresa al ático y agarrar la llave que esta en la chimenea. Buscar también, un tubo de goma, una llave de gas, una llave y naftalina del bolsillo del traje.
- Abrir la puerta con la llave y entrar al laboratorio.
- Bajar la escalera, ir a la izquierda, click en la computadora verde y usar el botón para hablar con Murtaugh.Luego de una corta conversación se imprime una lista. Agarrarla de la impresora. Ir todo a la derecha y agarrar el encendedor de la ventana.
- Bajar y agarrar el recipiente del piso.
- Bajar la escalera, ir a la izquierda y entrar al baño. Colocar el recipiente en la rejilla que esta en el piso. Usar el martillo para golpear la tubería arriba del recipiente.
- Salir del baño. Ir a la derecha a la habitación con la escalera, agarrar el CD que esta en la mesa y subir. Agarrar uno de los recipientes que esta en la mesita. ( irontrioxide). Ir a la derecha y agarrar el destornillador. Usar el tubo de goma para conectar el mechero con la tubería amarilla. Colocar la llave de gas en la tubería amarilla y girarla. Girar la llave del mechero y encenderlo usando el encendedor.
- Volver al tejado, subir la escalera y sobre el lado izquierdo usar el destornillador para quitar la válvula.
- Regresar al laboratorio y entrar al baño. Agarrar el jabón de la pileta. Colocar la válvula en la tubería vertical y girarla. Agarrar el recipiente con agua.
- Volver al mechero y colocar el recipiente arriba. Colocar en este orden: el jabón, el irontrioxide y la naftalina dentro del recipiente. Agarrar el recipiente con AcidiOxide y el tubo de ensayo vacío.
- Volver al baño y llenar el tubo de ensayo de la misma forma que se lleno el recipiente. Agarrar el agua. Ir todo hacia la derecha, usar la llave en la puerta cerrada y entrar. Clickear en la campana. Usar el AcidiOxide en el dispositivo. Ir a la derecha y agarrar la nota detrás del portal.
- Ingresar la clave 1-0-4 en el portal y clickear en el botón que esta abajo de los números.
Ancient Location
- Buscar el pedestal con 4 mecanismos verticales. Hay 4 signos en el mecanismo: : “/” “|” “_” “”. Vas a encontrar también que hay cuatro compartimientos con símbolos. Bajar los mecanismos correctos para abrir los compartimientos. Por ejemplo: si bajas los mecanismos con los símbolos “|” y “_”, se abre el compartimiento marcado con el símbolo “+” y así sucesivamente. Abrir los cuatro compartimientos y agarrar los siguientes objetos: Una llave de piedra, dos piezas de un puzzle, un bloque cilíndrico, y un cuchillo.
- Ir una habitación arriba desde el mecanismo y usar el bloque cilíndrico y la llave de piedra en los huecos que hay en la pared. Antes de subir colocar todos los mecanismo hacia abajo, subir, volver a subir hasta encontrar otro compartimiento que se encuentra abierto. Agarrar la tercer pieza del puzzle. Ir todo hacia arriba y usar el cuchillo para cortar la cuerda. Ir todo hacia abajo y agarrar la cuarta pieza del puzzle.
- Bajar a la habitación que tiene el perro. Usar todas las piezas del puzzle en el mecanismo que esta en la pared y clickear en el botón.
- Volver al portal, aparece una nueva escalera, subir y agarrar la bobina. Ir a la izquierda, agarrar la nota y regresar al portal. Ingresar el código 5-9-2 en el portal.
The Basement
- Ir dos habitaciones a la derecha, vas a encontrar un cargador de bobinas. Colocar la bobina sobre el cargador y girar la palanca. Cuando este cargada, agarrar la bobina e ir a la habitación que esta a la izquierda, abajo y a la izquierda.. Colocar la bobina en la maquina y bajar la palanca.
- Cuando la maquina este cargada, repetir el proceso con la maquina que esta todo hacia la derecha.. Luego girar la palanca de la maquina que esta en la habitación del medio. Va a aparecer un láser. Ir dos habitaciones arriba y colocar el CD en el dispositivo.
- Recargar la bobina nuevamente e ir al portal. Ingresar el código 6-9-0
Looping Trap
- Las habitaciones están ubicadas y un sistema de coordinadas. El portal esta en la habitación ( 0, 0). Si vas a la izquierda estas en la habitación (-1, 0).. Clickear en la maquina hasta que muestre el código 1,1. apretar el botón en la base de la maquina, e ir a la habitación 1,1 y apretar el botónrojo que aparece.
- Repetir el proceso con (1, 0), (0, 1) y (-1, -1). No olvidarse de apretar el botón luego de ingresar las coordinadas.
- Ir a la habitación (-1, 1), abrir el dispositivo y agarrar el circulo ( orb ).
- Regresar al portal e ingresar el código 5-2-9
The Basement (Revisited)
- Ir a la habitación con el pedestal y el láser, colocar el circulo en el pedestal, agarrar la llave. Volver al portal e ingresar el código 5-5-1
Brick Room
- Detener el agua de las tuberías apretando el botón. En el portal ingresar el código 4-6-2
Lighthouse
- Ir todo hacia la derecha y romper el candado con el martillo, hay que golpearlo 4 veces para romperlo. Agarrar la turbina. Regresar al portar e ingresar el código 8-0-0
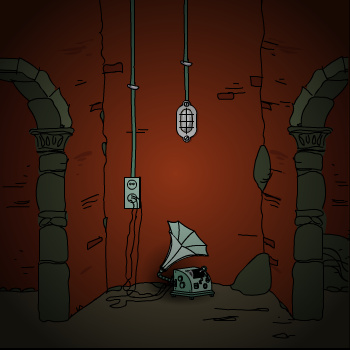
The Ship
- Esta oscuro, primero hay que encender la lámpara que esta en el medio a la izquierda usando el encendedor.
- Ir a la derecha y desatornillar la tapa metálica usando el destornillador. Usar el cuchillo para cortar los alambres.
- Una escalera nueva aparece en la habitación que esta todo hacia la izquierda.
- Subir. Usar el encendedor en la lámpara. Ir a la derecha y subir, usar nuevamente el encendedor en la lámpara. Colocar la turbina en la tubería y cerrar la tapa. Bajar, apretar el botón e ir a la derecha.
- Usar la llave para abrir el cofre. Agarrar el brazo, ir al portal e ingresar el código 7-7-0
The First Tomb
- Esta es la única habitación que hay aquí, hay que mirar de cerca el signo en la pared. Hay un circulo, un cuadrado y un triangulo. Ingresar el código 0-4-3 en el portal.
The Second Tomb
- Usar el agua en la burbuja gigante. Agarrar el cetro cuando aparezca.
- Volver al portal e ingresar el código 1-0-4
Ancient Location (Revisited)
- Subir, colocar la bobina cargada en la maquina. Ir a la izquierda, encender la lámpara y mirar por el telescopio, se ven las coordinadas 4-5-2, volver al portar e ingresar ese código.
Statue
- Usar el brazo y el cetro en la estatua… y listo, estas afuera.